Close-up: Nikon D5 Video Options image

Close-up: Nikon D5 Video Options

Nikon’s first full-frame DSLR to sport 4K video recording comes with many useful video-specific features. We take a closer look.

Nikon D5

4K video has finally come to Nikon’s pro-grade “D” series of cameras. Nikon has added additional controls and clever extras to make shooting and output easier. In the following article we examine the options available to the video user and how the camera can be customised for video shooting.

The Basics

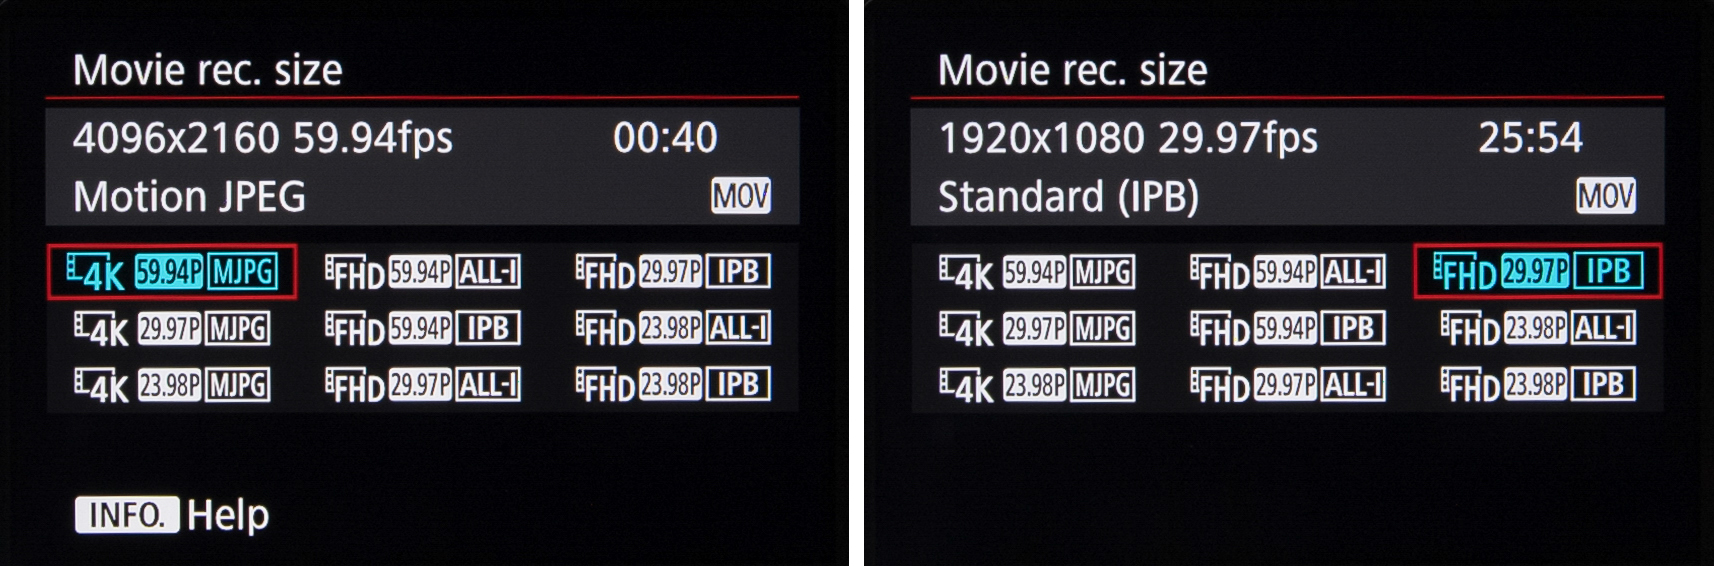
The Nikon D5 has a broad selection of video recording options with regards to resolution and frame size, including 4K UHD footage (3820×2160 pixels) at 30fps (29.97fps), 25 fps and 24fps (23.976fps) settings. The 4K recording has a crop factor of 1.5x, which means that a lens with focal length of 28mm will actually provide an effective focal length of around 42mm. In other words, you may end up needing to use a wider lens than you initially anticipate.

 Nikon D5 Video Options

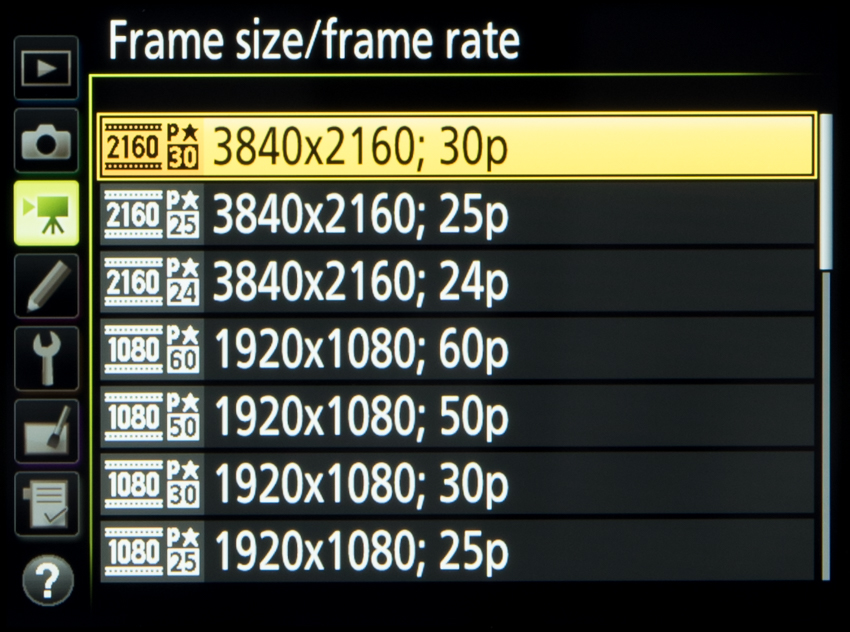
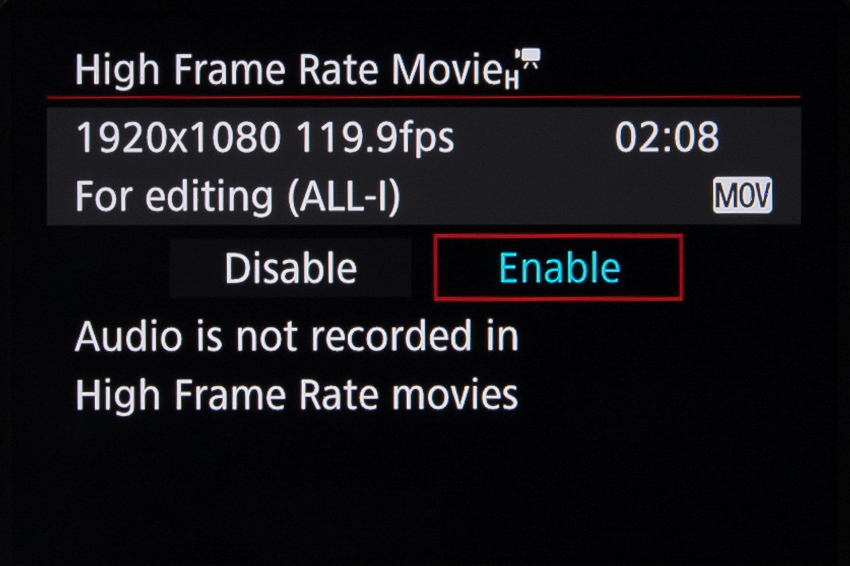
Full HD (1920×1080 pixels) recording at 60fps (59.94fps), 50fps, 30fps and 25fps and 24fps is also provided, as is Standard HD (1280×720 pixels) with 60fps and 50fps options. Additionally, all of the Full HD options can be recorded at a 3x crop factor, which is useful for distant subjects such as wildlife or sports.

Nikon D5 Video Options
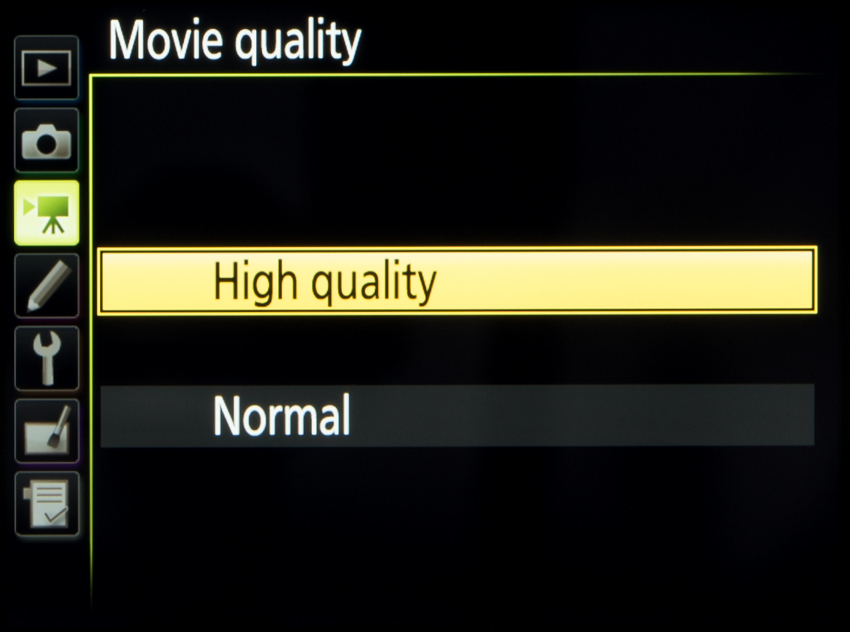
All video footage is recorded in the MOV format using the H.264/MPEG-4 codec, with 8bit 4:2:0 chroma subsampling. This results in 4K footage recorded at a maximum bit rate of 144Mbps, with Full HD footage recorded with a maximum 48Mbps bit rate. When recording Standard HD or Full HD footage, you can also select a ‘Normal’ recording quality as an alternative to the ‘High Quality’ option, and this has the effect of halving the maximum bit rate.


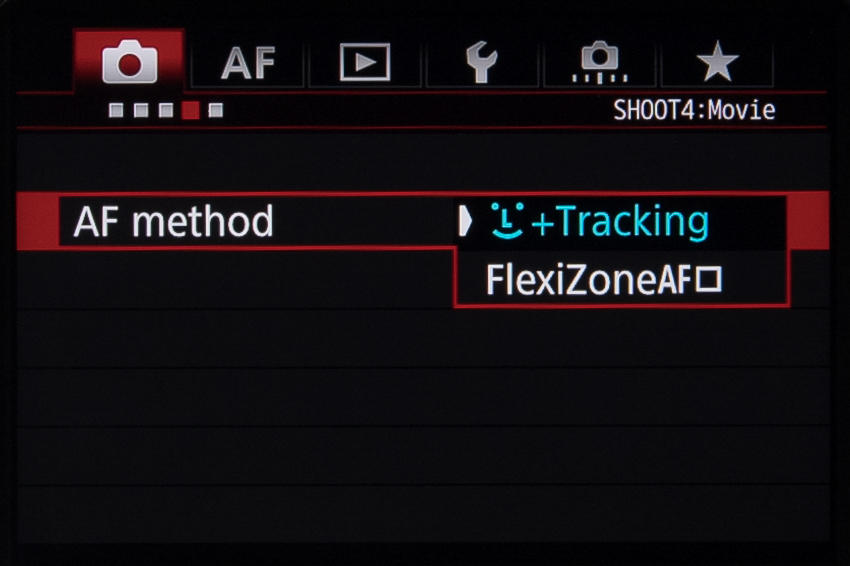
To refocus during recording you have the following options:

  • Press either the AF-ON button or the shutter release control
  • Let the camera refocus automatically by setting it to Full Time Servo (AF-F)
  • Press the touchscreen where you want the camera to focus
  • Use manual focus instead

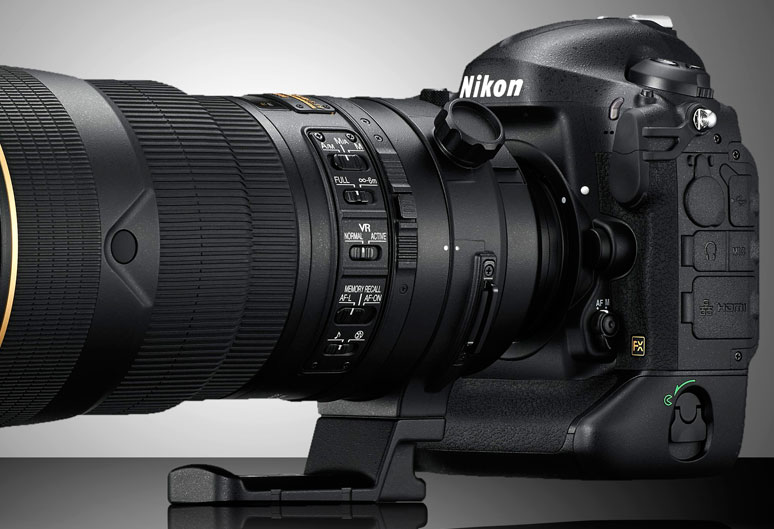
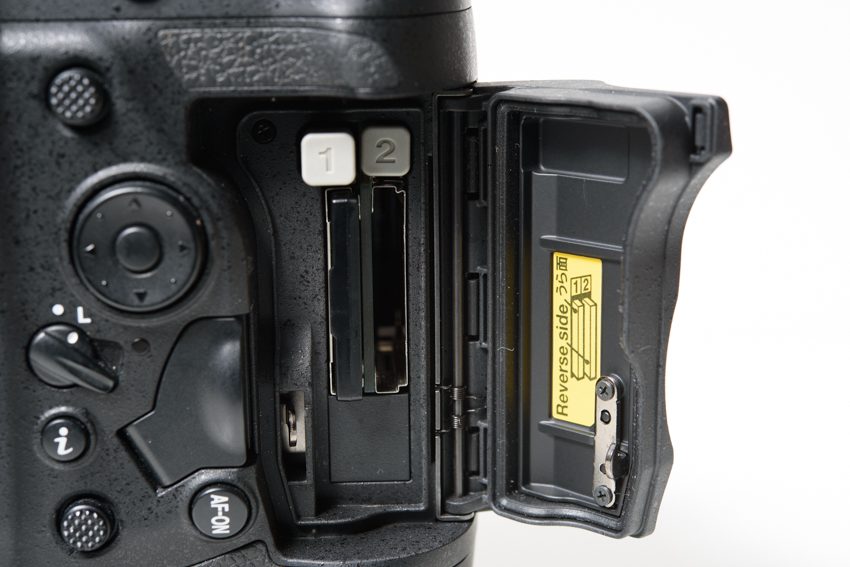
All footage is recorded to either XQD or CompactFlash media, depending on which model you have (the D5 is available in either dual XQD [below] or Dual CompactFlash formats).

Nikon D5 Video Options

Colour and white balance

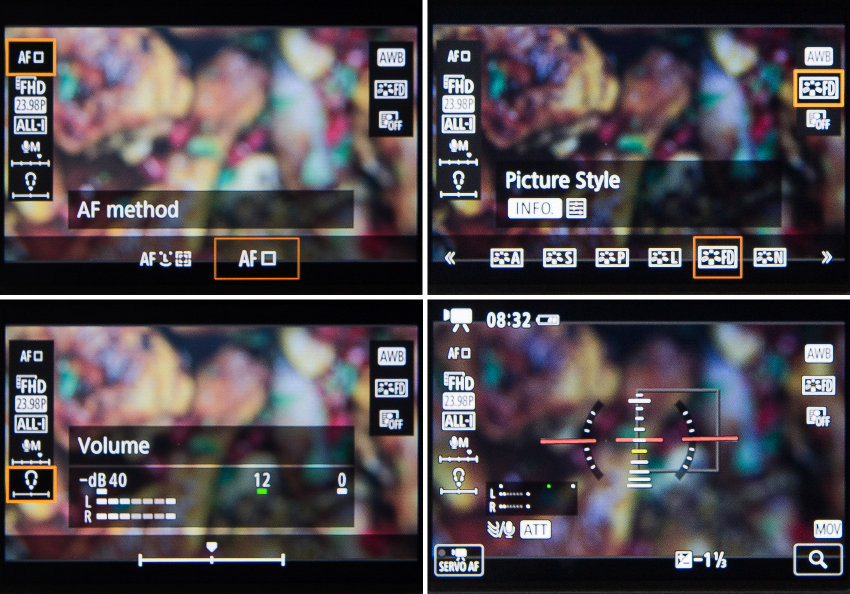
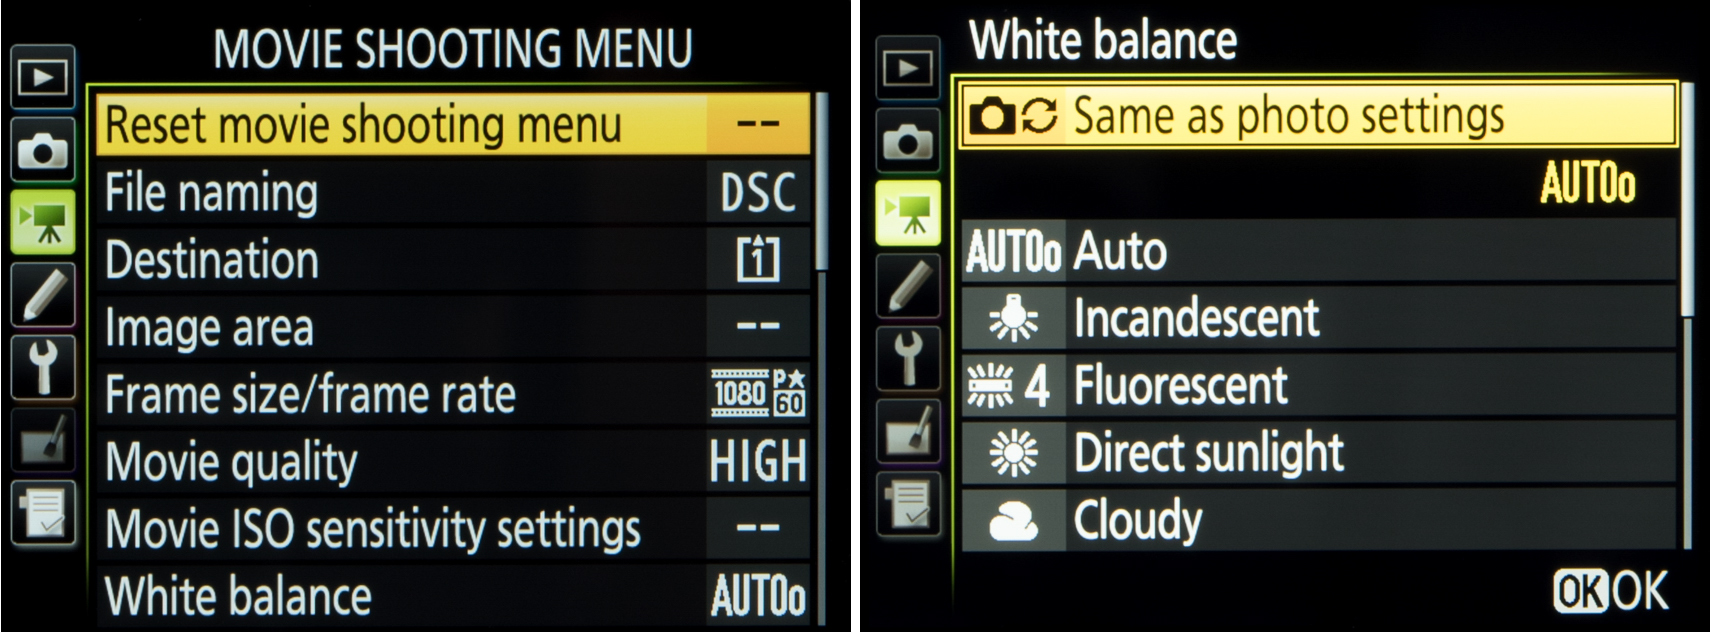
Many of the same controls that are available when shooting stills, such as white balance and Picture Style, are available when recording videos. These include the Flat Picture Style first seen in the D810 that has been designed to produce low-contrast footage that’s more appropriate for grading.

When setting white balance and Picture Style, you can select ‘Same as Photo Settings’ rather than selecting a particular preset. This is helpful when capturing stills in the same conditions and particularly useful when using a setting that has been customised (Auto White Balance with a slight bias, for example).

Nikon D5 Video Options

You can also bring up video-specific options by pressing the ‘i’ button when in the video mode. This allows you to quickly view and amend settings like headphone volume, frequency response for example.

Image capture

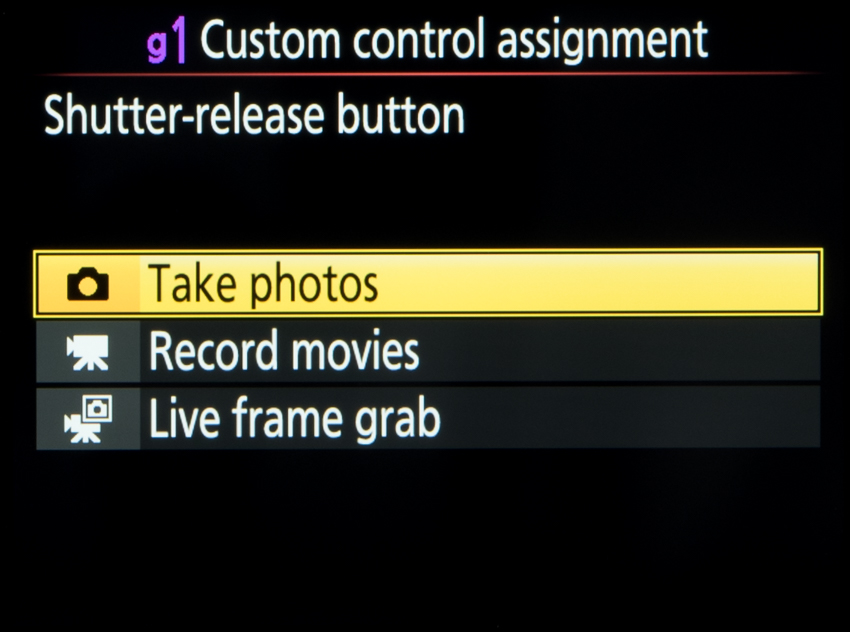
When using the Live Frame Grab option, the D5 allows you to capture an image as you’re recording footage, by pressing the shutter release button.
The images are saved without interruption and at the recording resolution. Without the Live Frame Grab option selected, pressing the shutter release button has the effect of terminating the recording to take the image.

Nikon D5 Video Options

As with other 4K-enabled cameras the D5 allows you to extract an image from recorded footage, with images output at an 8MP resolution.

Movie editing and playback

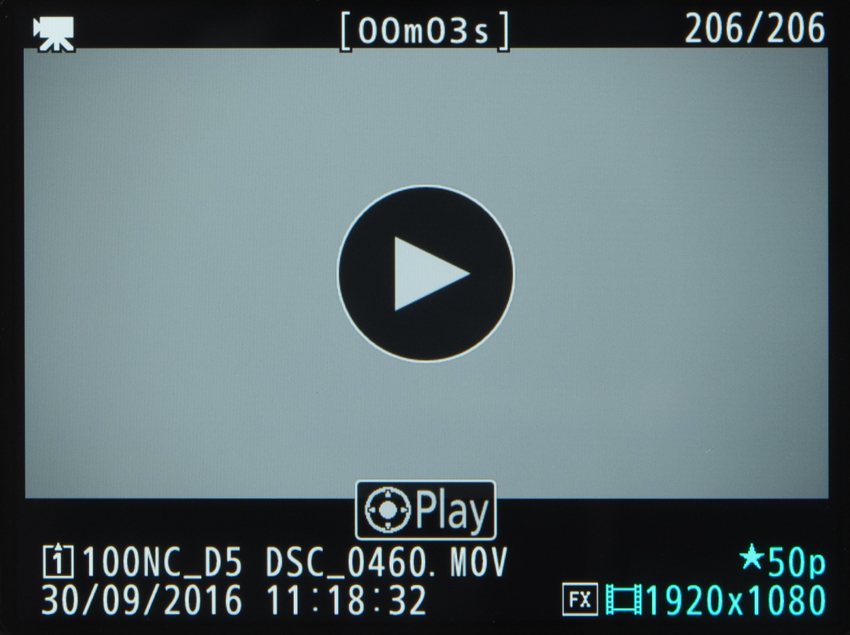
Pressing the ‘i’ button during playback allows you to specify a start and end point for footage. This can either be saved as a new file or over the existing footage. You can also rate footage and send it to another card or folder.

One nice touch when playing back footage is the option to initiate playback by pressing a large virtual Play button in the centre of the display, rather than any physical buttons.

Nikon D5 Video Options

Audio

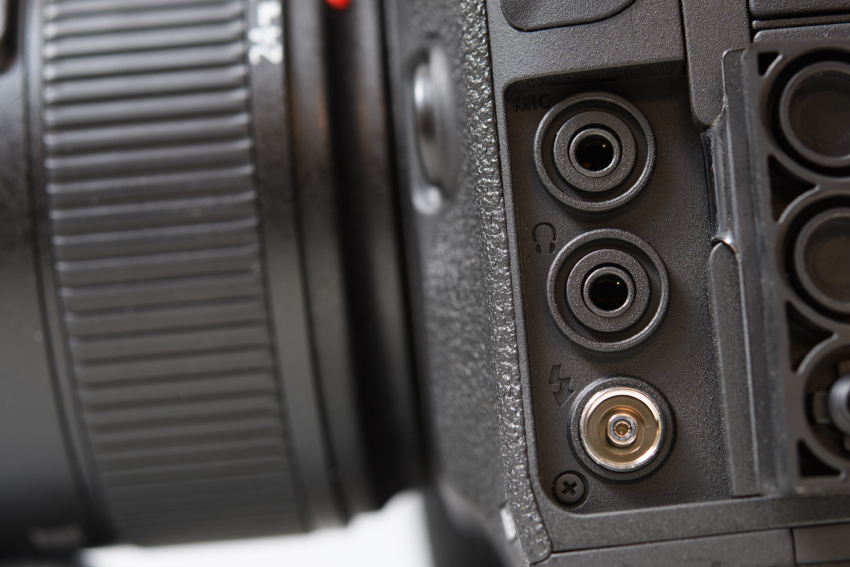
The Nikon D5 has stereo microphones located on its rear panel, although an external microphone with a 3.5mm jack can be plugged into its side for better quality recording. Regardless of the microphone used, the user can adjust sensitivity manually over 20 levels or leave it to an auto setting, with levels for each displayed on the rear monitor.

 Nikon D5 Video Options

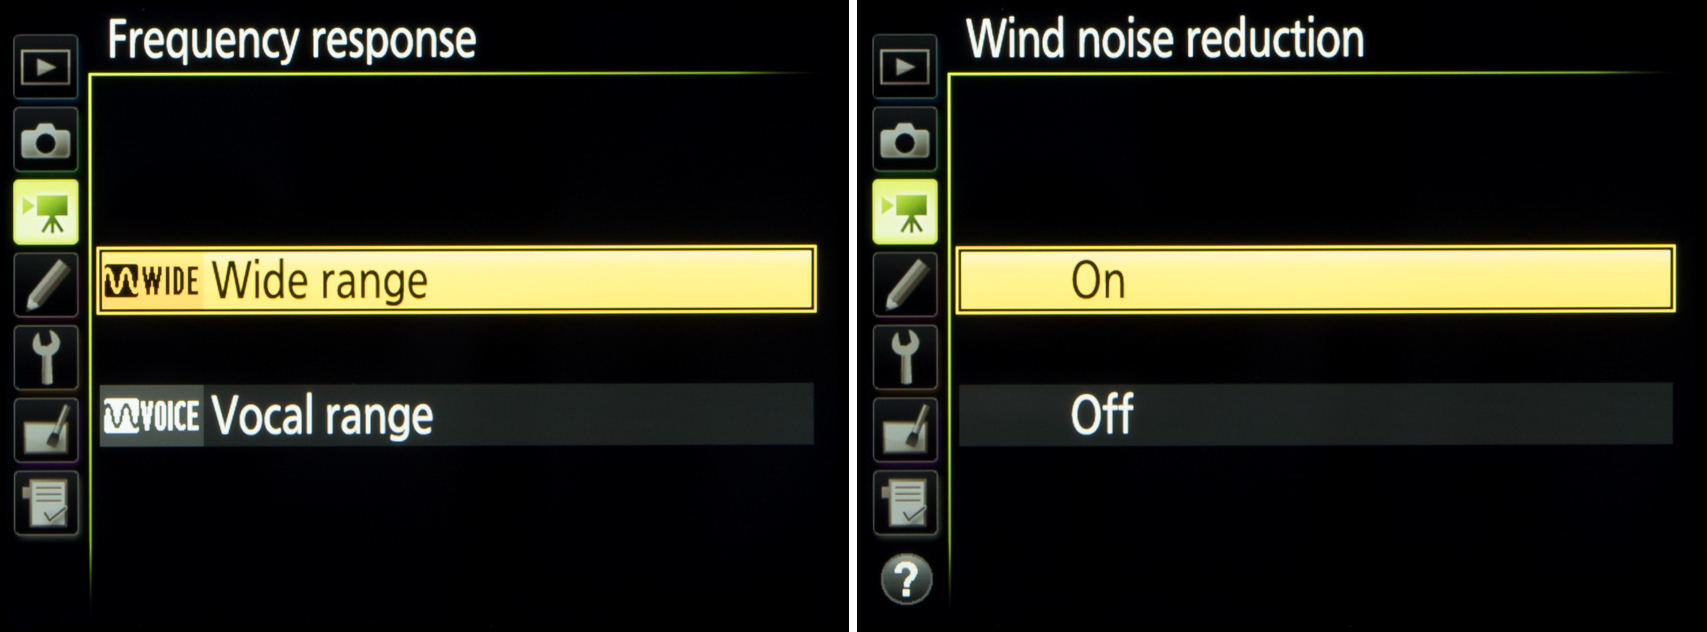
It’s also possible to adjust the frequency range between wide and vocal settings, call upon a wind noise filter as well as disable audio recording. You can also monitor audio while recording, through a set of headphones via the 3.5mm jack port on the camera’s side.
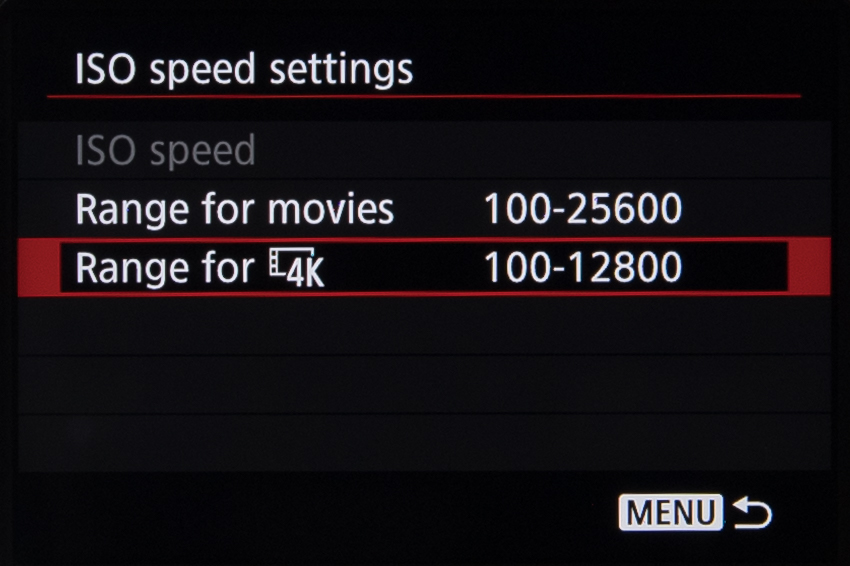
Nikon D5 Video Options

ISO

With the exception of its three ‘Lo’ settings that are available for stills capture, the D5 is capable of using its full native and extended ISO range when recording video. This runs from ISO 100 up to the Hi5 option that is equivalent to ISO 3,280,000. You also have the same control over Auto ISO as you do when shooting stills, and you can specify a maximum sensitivity if you’re concerned about noise levels.

Nikon D5 Video Options

Recording limits

Upon its launch, the D5 could only record three minutes of 4K video at a time, although the v1.10 firmware update announced in June took away this limitation to extend recording time to a maximum 29mins and 59secs. Any recording that generates a file larger than 4GB (the limit for the FAT32 format) will be split across up to eight individual files. These can be stitched together in post production.

Physical controls

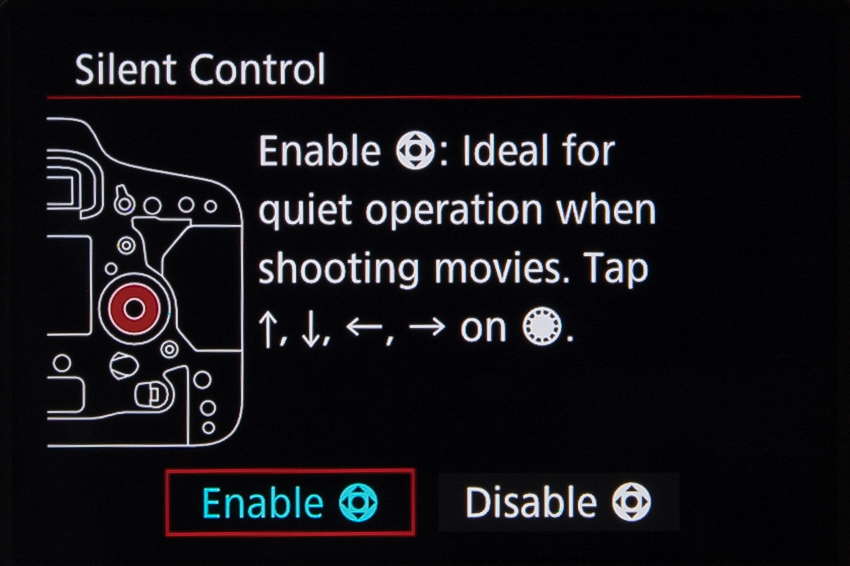
You can customise many controls around the body to serve a variety of functions that are useful when recording video. Index marking, for example, can be quickly called upon to place markers at specific points during video recording so that those points can be reached easily upon playback. Nikon’s Power Aperture feature, which closes/opens the aperture smoothly, can also be assigned to a function button.

Nikon D5 Video Options


Other settings

Nikon D5 Video Options
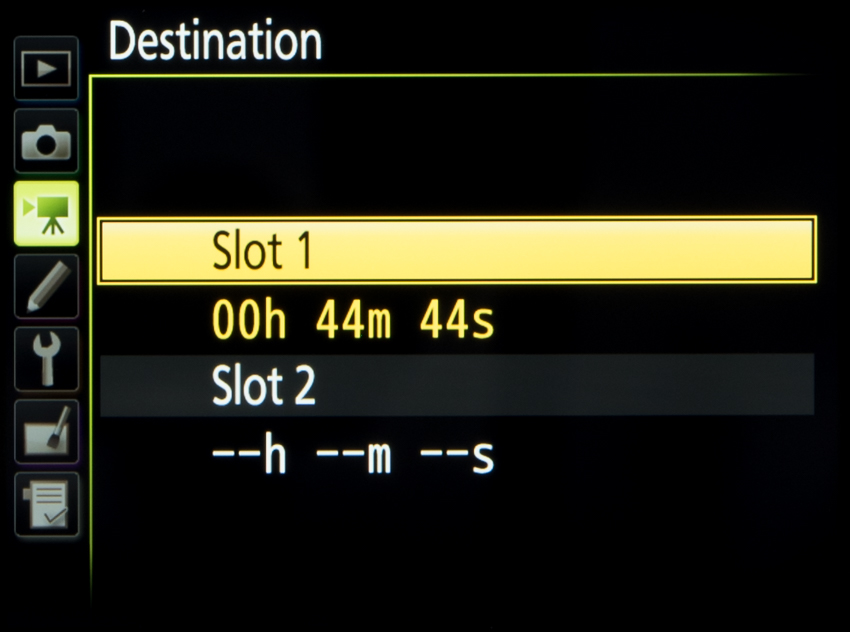
The majority of video-specific functions fall under the Movie Shooting Menu tab. These include the options to give files a specific three-letter prefix and to designate a card for videos if you use both slots. The card capacity in recording-time is indicated when selecting card slots.

Helpfully, should you make lots of changes and just want to go back to default options without resetting the camera entirely, you can do this with the first option in the video settings menu.


Timelapse

Nikon D5 Video Options
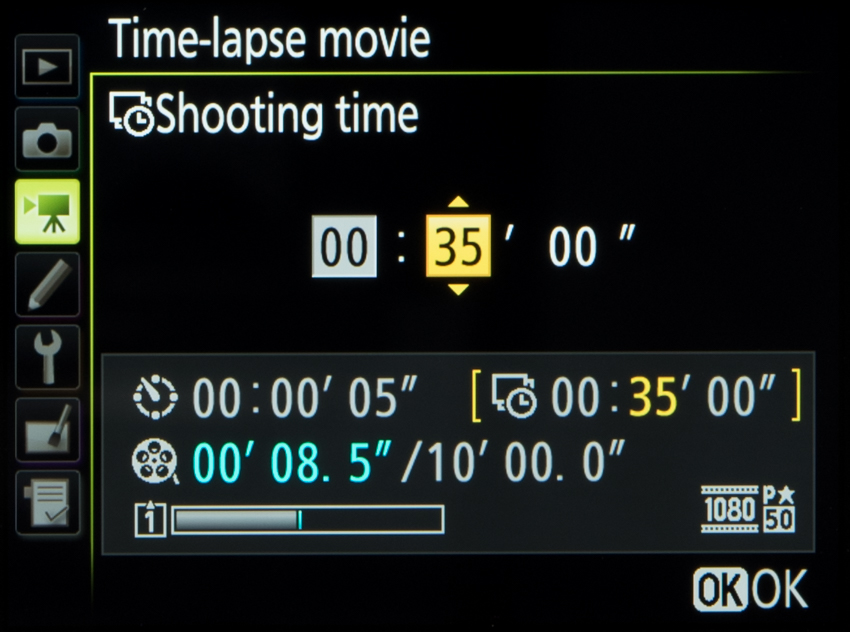
As with many previous Nikon DSLRs, the camera can be programmed to record images at regular intervals for the creation of time-lapse footage.

You can capture images as quickly as once per second and record for up to 7 hours and 59 minutes, with a maximum length of recorded videos set to 20 minutes. The camera also indicates how long it will need to capture the video at the settings you select and displays the proportion of the memory card required for this. Exposure smoothing is available, this attempts to even out exposures should there be any sudden changes in the scene between frames.

Electronic VR

Nikon D5 Video Options
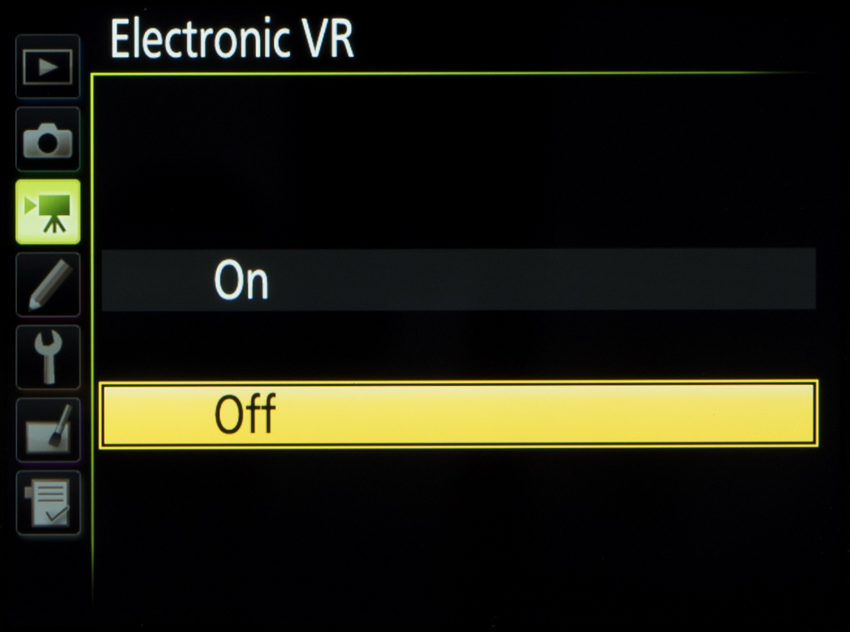
The same firmware update that lifted the recording time limit also gave video shooters an electronic VR setting. The Electronic VR is not available when recording 4K footage or when recording in one of the cropped Full HD options. It also has the effect of very slightly reducing the angle of view.


HDMI out

Nikon D5 Video Options
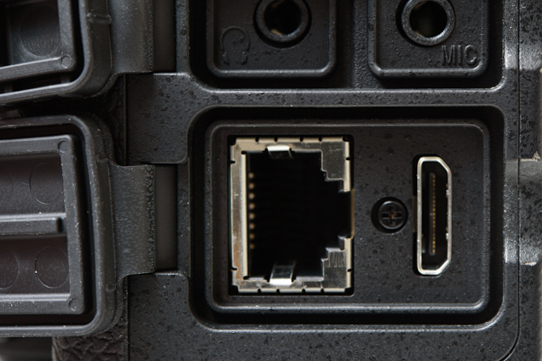
The D5 is equipped with a Type C HDMI port around its side. This allows you to output uncompressed footage with 4:2:0 chroma subsampling.

Last but not least, you can simultaneously record to the card inside the camera while recording to an external device via HDMI.


Close-up: Canon EOS-1D X Mark II Video Options image

Close-up: Canon EOS-1D X Mark II Video Options

We drill deep into the video functionality offered by Canon’s 4K-shooting EOS-1D X Mark II

Canon EOS-1D X Mark II

Canon’s flagship EOS DSLR, the EOS-1DX Mark II, is one of the company’s few DSLRs to record 4K-resolution video, and this is supported by a range of additional control over recording, playback and output. We’ve gone deep into the menu system to find out exactly what’s possible, and how the camera can be set up to meet your requirements. 

The Basics

The EOS-1D X Mark II records DCI 4K-resolution footage (4096 x 2160 pixels) using the Motion JPEG format, with 8bit 4:2:2 chroma subsampling. Having a slightly higher horizontal resolution than UHD 4K, the DCI 4K format records with a 17:9 aspect ratio, and this happens at a crop factor of around 1.3x.

If, however, you choose to record in Full HD (1920 x 1080 pixels), this is recorded at an aspect ratio of 16:9 without any crop factor applied, with the camera using the MPEG4 AVC / H.264 codec instead. Incidentally, it’s not possible to select standard HD (1280 x 720 pixels) or VGA (640 x 480 pixels) recording; Full HD is the lowest resolution available.

Canon-EOS-1D-X-Mark-II-Video-Options

4K footage is recorded as a MOV file, at 50fps, 25fps and 24fps when set to PAL. Those recording in NTSC, meanwhile, have 60fps (59.94fps), 30fps (29.97fps) and 24ƒ/23.98fps options available to them. Motion JPEG takes up a fair bit of space next to more modern formats, which means that when set to either the 50fps (PAL) or 59.94fps (NTSC) options bit rate is around 800Mbps. Using the lower frame rates in 4K, meanwhile, causes this drops to around 500Mbps.

When recording Full HD footage, however, the user has the choice of MOV and MP4 recording. Here, the camera records 8bit 4:2:0 footage, with a choice of ALL-I, IPB and IPB Light compression options.

High-frame-rate recording

When set to Full HD the camera can capture footage at up to 119.9fps (NTSC) or 100fps (PAL), recording this at 30fps and 25fps respectively (ie a quarter of the speed) for slow-motion results.

Canon EOS-1D X Mark II Video Options

This records using the MOV format and ALL-I compression, at a bit rate of around 360Mbps, which should help to maintain better image quality than the IPB options.

As we might expect, audio is not recorded as this happens, while the time limit for individual clips is 7mins and 29secs.


Sensitivity

Just as you can set a specific range of available sensitivities when shooting stills, you can do the same for video. The camera provides the option of specifying a range for when the camera is set to its ISO Auto mode and a separate range when manually selecting ISO, and separate adjustment over 4K and Full HD recording is provided.

Canon-EOS-1D-X-Mark-II-Video-Options

It’s not possible to select the very lowest ‘L’ option, equivalent to ISO 50, for video recording of any kind, and, similarly, the highest H4, ISO 409-600-equivalent setting is also off limits.

Instead, you can choose a minimum ISO between ISO 100 and H1 (equivalent to ISO 102,400) inclusive, and a maximum limit between ISO 200 and H2 (equivalent to ISO 204,800) inclusive.


Time limits

The camera can record up to three minutes of 4K footage at a time, and up to 29mins and 59secs of Full HD footage. Interestingly, Nikon’s D5 also arrived with the same limitation, although this was later removed through a firmware update. Should you be using an external recorder, however, you can bypass this three-minute cap.

When recording 4K footage in camera, Canon recommends using a CFast 2.0 card – otherwise, it’s possible to record footage to CompactFlash media (up to UDMA 7) as the camera features a slot for each format.

In line with many other 4K-enabled cameras, you can also use the camera’s Frame Grab feature to extract individual frames from 4K footage before saving them as JPEGs in camera. With footage recorded at 4096 x 2160 pixels this equates to a file with a resolution of approximately 8.8MP. It’s not, however, possible to extract images from footage recorded in Full HD.

Autofocus

Canon-EOS-1D-X-Mark-II-Video-OptionsAside from the availability of 4K recording, one of the main advantages of the new model over the previous EOS 1D X is the inclusion of Canon’s Dual Pixel CMOS AF system. This feature has been included in many models much lower down in the EOS range, although the EOS-1D X Mark II becomes the first full-frame model to employ the system (now joined by the EOS 5D Mark IV).

Dual Pixel CMOS AF provides phase-detect autofocus from the main imaging sensor, something made possible by each pixel having two photodiodes.

This system allows for focus to be acquired quickly and for continuous focus (Servo AF) while recording video, and you can also set the camera to track faces with the Face Detection feature. 

Canon-EOS-1D-X-Mark-II-Video-OptionsThanks to the camera’s touchscreen, it’s possible to select the point of focus prior to or during recording by simply pressing the screen. Should you do this while you’re recording, the Dual Pixel CMOS AF system will gently pull focus to the specified point in the scene, much more fluidly than contrast-detect AF systems found elsewhere.

The touchscreen also allows for Servo AF to be stopped and started, thanks to a small virtual button in the bottom left hand corner than responds to touch.

Canon has provided the option to adjust the speed of the AF Servo mode to suit whatever it is you’re shooting. You can set this to focus quickly for everyday footage, where you want the camera to quickly lock onto subjects, or reduce the speed where you want to continue using autofocus for smooth and professional-looking focus transitions.

You can also vary the tracking sensitivity of the AF Servo system over seven levels. This adjusts the focusing system’s behavior in the event that it loses focus of the subject being tracked. “Responsive” will quickly engage the auto focus if your subject is lost. “Locked on” holds the focus position longer even if your subject is obstructed or moves briefly out of shot.

Canon-EOS-1D-X-Mark-II-Video-Options

On-screen controls

It’s possible to bring up a range of on-screen information when recording videos, from frame rate, white balance and Picture Style to the option of overlaying a two-axis virtual electronic level. You can also bring up a series of different grids to help with both levelling and composition, although this is not maintained once you start recording.

Canon EOS-1D X Mark II Video Options

Although video options are split across a handful of screens, you can also group many video-specific options together for quick access using Canon’s My Menu tab.

 Physical controls

On default settings, movie recoding requires you to press the Start/Stop button on the rear panel (with the collar around it set to the video option) although you can also configure the shutter-release button to perform the same action through the menu system, should you find this to be easier.

Canon EOS-1D X Mark II Video OptionsAnother useful video-centric feature is the option to control the camera silently whilst recording. When this feature is enabled you can use the touch pad around the Quick Control dial on the back to perform a number of commands. Ordinarily the sounds from pressing buttons and turning dials may be picked up by the camera’s on-board microphone.

The controls available depends on the shooting mode used. In the Manual exposure mode you can control shutter speed, aperture, ISO, audio recording level and the output volume, if using headphones to monitor sound.


Playback and output

The camera has a Type C HDMI mini port on it’s side, which allows for clean (uncompressed) 8bit footage to be output with 4:2:2 chroma subsampling and audio, although only at a maximum Full HD resolution.

YCanon EOS-1D X Mark II Video Optionsou can output this to an external recorder, stream it to an external display, or use a unit that combines the two. In fact, you may wish to use an external display anyway, as this can be used to provide features not present on the camera itself, such as focus peaking, false colour and zebra patterning.

Something else the camera allows is for 4K footage to be recorded internally while Full HD footage is output via the HDMI port. Time code can also be appended to recordings output via HDMI.

You can also choose to maintain the feed on the rear display when outputting to an external one, and decide whether the rear display should show shooting information.

Audio

With a built-in microphone, located on the front panel, it is possible record (mono) audio without any external microphones. For better quality audio there is a stereo microphone port available for a range of external microphones.

Canon EOS-1D X Mark II Video Options

If you shoot outside and choose to record using the built-in microphone, you can employ the wind filter to help reduce wind noise. The wind filter does not work with external microphones. However, you can use these in conjunction with more effective wind shields such as a dead cat.

There is also an attenuator, which can be used to keep audio balanced should there be any sudden loud noises. As with the wind filter, if this is engaged, an icon will show up on the rear display.

Last but not least, the 3.5mm headphone port beneath allows audio to be monitored during recording, a useful new feature which was not present on the original EOS-1D X.

Behind the Scenes: World Cup Final image

Behind the Scenes: World Cup Final

Sports photographer Eddie Keogh recalls photographing the all-important Germany-Argentina clash of 2014


Germany's Mario Goetze lifts the World Cup trophy after the 2014 World Cup final against Argentina at the Maracana stadium in Rio de Janeiro

Germany’s Mario Goetze lifts the World Cup trophy after the 2014 World Cup final against Argentina at the Maracana stadium in Rio de Janeiro July 13, 2014. REUTERS/Eddie Keogh


I felt very privileged to be part of the Reuters photo team covering the World Cup in Rio in 2014, but was even happier when asked to be part of the team that stayed to cover the World Cup Final between Argentina and Germany.

It was an incredible setup: eleven photographers covering every angle on the pitch and from balcony positions high in the stand. There were even cameras bolted to the roof to give a very high view of each goalmouth.

Now as you can imagine, almost every media outlet in the world wanted to use a picture of the winning team holding aloft the World Cup trophy. So this was a big deal for Reuters, and by extension for us. We knew that if we got it wrong, our whole World Cup would finish on a downer.

We started with a team meeting, three hours before kick-off, where our photo editor Pawel Kopczynski briefed us all with the plan on how we were going to shoot the game, shoot penalties if it came to that, and finally how we would tackle the all-important trophy lift.


Camera equipment is seen inside the Canon loan service office at the Maracana stadium in Rio de Janeiro July 12, 2014. In a project called "On the Sidelines" Reuters photographers share pictures showing their own quirky and creative view of the 2014 World Cup in Brazil. REUTERS/Eddie Keogh (BRAZIL - Tags: SPORT SOCCER WORLD CUP SOCIETY MEDIA SCIENCE TECHNOLOGY) - RTR3YLVY

Camera equipment is seen inside the Canon loan service office at the Maracana stadium in Rio de Janeiro, July 12, 2014. REUTERS/Eddie Keogh 


The shoot


Our most important moments were in the aftermath of the game. When the dust settled, Germany emerged victorious. Mario Gotze scored the winner in extra time, finally putting down a frustrated Argentina who had not once managed a shot on target.

My colleague Dylan Martinez, also based in the UK, but with a sizeable amount of Argentinian blood in his veins, nailed the shot of the winning goal for Germany and didn’t know whether to laugh or cry.

When the final whistle blew, Germany immediately celebrated, and photographers were left with the choice between shooting that or getting a picture of Argentina’s Lionel Messi looking distraught.

Meanwhile, our two German photographers Kai Pfaffenbach and Michael Dalder were manoeuvring for the best head on presentation positions.


Photographers take their position for the award ceremony of the 2014 World Cup final between Germany and Argentina at the Maracana stadium in Rio de Janeiro July 13, 2014. REUTERS/David Gray (BRAZIL - Tags: SOCCER SPORT WORLD CUP) - RTR3YGZZ

Photographers take their position for the award ceremony of the 2014 World Cup final between Germany and Argentina at the Maracana stadium in Rio de Janeiro July 13, 2014. REUTERS/David Gray 


Due to the amount of photographers in that exact position, it wasn’t possible for Kai and Michael to shoot tethered. A photo technician had to wait behind them, ready to grab their card as soon as they felt they had the picture. It would then take valuable minutes before the photo technician would be able to get the pictures back to the computer to spool them into the desk.

Myself and three other photographers on the pitch remained tethered to our cables so that our pictures were moving real time as we shot the lifting of the trophy. I was positioned on the other side of the pitch, about  70 metres away from where the trophy was being presented, using my Canon EOS-1DX with a 600mm f/4 and shooting at ISO 1600, 1/1000sec at f/4.


Germany's captain Lahm lifts near coach Loew the World Cup trophy after the 2014 World Cup final against Argentina at the Maracana stadium in Rio de Janeiro

Germany’s captain Philipp Lahm lifts near coach Joachim Loew (R) the World Cup trophy after the 2014 World Cup final against Argentina at the Maracana stadium in Rio de Janeiro July 13, 2014. REUTERS/Eddie Keogh


For jobs like this, the editor and processors in the office will have a caption ready, meaning as soon as the first pictures arrive they can be cropped, captioned and sent out to our clients via satellite. On this job, pictures were dropping with our clients within three minutes of the trophy lift, which even by these standards is incredibly quick, and goes with Reuters’ reputation for moving world-breaking pictures with speed and accuracy.

It was a great night, everything went to plan, and we finished it off by knocking a few beers into the back of the net.


The Reuters photographers after photographing the 2014 World Cup Final, pose for a picture at the Maracana stadium in Rio de Janeiro July 13, 2014. (Top L-R) Michael Dalder, Leonhard Foeger, Dylan Martinez, Sergio Moraes, Kai Pfaffenbach, Damir Sagolj and Paulo Whitaker. (Bottom L-R) Darren Staples, David Gray, Eddie Keogh and Ricardo Moraes. In a project titled ?On The Sidelines?, Reuters award-winning photographers are sharing pictures showing their own quirky and creative view of the 2014 World Cup in Brazil. Their images offer an insight behind the scenes of the tournament, revealing the photographers? experiences as they live in and travel around Brazil. REUTERS/Paul Robinson (BRAZIL - Tags: MEDIA SOCIETY SPORT SOCCER WORLD CUP) - RTR3YWJL

The Reuters photographers. (Top L-R) Michael Dalder, Leonhard Foeger, Dylan Martinez, Sergio Moraes, Kai Pfaffenbach, Damir Sagolj and Paulo Whitaker. (Bottom L-R) Darren Staples, David Gray, Eddie Keogh and Ricardo Moraes. REUTERS/Paul Robinson 


Eddie Keogh is a professional sports photographer. View his portfolio at his website, eddiekeogh.com

Behind the scenes: Puppeteers’ Colony image

Behind the scenes: Puppeteers’ Colony

Susannah Ireland travels to West Delhi to photograph a fascinating and threatened community


Kathputli Artists

General view of the Kathputli slum colony of New Delhi, India, December 10th, 2014. All images by Susannah Ireland


Recently I embarked upon a photo essay documenting the lives and activities of residents in the Kathputli (or Puppeteers’) Colony, a community of artists in an area of West Delhi in India.

Popularised by Salman Rushdie’s novel Midnight’s Children, the slum has been famed for over 60 years for its dense population of puppeteers, acrobats, snake-charmers, musicians, dancers, actors and street performers – making it the world’s largest community of street performers.


Puppeteer Sarju Bhaat practises using his puppets at his home in the Kathputli slum colony of New Delhi, India, December 7th, 2014. He is one of 40,000 people living in the slum, which is popularly known for being the worlds largest colony of street performers, including magicians, snake charmers, acrobats, singers, dancers, actors, traditional healers and musicians and puppeteers. Their livelihood is under threat however as the Delhi government has obtained contracts to demolish the colony to make way for developers to build high-rise apartments. Photo Credit: Susannah Ireland

Puppeteer Sarju Bhaat practises using his puppets at his home in the Kathputli slum colony of New Delhi, India, December 7th, 2014.


Their community and subsequent livelihood is under threat from demolition by the Delhi Development Authority, who want to clear the slums the people live in to make way for luxury flats and shops. The artists would be relocated into a nearby transit camp in a high-rise apartment block, making it impossible, so they claim, to practice their art.


Kathputli Slum Artists

Jagdeesh Makkhan is pictured performing the Kachhi Ghodi traditional Rajasthani folk dance at his home in the Kathputli slum colony of New Delhi, India, December 7th, 2014. 


As a foreigner and lone female with only limited grasp of Hindi, it would be inadvisable for me to simply walk into a slum and expect co-operation. I therefore sought the help of a local charity, which was already working with residents of the slum to assist my project.


A monkey is pictured chain up outside a urinal in the Kathputli slum colony of New Delhi, India, December 7th, 2014. The slum has 40,000 people living in the slum, which is popularly known for being the worlds largest colony of street performers, including magicians, snake charmers, acrobats, singers, dancers, actors, traditional healers and musicians and puppeteers. Their livelihood is under threat however as the Delhi government has obtained contracts to demolish the colony to make way for developers to build high-rise apartments. Photo Credit: Susannah Ireland

A monkey is pictured chained up outside a urinal in the Kathputli slum colony of New Delhi, India, December 7th, 2014. 


I was acutely aware of the patronising nature of ‘slum tourism’ and did not want to fall into any negative stereotypes of ‘poverty porn’ in my portrayal of the residents and their campaign, whilst also being careful not to glamourise or romanticise the obvious lack of basic facilities and challenging living conditions.

Consequently, I had quite a few meetings with the charity volunteers and community residents to establish my intentions as a photojournalist, understanding their grievances and building trust in the community before even shooting a single frame.


Rajasthani puppets are pictured in the home of a puppet maker Ghita Devi in the Kathputli slum colony of New Delhi, India, December 8th, 2014. Ghita is one of 40,000 people living in the slum, which is popularly known for being the worlds largest colony of street performers, including magicians, snake charmers, acrobats, singers, dancers, actors, traditional healers and musicians and puppeteers. Their livelihood is under threat however as the Delhi government has obtained contracts to demolish the colony to make way for developers to build high-rise apartments. Photo Credit: Susannah Ireland

Rajasthani puppets are pictured in the home of a puppet maker Ghita Devi in the Kathputli slum colony of New Delhi, India, December 8th, 2014. 


I spent several days with the charity outreach workers travelling around the slum, visiting families and artists and setting up my equipment in the quite limited space. I was lucky enough to have a translator with me who helped enormously with setups and explanations.

All the residents I met were brilliant – an inspiration of artistry and resilience despite such challenging conditions. They were all against the planned demolition of the site and were extremely helpful in any efforts to raise awareness and help fight against it.


Kathputli Slum Artists

Seven-year-old Mohip Beda performs dressed in a monkey costume at the Kathputli slum colony of New Delhi, India, December 7th, 2014.


I became aware about half way through the project that the charity I was working with wasn’t quite as legitimate as I’d originally thought. The apparently philanthropic owner seemed to be asleep whenever I turned up, even in the middle of the day, or else drunk and not contactable.

I began to suspect it was just an establishment designed to exploit and profit from the infamous nature of the slum, a conductor of slum tours for foreigners – the exact thing I was intent on avoiding.  The volunteers who actually worked, and sometimes lived, in the colony were brilliant though, but hinted that much of the money made by the charity never actually reached the residents it claimed to help.

I decided to continue working with the volunteers, and distance myself from the owner if at all possible.


Fire breather Amit Kumar Bhatt practising his craft at his home in the Kathputli slum colony of New Delhi, India, December 10th, 2014. He is one of 40,000 people living in the slum, which is popularly known for being the worlds largest colony of street performers, including magicians, snake charmers, acrobats, singers, dancers, actors, traditional healers and musicians and puppeteers. Their livelihood is under threat however as the Delhi government has obtained contracts to demolish the colony to make way for developers to build high-rise apartments. Photo Credit: Susannah Ireland

Fire breather Amit Kumar Bhatt practising his craft at his home in the Kathputli slum colony of New Delhi, India, December 10th, 2014.

Shooting the firebreathing artist (above) was very dramatic, although it made me slightly nervous, as health and safety didn’t appear to exist and there were a lot of children running around the already cramped location.

I also had to be careful to avoid getting bitten by rats whilst trying to get particular angles on the images I needed, which once involved wading through sewage.

It was fascinating observing all the micro-industries and industrious enterprises operating in the colony though, and how much creativity can thrive in such a small space.


Magician Sohil Kahn practises his magic with a white rat at his home in the Kathputli slum colony of New Delhi, India, December 7th, 2014. He is one of 40,000 people living in the slum, which is popularly known for being the worlds largest colony of street performers, including magicians, snake charmers, acrobats, singers, dancers, actors, traditional healers and musicians and puppeteers. Their livelihood is under threat however as the Delhi government has obtained contracts to demolish the colony to make way for developers to build high-rise apartments. Photo Credit: Susannah Ireland

Magician Sohil Kahn practises his magic with a white rat at his home in the Kathputli slum colony of New Delhi, India, December 7th, 2014. 


The Kathputli colony campaign is still ongoing, and the residents are still campaigning against the clearance of their home, despite some residents having already been moved on. My story was published in The Independent on Sunday Magazine and the colony’s campaign has reached the attention of the international media, something I hope my photo essay contributed to, although how much influence that will have on subsequent government policy is yet to seen.


Children walk home on the railway track which runs alongside the Kathputli slum colony of New Delhi, India, December 10th, 2014. 40,000 people live in the slum, speaking 11 different languages, which is popularly known for being the worlds largest colony of street performers, including magicians, snake charmers, acrobats, singers, dancers, actors, traditional healers and musicians and puppeteers. Their livelihood is under threat however as the Delhi government has obtained contracts to demolish the colony to make way for developers to build high-rise apartments. Photo Credit: Susannah Ireland

Children walk home on the railway track which runs alongside the Kathputli slum colony of New Delhi, India, December 10th, 2014.


Susannah Ireland is an editorial and documentary photographer. She can be reached at susannahireland.com. Susannah was talking to Jon Stapley


Close-up: Fuji X-T2 AF system image

Close-up: Fuji X-T2 AF system

Fujifilm’s X-T2 arrived with an overhauled AF system and a strong focus on moving subjects. We take a closer look.

X-T2_BK_18-55mm_front_White

Although Fujifilm’s X-T2 may look similar on the surface to the previous X-T1, there are number of refinements to what’s going on inside.

The autofocus system is one area that’s received considerable attention. Some of the changes made are a direct result of the upgraded X-Processor Pro engine, and those who would like to use the X-T2 for sports and general action-based photography should be particularly interested.

The Basics

Like the X-T1, the X-T2 features an Intelligent Hybrid AF system that offers both phase-detect and contrast-detect autofocus.

When the X-T1 was released it offered 49 AF points in a 7×7-point formation. The v.4.0 firmware added Zone AF or Wide/Tracking AF modes and boosted the array to 77 points when using those modes.

By comparison, the X-T2’s AF system offers 91 points in a 7×13-point formation at default, and this can be expanded to 325 points in a 13×25-point formation.

When set to the default 91-point mode there are 49 phase-detect AF points in the centre of the array. This is a significant improvement from the nine phase-detect AF points that featured in the X-T1.

The XT2 AF arrays compared
The X-T2’s default 91-point AF system* compared with the expanded 325-point AF setting*

When using the expanded 325-point setting, however, 169 central points are phase-detect AF points in the centre of the frame. Both patterns occupy roughly the same proportion of the screen as each other, although the 325-point system is much denser, which makes it better suited for tracking moving subjects.

This central area with the phase-detect points covers 40% of the frame, and with the contrast detect points the total coverage is 85%. You can easily see the extent of both types as the phase-detect AF points are larger than the contrast-detect AF ones.

Fujifilm claims the phase-detect AF system comes into play more readily on the X-T2 than before, while the contrast-detect AF system is said to work down to -3EV.

* These images include the black surround of the LCD screen. As such, they do not accurately show the extent to which they cover the frame.

Focus options

Both the Single (AF-S) and Continuous (AF-C) options can be used with each of the Single Point, Zone and Wide/Tracking AF modes, which gives a total of six combinations to suit different subjects and scenes.

The Single Point is the default option, with one point that can be positioned anywhere on the array. The Zone option allows you to specify a particular area of the focusing system to use, while the Wide/Tracking option is programmed to automatically focus on subjects in the scene with the highest contrast, or alternatively to track moving subjects across the frame when used in the continuous focus setting.

Additionally, the camera can be set to manual focus, with the same focus assist aids as before. These are Digital Split Image, in either colour or monochrome settings, as well as focus peaking, which can have its colour adjusted over white, blue and red highlights and its peaking level set to either high or low options.

Fuji X-T2 AF System
The camera offers comprehensive control over focus peaking

Speed and precision

The new processor is said to have improved overall response times, and the AF system has benefited from this. Whereas Fujifilm claimed AF times as short as 0.08sec with the X-T1, the X-T2 shaves off 0.02sec from this to just 0.06sec. This is possible when the camera is set to its Boost option in its Power Management settings, although activating this comes at the slight expense of battery life; whereas Fujifilm claims a battery life of around 340 frames on the Normal setting when using the LCD screen, this is reduced to approximately 260 in the Boost mode.

Fujifilm also claims that the updated processor and improvements to the focusing algorithm mean that the camera refocuses more quickly than previous models, and also that the contrast-detect AF system benefits from data being read twice as quickly than before.

The camera is also said to focus more easily against low-contrast subjects and those with very fine details than was previously the case. Something else that helps here is the ability to change the size of the AF point over five levels. You simply press the Focus Lever on the back and rotate the rear command dial to alternate between the different sizes. Furthermore, when shooting with the Zone setting, you can use the same controls to change the area of the Zone over three levels.

Physical controls

The body maintains the same Focus Mode Lever from the X-T1, with Single, Continuous and Manual Focus options, and this is found on the front plate. On the back of the camera, however, Fujifilm has added a new Focus Lever (something first seen on the X-Pro 2), just beneath the Q button.

AF controls on the XT-2
The new Focus Lever control (left). As on previous models, the focusing mode is still chosen with the switch on the front plate (right).

The primary purpose of this new control is to allow for the focus point to be shifted more easily than before. It moves up, down, left, right and diagonally, and pressing it into the camera allows you to quickly return the focusing point to the centre of the array.

It also serves another purpose; when manually focusing the lens, you can shift this to the point where you want the camera to magnify into the scene beforehand. Once this happens, you can also use the rear command dial to magnify further into the scene for extra precision.

Continuous Focus

Although the X-T1 did a very good job to track moving subjects, continuous focus has not traditionally been a main selling point for the X-series. Nevertheless, the X-T2 follows the similarly specified X-Pro2 in attempting to change that.

Fujifilm XT-2 AF tracking scenarios.
You can select one of five scenarios to help the continuous focus system (left) or program your own with settings to suit your subject (right).

Fujifilm has complemented the changes to the AF system with improvements to the continuous focus algorithm. The user now has the option to customise the system to suit five different scenarios. These are:

  1. Multi Purpose
  2. Ignore Obstacles & Continue To Track Subject
  3. For Accelerating/Decelerating Subject
  4. For Suddenly Appearing Subject
  5. For Erratically Moving & Accelerating/Decelerating Subject

Each option is designed with a different combination of Tracking Sensitivity, Speed Tracking Sensitivity and Zone Area Switching, although if you feel that none suit the subject, you can also design your own AF-C algorithm and store it as the sixth option.

Look familiar? This echoes the AF Configuration tools that have been included on Canon’s higher-end EOS models for some time.

Canon EOS 1D X AF System
The similar option inside the Canon EOS-1D X Mark II

Other features

Eye Detection AF wasn’t initially included in the X-T1, although this came along in the v.4.30 firmware update announced in February. Not surprisingly this feature has been included here as standard, although it is said to have been improved to provide more accurate results. You can choose to focus on either the left or right eyes, or leave it to an auto setting. Alternatively, you can use face detection without enabling Eye Detection AF.

Fuji X-T2 AF System
You can choose whether to spot meter at the selected focus point

The Interlock Spot AE & Focus Area option allows you to specify whether you want the camera to meter at the selected focus point when using spot metering.

You can also select how to assess depth of field using the Depth-of-Field Scale option. The Film Format Basis option is suggested for those who will be printing their images to moderate sizes. The Pixel Basis, meanwhile, is intended for those who may be examining their images at 100% on a computer display. As the permissible circle of confusion becomes smaller when images are analysed in this way, this option is designed to provide the finest control for utmost accuracy.

Finally, an AF Assist illuminator is once again located on the front plate, and this kicks into action whenever the camera lacks the illumination required for fast autofocus. It is, however, possible to disable this, which is useful when you need to be discreet.

Hi, how can we help?