TIPS & TRICKS | HOW TO CHECK YOUR SENSOR AT HOME

Tips & Tricks | How to check your sensor at home

Dust spots on photos can lead to hours of extra editing. Sometimes there are motes of dust, oil spots, even fingerprints on a camera sensor. But how can you know before it’s too late?

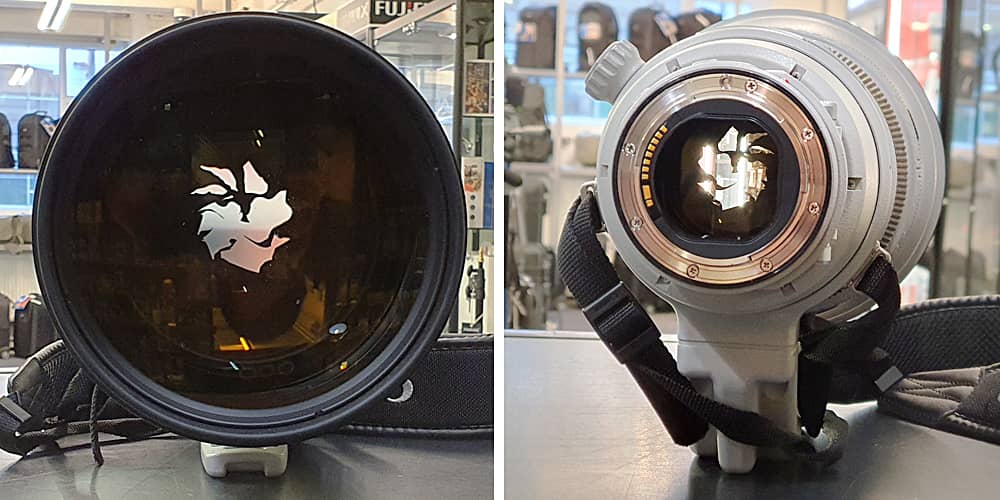
Dust resting on your Mirrorless or DSLR cameras imaging sensor can show up as black spots or soft grey blobs on your images. Most frequently these UFOs (unidentified foreign objects) on the sensor show up in images with clear skies or plain backdrops when your lens is stopped down to f/8 and lower.

You can do a blue sky test but Blue skies are not always available in the UK. Luckily you can check your sensor quickly at home. Before any important assignment, project, holiday or wedding we recommend checking your sensor to see if it needs a clean. This could save you hours in editing afterwards.

Our technicians clean camera check and clean sensors every day. We asked them the best way to check for dust on an imaging sensor.

Sensor Check Kit List

  • Your Camera
  • A 50mm f1.4 lens (ideally but any standard angle lens will do)
  • Tracing paper or diffusion gel
  • BlueTak
  • a light source or window (do not point your camera at the sun, it can damage cameras and lenses)
  • Image editing software eg. Photoshop Elements

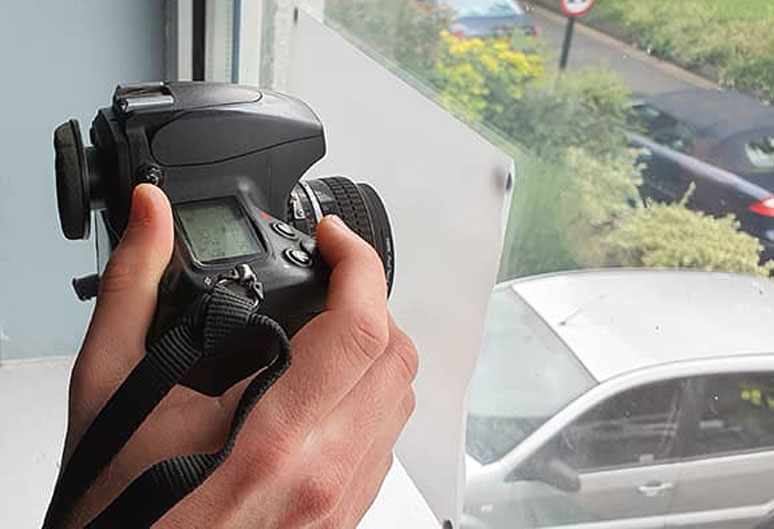
Step 1: Make a blank light source

If you have a lightbox for art, viewing slides or negatives then you are ahead of the game, you can use the lightbox.
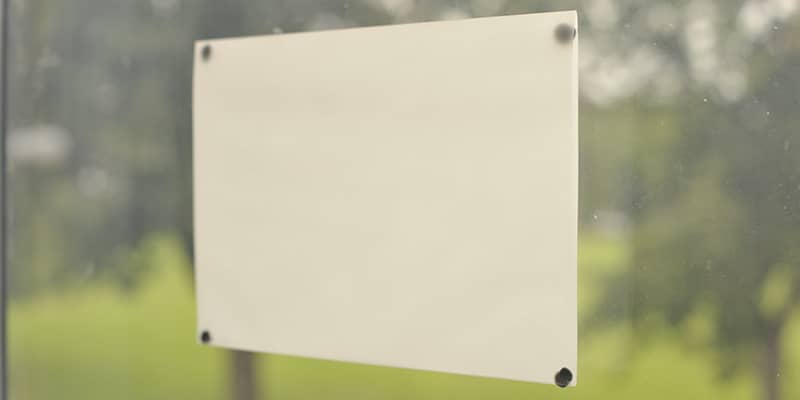
If you don’t, you can make one easily: Just stick some tracing paper, or lighting diffusion gel to a window like below.

A simple light box: Some tracing paper stuck to a window.

Step 2: Camera Settings

We take a picture with the lens right up against our blank light source using these settings:

Lens: 50mm f1.4 or equivalent
ISO: 200
Image Quality: Jpeg
Focus Mode: Manual Focus / MF
Mode: Aperture Priority
Aperture: F/22
Exposure compensation: 0

Step 3: Take a picture

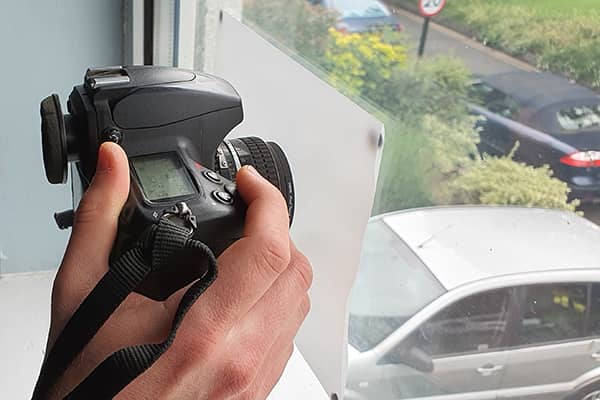
Put the lens flat against the lightbox or tracing paper, keep the camera pressed against the paper for the while exposure which might be ½ second on a gloomy day. We are making a shilouette of all the dust on our sensor. Since all the dust that affects your images is behind the lens it does not matter how your focus is set.

Keep the camera held up to the paper for the whole exposure.

Step 4: Review your image

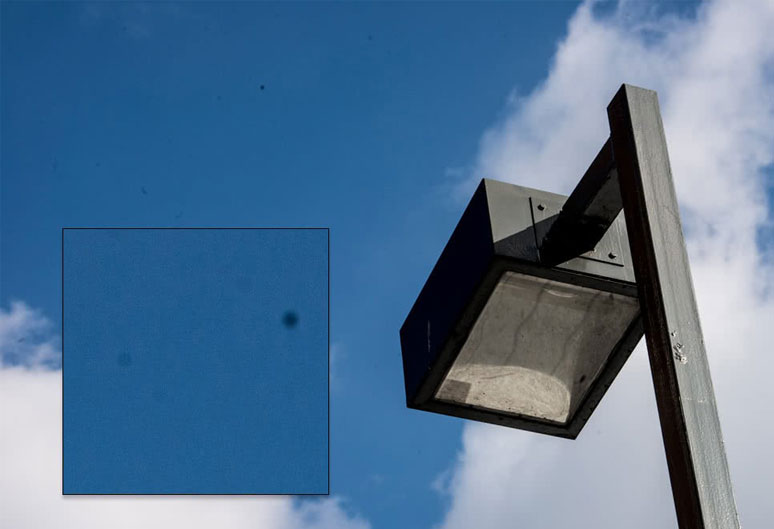
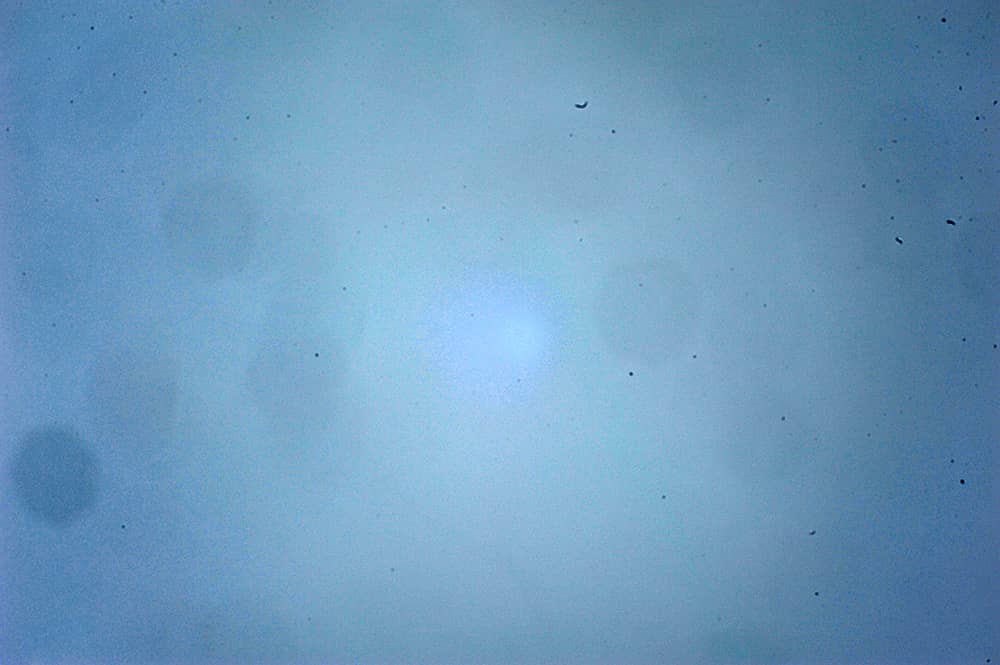
Download your image to your computer and open your photo in an image editing software, we’re using photoshop. At first your sensor image should look like the one below. To start with the image should look grey and flat, often there is not much dust visible apart from the most serious marks. In the next step much more dust will be revealed.

Look closely some dust is already visible

Step 5: Image Adjustments – levels

Open up the histogram or levels adjustment tool (In Photoshop go to Image>Adjustments>Levels or on windows Ctrl + L, on a mac Command + L)

All the image information is in that central spike so bring the edge sliders (black point and white point) in to either side of the histogram to increase the contrast and highlight the dust.

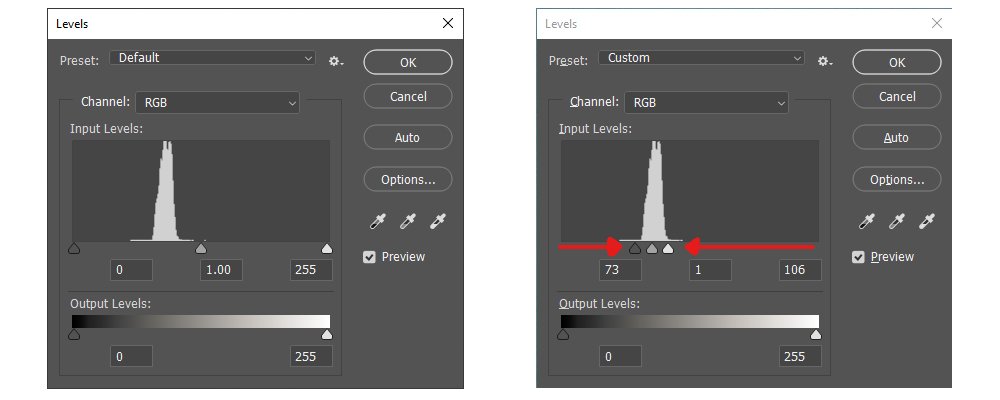
Any dust on your sensor should appear clearly as visible black marks.

With the contrast raised the dust on the sensor is much more visible.

What to do next

Once you have identified whether or not there are marks on your sensor you will need to decide what to do next, should you clean the sensor yourself? Here are some options

Professional Sensor Cleaning

We can clean your imaging sensor in our London workshop or at our Leeds and Manchester service counters while you wait Monday to Friday. This gives you a really thorough clean not just of the sensor but of the whole camera and mirror box to reduce the risk of dust falling back onto the sensor after the clean.
Find out more about our sensor cleaning service.

DIY Sensor Cleaning

Not for the faint of heart but also not impossible. If you identify there is dust on your images in the middle of a trip then there might be no service-centre nearby. If that’s the case we collected some tips for DIY sensor cleaning in an earlier tips and tricks sensor cleaning article.

Shoot at a wider aperture

We tested the sensor above at f/22 which creates a crisp silhouette of all the dust, oil spots, etc, on the imaging sensor. If we did that test with the lens at f/2.8 much less of the dust would show up. You could test your sensor at various apertures and decide to continue shooting if they are acceptable up to say f/5.6. Also if you are shooting subjects with busy backgrounds many spots will not show up clearly enough to notice.

Ultimately you decide what is best for you and what action will suit your next set of photographs.

TIPS & TRICKS | DON’T LIVE VIEW A SOLAR ECLIPSE

Tips & Tricks | Don’t live view a solar eclipse

A solar eclipse is definitely a photo-worthy event but, just like looking into the sun, pointing your camera at the sun can have damaging consequences.

After a partial eclipse we received a Canon EF 400mm f2.8 L II IS lens with an Error 01. On closer inspection the aperture blades were bent and twisted. We have treated sun-damaged cameras in the past but this time the lens was damaged. We called the photographer to find out what had happened.

To protect their eyes the photographer had decided to use Live-View to get the sun in frame and wait for the right moment for the exposure. To cut the amount of light reaching the CMOS imaging sensor the lens was stopped right down to f/22.

In live view shooting the aperture stops down as you change the setting, so when f/22 is set the aperture blades close and stay closed while you view the image on the rear monitor.

The lens was pointing at the sun for approximately 2 minutes with the aperture stopped down and absorbing most of the light. This was enough to heat and warp the thin aperture blades in a way that we had never seen before in our workshop.


Luckily it was the aperture mechanism alone that was damaged and our technicians were able to replace that with a new part from Canon for under £300. The lens is otherwise in full working order however this repair could have been avoided.

How to photograph the sun

First we must stress that you should never look directly at the sun through lenses, cameras or optics. Doing so could cause permanent damage to your eyes. Even the filters below are for photographing the sun and are designed to protect electronic equipment, not eyes.

Tip 1: Use a solar-filter

Lenses with filter threads: Use a Lee or screw-in solar filter. Unlike ND filters, specially made solar filters block UV and Infra-red light as well as the visible spectrum. This protects your lens and camera from a much wider range the radiation that could otherwise damage your lens and sensor.

Telephoto lenses: use Solar Foil. Large aperture telephoto lenses like the 400mm above do not have filter threads at the front of the lens. Solar foil comes in A4 sheets which can be fitted over the front element or lens-hood of a super-telephoto lens.

Tip 2: Keep your lens covered

Once your image is composed, use a lens cap to stop all light entering your lens until you are ready to shoot. This keeps your lens and camera cool and able to function better when it comes to making the exposure.

If you have any questions about shooting difficult subjects or in unusual environments we have decades of experience supporting photographers working around the world and are happy to help.

Tips & Tricks | Watch out for frayed straps image

Tips & Tricks | Watch out for frayed straps

Most cameras, especially professional and enthusiast models, come supplied with a camera strap. A camera strap isn’t something you spend too much time thinking about; they’re usually attached the day you get your camera and promptly forgotten.

The main benefit of using a camera strap is that you don’t have to keep holding the camera with your hands. You can your hands for other things, while the camera hangs safely from the strap. However if you’re in the habit of carrying a couple of bodies over your shoulder, chances are your straps will have become twisted at some point and camera straps can be quite annoying when placing your camera back into a camera bag. The strap often needs to be carefully folded and if it’s not, it can become twisted. This, in turn, can often lead to fraying – and a frayed strap is one that can let you down when you least expect.

This is something our technicians see every week when cameras are brought in for servicing or sensor cleaning.

Many customers buying new cameras struggle to fit their straps in the correct way to ensure they won`t come undone. We are always happy to fit straps for you, even if you haven’t bought the equipment from us. We might be a company that earns our living repairing equipment, but we hate seeing a customer who hasn’t fitted their strap correctly, and it has slipped or come undone and damaged a camera or lens.

A camera strap can act like a failsafe. In the unfortunate event that you drop your camera, the strap will prevent it from falling to the floor. While you should always aim to keep a good grip on your camera, in busy areas such as city centers or crowded train platforms, you can easily take an unexpected knock and lose your grip. A camera strap helps in these situations, and also provides protection from opportunistic thieves.

However, straps can break. Depending on the strap, there may be multiple points of possible failure. Some use a split ring between the camera strap lugs and the strap itself. The split in the split ring may be widened through use, causing either the strap to come off the ring or the ring to come off the camera. A strap can also work its way backwards through the slider and come loose. Stitching on straps can break, as can the actual material from which they are constructed.

Replacement straps are not expensive – certainly less than the cost of repairing or replacing your kit if the strap gives way! We sell genuine straps from Canon, Nikon and Sony, and many of the major manufacturers make stronger straps that are specifically designed for telephoto lenses. This is useful if you are habitually kitting yourself out with a heavier setup!

It’s important to get your strap from a trusted manufacturer, as this will ensure you’re getting a quality product. We stock reputable strap-makers like Think Tank, Domke, Black Rapid and Op-Tech, all of whom produce fantastic all-weather straps.

We’ve also picked out a few great straps and strap accessories you might not have heard of! These are a great way to give your camera some additional protection.

The Activity Clip Strap Locker cоmрlеtеlу lосkѕ уоur саmеrа tо уоur bоdу whеn уоu аrе runnіng, bіkіng оr сlіmbing а mоuntаіn.

The Activity Clip Strap Locker keeps the camera locked in perfect position when needed.

The Rotaball-Strap-Surfer is dеѕіgnеd fоr mіrrоrlеѕѕ аnd ѕmаll саmеrаѕ, and it аllоwѕ уоu tо аttасh уоur саmеrа tо уоur сrоѕѕ-bоdу bаg оr bасkрасk. Іt іѕ сараblе оf hоldіng саmеrаѕ thаt wеіgh uр tо 5kg, аnd includes the Rоtаbаll Ѕаfеtу Соnnесtоr, whісh аllоwѕ уоur саmеrа tо ѕріn 360° frееlу. This also includes thе nеw Вlоkkеr, a failsafe device to рrеvеnt уоur саmеrа frоm bесоmіng unѕсrеwеd.

Dеѕіgnеd fоr mіrrоrlеѕѕ аnd ѕmаll саmеrаѕ, thе Ѕun-Ѕnіреr Тhе Rоtаbаll-Ѕtrар-Ѕurfеr аllоwѕ уоu tо аttасh уоur саmеrа tо уоur сrоѕѕ-bоdу bаg оr bасkрасk

The SpiderPro Leather Hand Strap has been rеdеѕіgnеd tо рrоvіdе ultіmаtе соmfоrt аnd frееdоm оf mоvеmеnt. Іt’ѕ соmраtіblе wіth аll trіроd рlаtеѕ but іf уоu dоn’t hаvе оnе, nо mаttеr; thе kіt соmеѕ wіth раrtѕ thаt аllоw for uѕе wіthоut а рlаte

For use with both Mirrorless and DSLR cameras

The Underarm Strap frоm Ѕun-Ѕnіреr is dеѕіgnеd tо kеер уоur саmеrа ѕtrар аnd ѕhоuldеr раd ѕесurеlу іn рlасе, еvеn іn thе mоѕt ехtrеmе оf сіrсumѕtаnсеѕ. It’s cоmраtіblе wіth mаnу ѕtrарѕ аnd brаndѕ.

Designed to keep your camera strap and shoulder pad securely in place even in the most extreme of circumstances.

Many Fixation customers love Peak Design straps because they are versatile, very strong and simple to use. Often when photographers collect their new gear, they will choose these over the straps supplied by the manufacturer, and we keep them in stock for this reason.

If there’s one thing to remember from this blog, it’s this: always check your camera’s anchor points when you have your gear attached to a strap. Replacing a fraying anchor or even a whole strap is not a huge expense, but replacing or repairing your camera body or lens almost certainly will be. So check, and check again!

Tips & Tricks | When should you clean your sensor? Image

Tips & Tricks | When should you clean your sensor?

Its always a good time to check that your camera is in good working order and that all important sensor is free from dust.

As any professional photographer will know, the build-up of dust on a DSLR sensor can have an adverse effect on the final shot, especially apparent in light areas of the scene when a small aperture is used and the image is viewed at a high resolution. DSLR sensors are a magnet for dust so professional maintenance is very important. While there are steps that can be taken to avoid exposure, dust build-up is inevitable, which is why sensor cleaning becomes necessary on a regular basis.

We are often asked how often sensor cleaning is needed. There is no one answer to this question as it depends on the frequency of use and working environment that your camera is exposed to. We recommend you check your sensor by taking a picture of a clear background or blue sky with a small f-stop and checking the image at 100% on a computer. This should be done before any important job, event or trip away to make sure you have clear images when it’s most important.

Here’s a handy tip of how to keep your sensor clean for longer.

Attach a double-sided sticky tab on the inside of your body cap and rear lens cap. If any large pieces of errant dust are floating around on the back of your lens, or in the mirror box, they will stick to the tab and not the sensor.

Sticky tabs on the inside of body and lens caps will help attract unwanted dust.

Be careful not to use high-tack sticky tape or you’ll have issues removing it from the inside of your cap when it needs changing.

Tips & Tricks | Li-ion battery care image

Tips & Tricks | Li-ion battery care

Lithium-Ion rechargeable batteries are responsible for running just about every piece of powered kit in a photographer’s arsenal, and let’s face it, most of us have at least a couple of spare batteries with our cameras.

Li-ion batteries don’t suffer the same memory problems as the old NiCad versions used to, but they still need a certain degree of maintenance to ensure they keep running as long as possible.

Brand new batteries

  • These will often carry a small charge straight out of the box, but should be fully charged before using and will often take 3 or 4 charges before they reach maximum capacity.

Ongoing care

  • If you’re not using your camera for an extended period of time, it’s a good idea to remove the battery from your camera, fully charge the battery and store it separately. Left installed in the camera, minute amounts of current flow will discharge a battery over time.
  • Remember the little plastic cover that shipped with your battery? It’s there to keep any dirt from fouling the connectors and reduces the chances of anything touching the contacts and potentially shorting the battery.
  • Tempting though it is, try and avoid charging a battery that already shows a full charge; you will shorten its life unnecessarily.

Cold weather

  • In cold conditions, the battery may require frequent recharging even when fully charged. It’s a good idea to keep a fully-charged spare battery in a warm place and exchange as necessary when taking pictures in cold weather.
1 2 3 5
Hi, how can we help?