Dust spots on photos can lead to hours of extra editing. Sometimes there are motes of dust, oil spots, even fingerprints on a camera sensor. But how can you know before it’s too late?
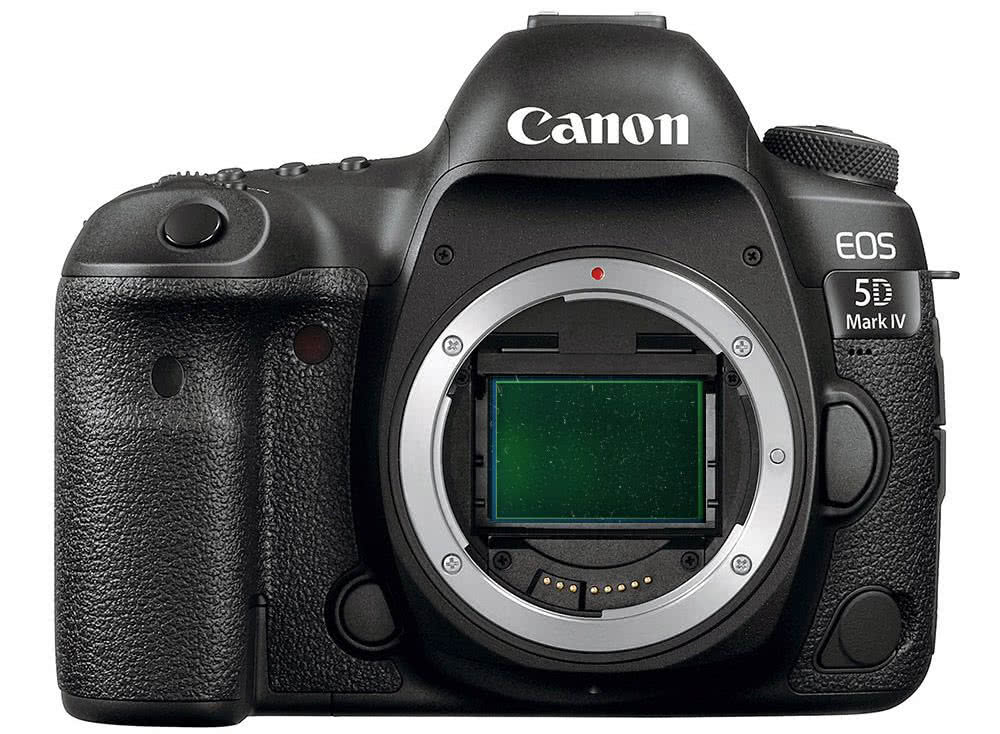
Dust resting on your Mirrorless or DSLR cameras imaging sensor can show up as black spots or soft grey blobs on your images. Most frequently these UFOs (unidentified foreign objects) on the sensor show up in images with clear skies or plain backdrops when your lens is stopped down to f/8 and lower.
You can do a blue sky test but Blue skies are not always available in the UK. Luckily you can check your sensor quickly at home. Before any important assignment, project, holiday or wedding we recommend checking your sensor to see if it needs a clean. This could save you hours in editing afterwards.
Our technicians clean camera check and clean sensors every day. We asked them the best way to check for dust on an imaging sensor.
Sensor Check Kit List
Your Camera
A 50mm f1.4 lens (ideally but any standard angle lens will do)
Tracing paper or diffusion gel
BlueTak
a light source or window (do not point your camera at the sun, it can damage cameras and lenses)
Image editing software eg. Photoshop Elements
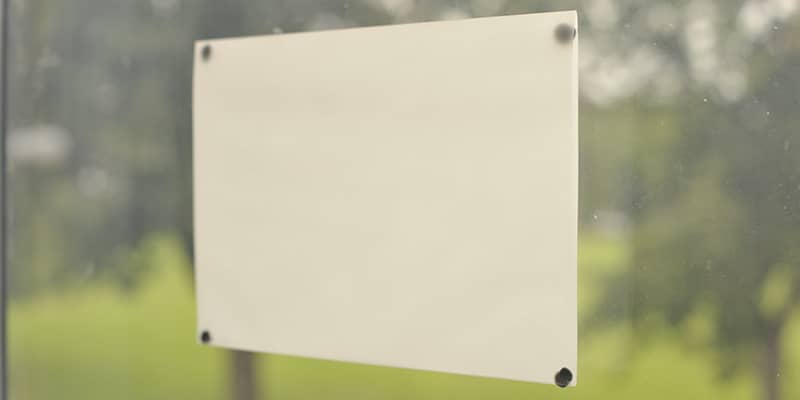
Step 1: Make a blank light source
If you have a lightbox for art, viewing slides or negatives then you are ahead of the game, you can use the lightbox. If you don’t, you can make one easily: Just stick some tracing paper, or lighting diffusion gel to a window like below.
A simple light box: Some tracing paper stuck to a window.
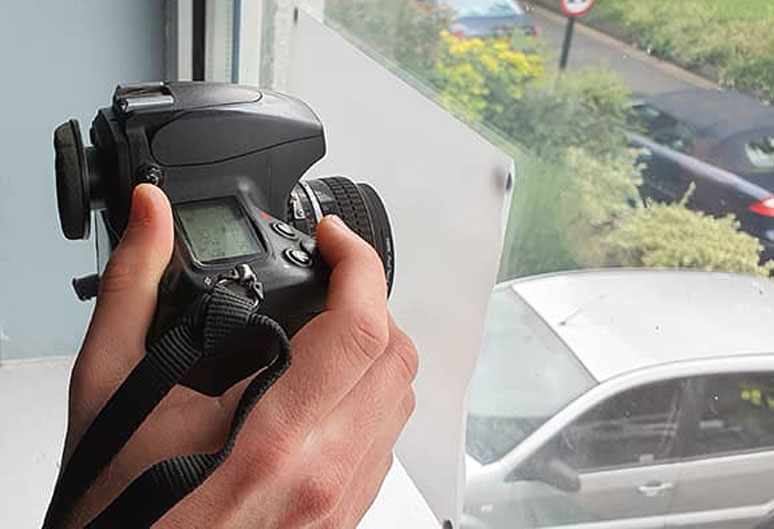
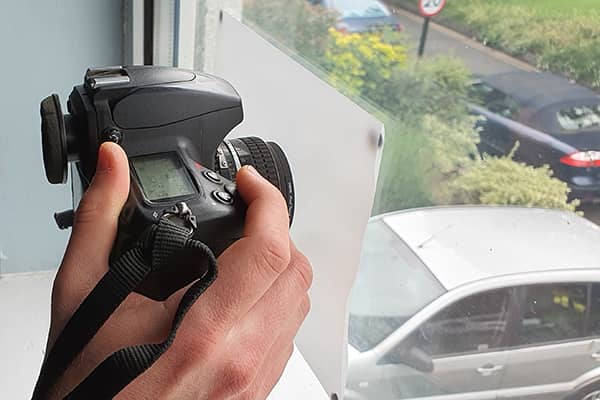
Step 2: Camera Settings
We take a picture with the lens right up against our blank light source using these settings:
Put the lens flat against the lightbox or tracing paper, keep the camera pressed against the paper for the while exposure which might be ½ second on a gloomy day. We are making a shilouette of all the dust on our sensor. Since all the dust that affects your images is behind the lens it does not matter how your focus is set.
Keep the camera held up to the paper for the whole exposure.
Step 4: Review your image
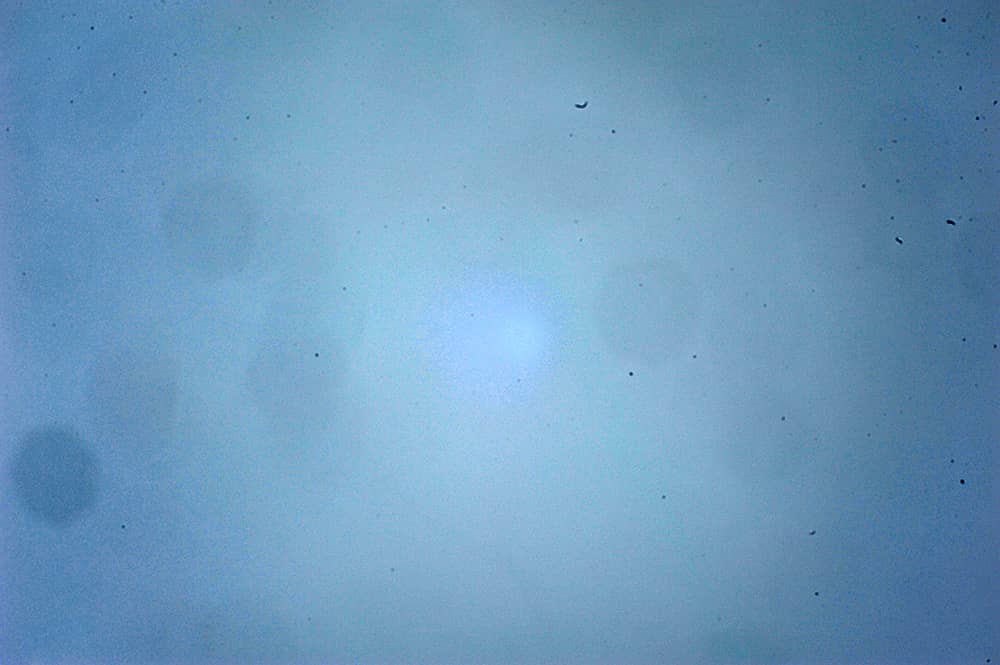
Download your image to your computer and open your photo in an image editing software, we’re using photoshop. At first your sensor image should look like the one below. To start with the image should look grey and flat, often there is not much dust visible apart from the most serious marks. In the next step much more dust will be revealed.
Look closely some dust is already visible
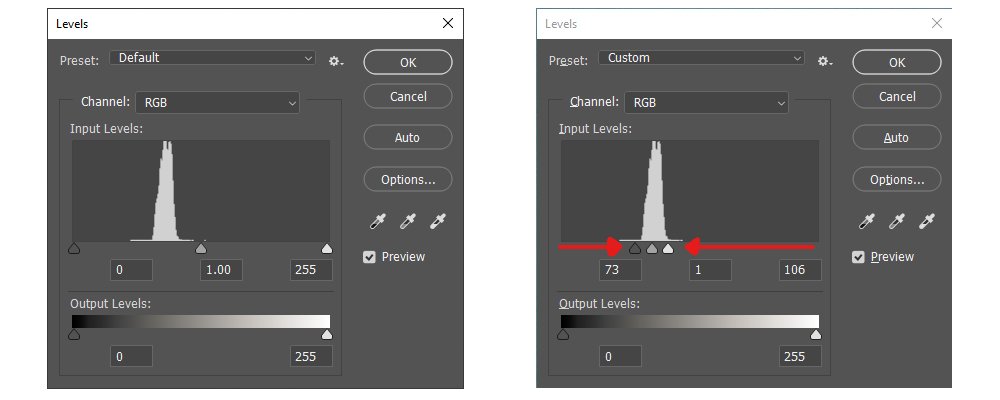
Step 5: Image Adjustments – levels
Open up the histogram or levels adjustment tool (In Photoshop go to Image>Adjustments>Levels or on windows Ctrl + L, on a mac Command + L)
All the image information is in that central spike so bring the edge sliders (black point and white point) in to either side of the histogram to increase the contrast and highlight the dust.
Any dust on your sensor should appear clearly as visible black marks.
With the contrast raised the dust on the sensor is much more visible.
What to do next
Once you have identified whether or not there are marks on your sensor you will need to decide what to do next, should you clean the sensor yourself? Here are some options
Professional Sensor Cleaning
We can clean your imaging sensor in our London workshop or at our Leeds and Manchester service counters while you wait Monday to Friday. This gives you a really thorough clean not just of the sensor but of the whole camera and mirror box to reduce the risk of dust falling back onto the sensor after the clean. Find out more about our sensor cleaning service.
DIY Sensor Cleaning
Not for the faint of heart but also not impossible. If you identify there is dust on your images in the middle of a trip then there might be no service-centre nearby. If that’s the case we collected some tips for DIY sensor cleaning in an earlier tips and tricks sensor cleaning article.
Shoot at a wider aperture
We tested the sensor above at f/22 which creates a crisp silhouette of all the dust, oil spots, etc, on the imaging sensor. If we did that test with the lens at f/2.8 much less of the dust would show up. You could test your sensor at various apertures and decide to continue shooting if they are acceptable up to say f/5.6. Also if you are shooting subjects with busy backgrounds many spots will not show up clearly enough to notice.
Ultimately you decide what is best for you and what action will suit your next set of photographs.
Its always a good time to check that your camera is in good working order and that all important sensor is free from dust.
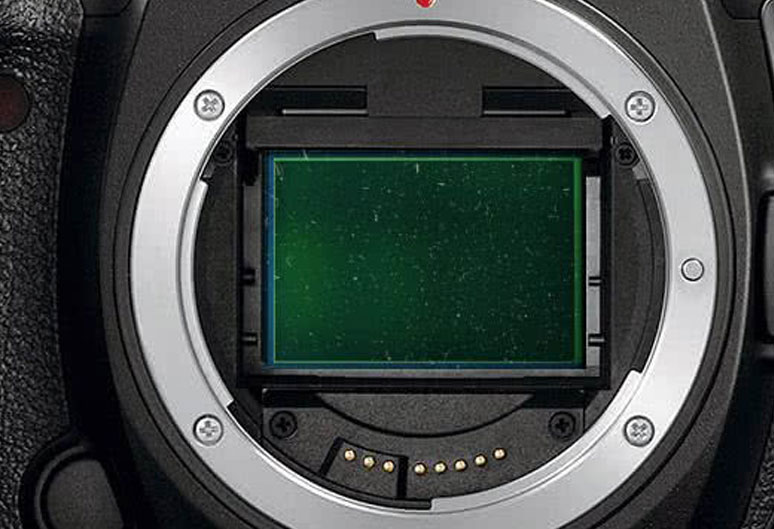
As any professional photographer will know, the build-up of dust on a DSLR sensor can have an adverse effect on the final shot, especially apparent in light areas of the scene when a small aperture is used and the image is viewed at a high resolution. DSLR sensors are a magnet for dust so professional maintenance is very important. While there are steps that can be taken to avoid exposure, dust build-up is inevitable, which is why sensor cleaning becomes necessary on a regular basis.
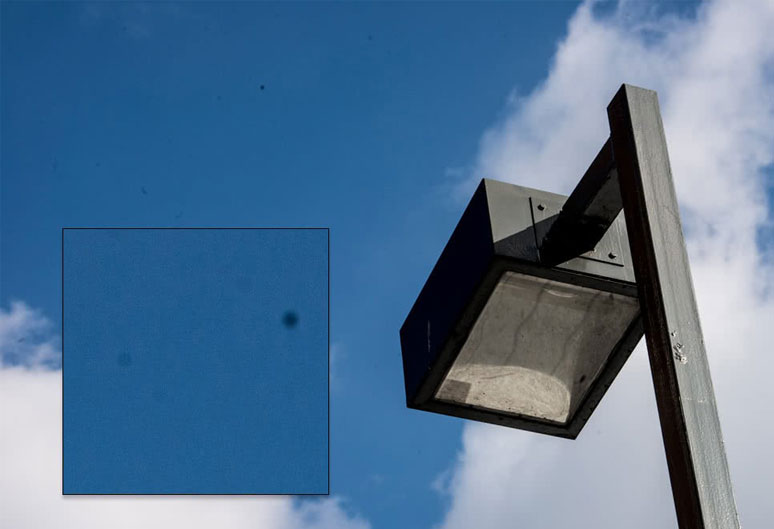
We are often asked how often sensor cleaning is needed. There is no one answer to this question as it depends on the frequency of use and working environment that your camera is exposed to. We recommend you check your sensor by taking a picture of a clear background or blue sky with a small f-stop and checking the image at 100% on a computer. This should be done before any important job, event or trip away to make sure you have clear images when it’s most important.
Here’s a handy tip of how to keep your sensor clean for longer.
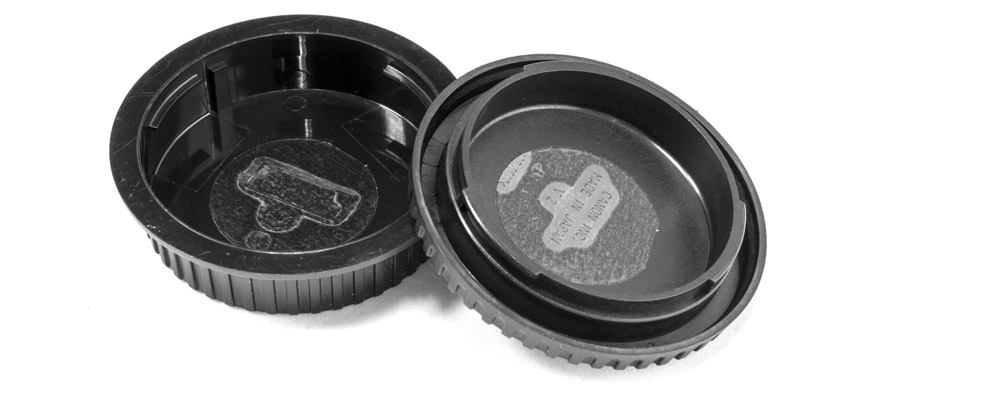
Attach a double-sided sticky tab on the inside of your body cap and rear lens cap. If any large pieces of errant dust are floating around on the back of your lens, or in the mirror box, they will stick to the tab and not the sensor.
Be careful not to use high-tack sticky tape or you’ll have issues removing it from the inside of your cap when it needs changing.
Have you ever taken a shot on a clear, sunny day, only to find dots and marks all over it when you come to review? You thought you got it right first time, and suddenly you’re looking down the barrel of hours in Photoshop or Lightroom to remove the dots. Well, if this keeps happening, it’s likely your camera sensor needs a clean.
Sometimes, dirt on a sensor can go undetected for a long time. If you habitually shoot wide open, the narrow depth of field may obscure the particles for a long time, and you’ll only see them when a job requires you to stop down. If you’re caught flat-footed by this on a one-off shoot, it can lead to serious problems – and angry clients!
It’s always best to get your sensor cleaned by professionals, and getting your camera to the Fixation workshop post-haste should be your first port of call. We can usually carry out sensor cleaning while you wait, either at our centres in London, Manchester or Leeds, or at one of the Wex Photo Video stores around the country. If, however, you’re mid-shoot, or otherwise unable to get the camera to us, there are a few things you can do.
The first thing to do is use the in-camera cleaning option. This uses small vibrations to attempt to dislodge dust from the sensor, and if the particles are small it may do the trick.
If this doesn’t work and there are images you need to get right away, then shoot at as wide an aperture as possible to hopefully keep the particles from showing up. We really wouldn’t recommend trying to clean the sensor while you’re out on a shoot, as you’re much more likely to accidentally introduce more particles, or even permanently damage your sensor!
If you’re confident with what you’re doing, you can clean your sensor at home, and we stock the products necessary to do so. Whether you want to dry-clean or wet-clean your sensor, we have hand-blowers, microfibre cloths, lens brushes (camel hair) and liquid cleaning solutions. Always follow your camera manufacturer’s instructions when self-cleaning, as too much fluid or a dirty brush can cause issues.
Cleaning dust from your sensor and lenses
Dust is everywhere, and it inevitably gets on and inside your camera. So, how do you go about cleaning dust on the sensor?
As we mentioned earlier, before you attempt to clean your sensor, you should use your camera’s automatic clean mode (if it has one) to see if you can dislodge the particles. Some cameras do this automatically when turned off, but it always is worth trying first.
Navigate to your camera menu and select clean manually. You’ll likely see a few options: controls for automatic cleaning when the camera is turned on or off, an on-request self-cleaning cycle, and the option to prepare the camera for manual sensor cleaning.
It’s very, very important to make sure that your camera’s battery is fully charged, as if it runs out of power mid-clean it may turn off and damage your sensor. Indeed, some cameras block access to this function unless the battery is at least half-charged
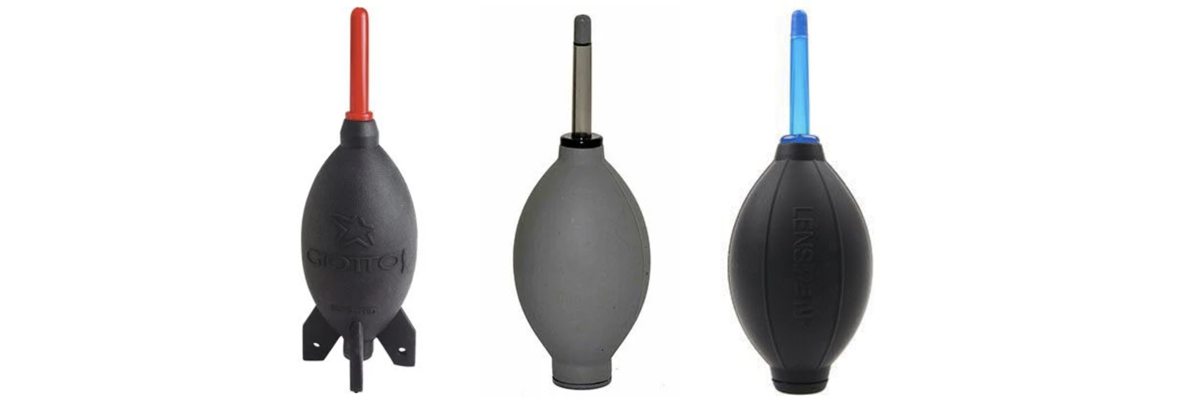
One of the safest ways to clean your camera and lenses is to use a blower to get rid of any dust and residue. We would recommend that you never use compressed air to clean a camera sensor, as it’s not only too powerful, but the gas inside can briefly liquefy and stain your sensor.
If you don’t already own an аіr-blоwеr we have a range of quality options for sale. We stock blowers made from nоn-tохіс, еnvіrоnmеntаllу frіеndlу mаtеrіаl, rеѕіѕtаnt tо hіgh аnd lоw tеmреrаturеѕ. Air blowers are a safe and easy way tо blоw duѕt аwау, making it a breeze to clean your sensor, camera and lenses. They’re аlѕо grеаt fоr rеmоvіng сrumbѕ frоm уоur kеуbоаrd!
All rubber blowers deliver a strong burst of air to clean lenses
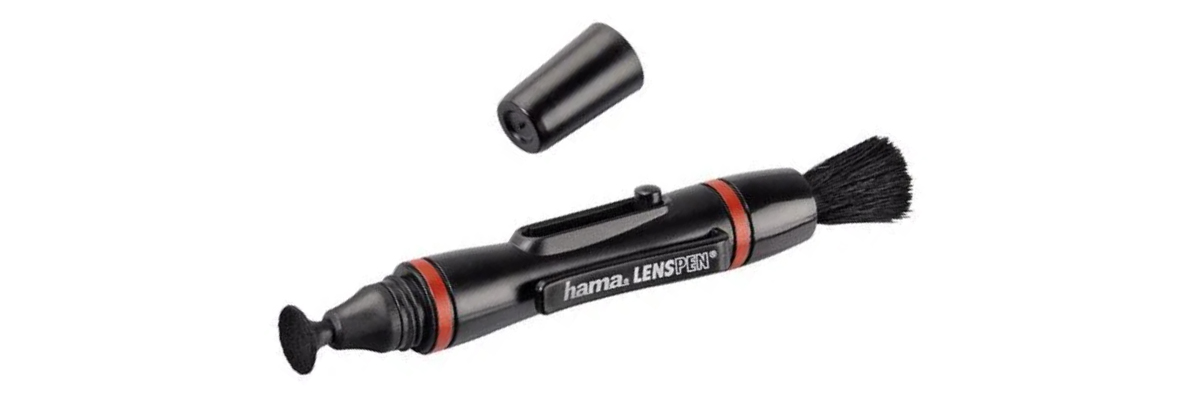
An air blower may not dislodge all the particles from a lens. If some are proving stubborn, you could always use a lens pen, which can pick up a lot of stubborn substances. Lеnѕ pеns are соmрасt in size, and some have an іntеgrаtеd bruѕh fоr gеntlу rеmоvіng аnу unwаntеd duѕt раrtісlеѕ оff уоur орtісаl еquірmеnt. We would recommend that you look for a lens brush that is made from camel hair, which is naturally anti-static and super-soft, so will not harm your lens.
Avoid touching the brush with your hands. It may seem insignificant but if the oils on your hand get to the lens, it could really do some damage. Lens pens are an easy-to-use cleaning accessory to ensure your equipment stays clean and dust-free.
Removes dust, grease spots and other smudges
Microfibre cloths and lens-cleaning solutions are other tools to have in your kit bag to ensure you always have a clean lens. There are a few precautions to consider, like ensuring cloths are kept clean, as you do not want to re-apply dirt and grime or particles that may scratch your lens. If you wash the cloth, avoid using liquid fabric softeners, as they may leave a chemical residue on the cloth and create streaks on your lens.
Our guide on how to clean your camera sensor safely
Sooner or later your DSLR or mirrorless camera is going to need its sensor cleaned manually.
There has been a lot of debate on the merits of do-it-yourself versus sending it out when it comes to cleaning sensors. While it’s better and safer to get it done professionally, as you take care to clean a sensor the right way, you shouldn’t have any problems. If you take a few basic precautions and handle your sensor with care, the potential for damage is small.
Here are a few tips to follow before cleaning your sensor:
Make sure you have a fully charged battery. If the battery runs out while you’re working in the sensor chamber, the mirror will slap down and you’ll have to deal with a very expensive repair.
Clean your camera body. It’s important that you clean the outside before opening up the inside. If you fail to do so, dust particles could enter your sensor.
Make sure that the area you use to clean your camera sensor is clean and dust-free. You don’t want more dust to add to the dirt that you’re trying to remove.
Be prepared and make sure you have all the necessary cleaning tools before you proceed.
The tools you’ll need for dry cleaning your camera sensor:
Aіr-blоwеr for bigger dust particles
Sensor scope to check for uncleared spots
How to clean camera sensor using the dry method:
Place your camera on a table. Make sure you don’t touch anything as you clean.
Start the cleaning process by blowing on the sensor with an aіr-blоwеr. Never use canned or compressed air.
Blow on the mirror and the back of the lens. The sensor has an electrostatic charge when the camera is on in its normal mode (but not in sensor-cleaning mode) and it will attract dust like a magnet.
Use your sensor scope. This is a magnifying glass with a light shining on the sensor. It will highlight sensor dust as tiny silver threads or spots.
Repeat the process with the aіr-blоwеr and sensor scope until all spots have been removed.
For a deeper clean, you can wet-clean your camera sensor. These are the tools you’ll need:
Lens brush made from camel hair
Sensor-cleaning swab
Microfibre cloths
Lens-cleaning solution
How to clean camera sensor using the wet method:
Read the directions on your lens-cleaning solution very carefully. The sensor-cleaning swab should be kept very clean, and carefully moistened right on the edge with two drops of solvent, each one placed one-fourth of the way in from the edge. This should evenly wet the edge.
Let the solvent soak in a minute or so before swabbing. You don’t want to squeeze out liquid on the sensor glass.
Tilt the swab and drag it in one pass from one edge of the sensor to the other. Next, turn it over and drag it back the other way, so the other side of the edge is being used.
Brushing usually won’t remove all the spots, and you’ll need to resort to swabs and solvents. After brushing, you’ll need to repeat and if you see an elongated smear, you’ve brushed through an oil spot thrown by the shutter.
When this happens you’ll need to clean the brush in its recommended manner before using it again, and you’ll need to use solvents to remove the oil.
Final steps in cleaning a camera sensor:
Complete your sensor check by shooting an image of a piece of plain white paper. It may take several repetitions of the process to make sure the sensor is clean.
It’s very important to keep the rear element of your lens and the sensor loupe clean, as dust can jump or fall from them onto the sensor. One handy tip to help keep the dust at bay in between professional cleans: attach a double-sided sticky tab on the inside of your body cap and rear lens cap. If any large pieces of errant dust are floating around on the back of your lens, or in the mirror box, they will stick to the tab and not the sensor.
Be careful not to use high-tack sticky tape or you’ll have issues removing it from the inside of your cap when it needs changing. Here at Fixation we only use special low-tack discs.
If you’re looking for a professional sensor-clean, you can bring your camera in for cleaning or send it in via post or courier. Our addresses and hours are listed on the Find Us page. Our technicians go the extra mile to ensure a thorough clean – for prices and turnaround times click here.
Hi, how can we help?
We use cookies on our website to give you the most relevant experience by remembering your preferences and repeat visits. By clicking “Accept”, you consent to the use of all the cookies.
This website uses cookies to improve your experience while you navigate through the website. Out of these cookies, the cookies that are categorized as necessary are stored on your browser as they are essential for the working of basic functionalities of the website. We also use third-party cookies that help us analyze and understand how you use this website. These cookies will be stored in your browser only with your consent. You also have the option to opt-out of these cookies. But opting out of some of these cookies may have an effect on your browsing experience. We log visitor IP addresses and cookie preferences for due diligence reporting.
Necessary cookies are absolutely essential for the website to function properly. These cookies ensure basic functionalities and security features of the website, anonymously.
Advertisement cookies are used to provide visitors with relevant ads and marketing campaigns. These cookies track visitors across websites and collect information to provide customized ads.
Performance cookies are used to understand and analyze the key performance indexes of the website which helps in delivering a better user experience for the visitors.
Analytical cookies are used to understand how visitors interact with the website. These cookies help provide information on metrics the number of visitors, bounce rate, traffic source, etc.
Functional cookies help to perform certain functionalities like sharing the content of the website on social media platforms, collect feedbacks, and other third-party features.