VLOGGING GUIDE | FUJIFILM X-T2

Vlogging Guide | Fujifilm

Thinking of starting a YouTube channel, or sharing videos of your exploits on Facebook, Instagram or another social media platform? Then you’ll want to pick up one of the best cameras for vloggers.

When you’re looking for a great camera for vlogging, there are a number of different factors you have to consider. It’s a given that you need the camera to be able to capture high-quality video, in at least Full HD if not 4K, but there are other things too.

A good vlogging camera should have an external microphone socket so that you can produce top-quality sound for your videos (most cameras’ on-board mics simply won’t cut it for anything but the most amateurish productions). It needs a decent LCD screen for monitoring, should have solid battery life, and ideally shouldn’t be too large and bulky, as you’ll be taking it with you to shoot on location.

People buy vlogging gear for all different reasons – maybe you’re planning to start a YouTube channel, maybe you want to offer your clients an additional service, or maybe you just fancy mucking about with some behind-the-scenes videos of your shoots.

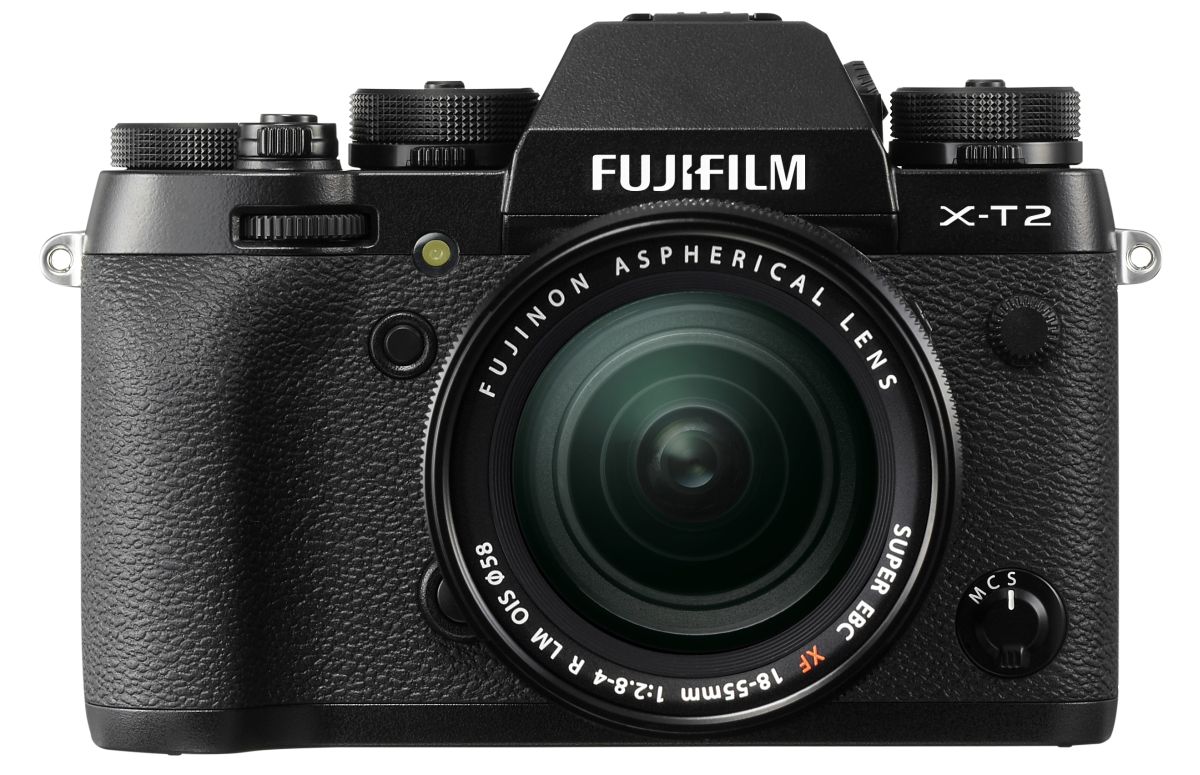
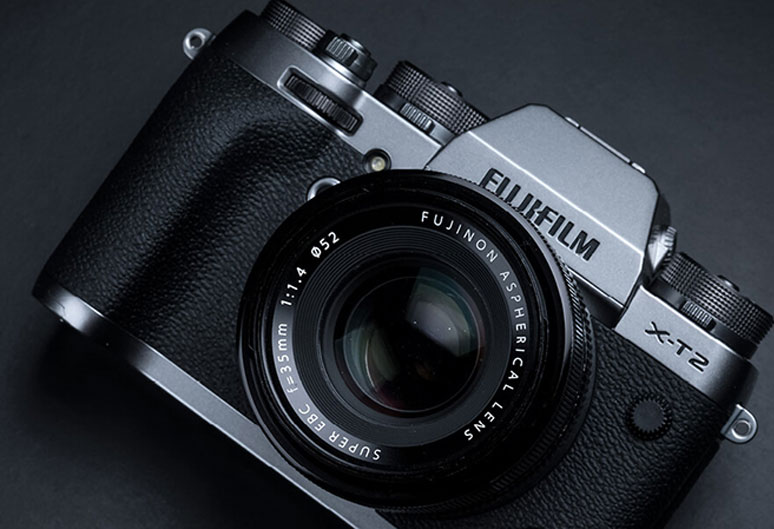
Previously in our vlogging cameras series we looked at a fantastic option – the Nikon D7500. Now we’ve got another recommendation to share with as one of the best choices for vloggers, this time a mirrorless camera. Today’s recommendation is the Fujifilm XT-2 with the VPBC-XT2 battery grip.

Read on as we discuss why in more detail.

Why the Fujifilm X-T2 is perfect for vloggers

Those of you who keep up with your camera news might be thinking this a slightly odd choice, given that Fujifilm has since released the X-T3 and X-T30. However, the X-T2 is still a fantastic camera in its own right, and all the subsequent releases mean it’s only going to get more affordable.

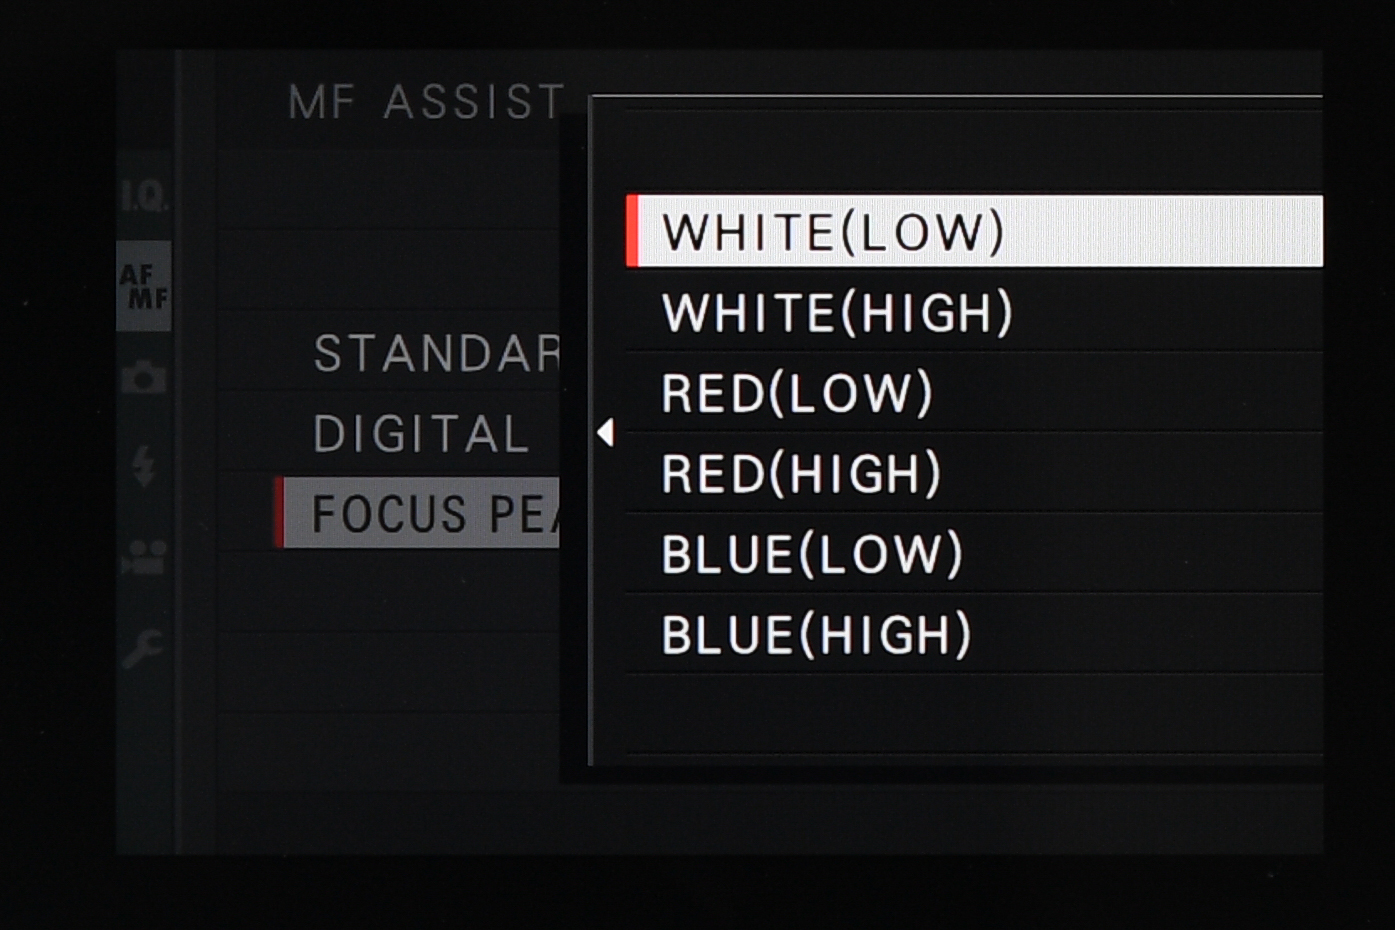
The video quality of the X-T2 is more than enough for vlogging. It was the first Fujifilm X-series camera to show that Fuji was really taking video seriously – that’s why it shoots 4K UHD (3840 x 2160) video at a bit rate of 100Mbps, all of which represents a considerable jump from the X-T1. Its footage looks simply fantastic, rendering beautifully thanks to the 24.3MP X-Trans CMOS sensor, and the 3-inch rear display with 1.04million dots makes monitoring your shots a matter of ease. The X-T2 also has a 3.5mm microphone port, meaning it’s easy to attach a shotgun microphone to bump up your sound quality and really improve your footage.

As mentioned earlier, we’re specifically recommending the X-T2 with the optional VPBC-XT2 battery grip. This accessory transforms the camera from a decent vlogging camera into an exceptional one, and if you’re serious about vlogging with the X-T2 we’d go so far as to say it’s essential.

This is for two reasons: #1 the VPBC-XT2 battery grip contains an external headphone socket for monitoring your audio. And #2, the grip extends the X-T2’s maximum 4K recording time from 10 minutes to 29 minutes. Either of those by themselves would be enough to make the battery grip a worthy purchase – put them together and they make it essential.

There are plenty more features we can list on the X-T2 – it has an HDMI output, audio volume live monitoring and dual card slots compatible with UHS-II – but the other thing perhaps most worth flagging up is that it is stylishly and ergonomically designed to be easy to use (with dial-led controls) and to look good too. Lightweight and rugged, the X-T2 is a camera that’ll keep up with you no matter where your vlogging adventures take you.

An ideal vlogging setup with the Fujifilm X-T2

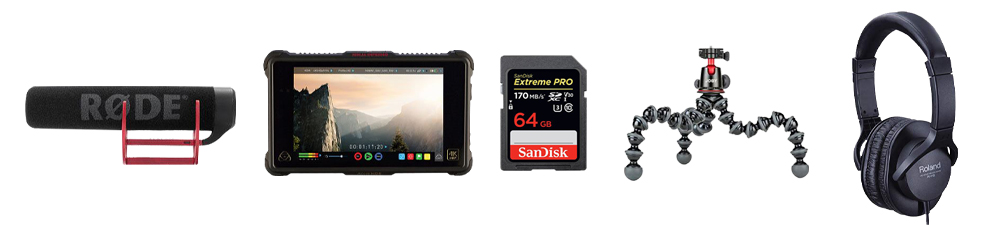
We’ve put together a recommended vlogging setup for getting started with the Fujifilm X-T2. While we encourage experimentation and finding a setup that works for you, here is our selection of accessories you can use to make your shoots run a little more smoothly:

– Get a decent wide lens with a large maximum aperture. This will allow you to gather plenty of light and create shallow depth of field, as well as ensuring that the image you produce is of top quality. Something like the Fujifilm XF 35mm f2 R WR Fujinon Lens is a good choice, providing an equivalent focal length of about 50mm.

– Add the VPBC-XT2 battery grip (pictured above) to make your shoot last longer.

– A good microphone that can take advantage of the X-T2’s 3.5mm mic socket. We recommend the RØDE VideoMic GO, a portable and powerful microphone that’ll easily fit in your kit bag.

– Get multiple UHS-II memory cards. The X-T2 has two powerful card slots – use them! Get a couple of SanDisk Extreme PRO UHS-II cards in your preferred size (we’d recommend going as high as your budget allows).

– A tripod that’s geared for video. Stable but lightweight, with a head that enables smooth movement. The Manfrotto 500 Video System is a good choice.

– A pair of monitoring headphones for keeping an eye (an ear?) on your sound. You can’t go wrong with a pair of Roland RH-5 headphones.

– A video light. This doesn’t have to be expensive, but is useful to have in a pinch. Something light the Rotolight NEO II is ideal.


That’s all for the Fujifilm X-T2! We’ll see you for the next instalment of our vlogging kit series.

Fixation | Official Fujifilm Service Centre

Fixation | Official Fujifilm Service Centre

Fujifilm have today launched the Fujifilm Professional Service (FPS) and we’re proud to announce we will be an official Service & Support Centre, working in conjunction with Fujifilm to offer benefits to FPS members.

FPS-logo-large

With the increasing numbers of professional photographers switching to Fuji mirrorless cameras like the X-Pro2 and X-T2, and also with the launch of the GFX medium format mirrorless system in March 2017, there is an increasing need to offer support to these photographers in a similar vein to services offered by Nikon & Canon.

As Fuji products have evolved and are now widely used by professional photographers, it is a natural development that Fixation should be able to offer service support for Fuji products. We are also proud to be a key supporter of the FPS programme. Fixation General Manager

The scheme is open to working photographers who own either a GFX system or at least 2 professional X system bodies and 3 XF lenses. Membership to FPS will be offered free of charge for the first 2 years.

Paul Stewart, long time Fixation customer and professional press photographer, switched to Fuji over a year ago and hasn’t looked back. ” I’m delighted to hear that Fixation will be the London Support Centre for FPS. It’s something I’ve been asking Fuji for and I’m glad they listened!”

3-fuji-cameras-compressorFujifilm’s GFX, X-Pro2 & X-T1 models have been well received by professional photographers

Mick Edwards, Fixation’s Technical Manager will be heading up the Fuji service department: “We’re very excited to take on Fuji as an authorised service centre, allowing us to support our customers as we’ve always done.”

FPS members will be able to take advantage of while-you-wait sensor cleaning, cosmetic repairs and loan stock if equipment has to be sent away for more extensive repair.

For more information on which models we can service, click here.

For details on how to join the FPS, see Fujifilm’s page here

Close-up: Fuji X-T2 AF system image

Close-up: Fuji X-T2 AF system

Fujifilm’s X-T2 arrived with an overhauled AF system and a strong focus on moving subjects. We take a closer look.

X-T2_BK_18-55mm_front_White

Although Fujifilm’s X-T2 may look similar on the surface to the previous X-T1, there are number of refinements to what’s going on inside.

The autofocus system is one area that’s received considerable attention. Some of the changes made are a direct result of the upgraded X-Processor Pro engine, and those who would like to use the X-T2 for sports and general action-based photography should be particularly interested.

The Basics

Like the X-T1, the X-T2 features an Intelligent Hybrid AF system that offers both phase-detect and contrast-detect autofocus.

When the X-T1 was released it offered 49 AF points in a 7×7-point formation. The v.4.0 firmware added Zone AF or Wide/Tracking AF modes and boosted the array to 77 points when using those modes.

By comparison, the X-T2’s AF system offers 91 points in a 7×13-point formation at default, and this can be expanded to 325 points in a 13×25-point formation.

When set to the default 91-point mode there are 49 phase-detect AF points in the centre of the array. This is a significant improvement from the nine phase-detect AF points that featured in the X-T1.

The XT2 AF arrays compared
The X-T2’s default 91-point AF system* compared with the expanded 325-point AF setting*

When using the expanded 325-point setting, however, 169 central points are phase-detect AF points in the centre of the frame. Both patterns occupy roughly the same proportion of the screen as each other, although the 325-point system is much denser, which makes it better suited for tracking moving subjects.

This central area with the phase-detect points covers 40% of the frame, and with the contrast detect points the total coverage is 85%. You can easily see the extent of both types as the phase-detect AF points are larger than the contrast-detect AF ones.

Fujifilm claims the phase-detect AF system comes into play more readily on the X-T2 than before, while the contrast-detect AF system is said to work down to -3EV.

* These images include the black surround of the LCD screen. As such, they do not accurately show the extent to which they cover the frame.

Focus options

Both the Single (AF-S) and Continuous (AF-C) options can be used with each of the Single Point, Zone and Wide/Tracking AF modes, which gives a total of six combinations to suit different subjects and scenes.

The Single Point is the default option, with one point that can be positioned anywhere on the array. The Zone option allows you to specify a particular area of the focusing system to use, while the Wide/Tracking option is programmed to automatically focus on subjects in the scene with the highest contrast, or alternatively to track moving subjects across the frame when used in the continuous focus setting.

Additionally, the camera can be set to manual focus, with the same focus assist aids as before. These are Digital Split Image, in either colour or monochrome settings, as well as focus peaking, which can have its colour adjusted over white, blue and red highlights and its peaking level set to either high or low options.

Fuji X-T2 AF System
The camera offers comprehensive control over focus peaking

Speed and precision

The new processor is said to have improved overall response times, and the AF system has benefited from this. Whereas Fujifilm claimed AF times as short as 0.08sec with the X-T1, the X-T2 shaves off 0.02sec from this to just 0.06sec. This is possible when the camera is set to its Boost option in its Power Management settings, although activating this comes at the slight expense of battery life; whereas Fujifilm claims a battery life of around 340 frames on the Normal setting when using the LCD screen, this is reduced to approximately 260 in the Boost mode.

Fujifilm also claims that the updated processor and improvements to the focusing algorithm mean that the camera refocuses more quickly than previous models, and also that the contrast-detect AF system benefits from data being read twice as quickly than before.

The camera is also said to focus more easily against low-contrast subjects and those with very fine details than was previously the case. Something else that helps here is the ability to change the size of the AF point over five levels. You simply press the Focus Lever on the back and rotate the rear command dial to alternate between the different sizes. Furthermore, when shooting with the Zone setting, you can use the same controls to change the area of the Zone over three levels.

Physical controls

The body maintains the same Focus Mode Lever from the X-T1, with Single, Continuous and Manual Focus options, and this is found on the front plate. On the back of the camera, however, Fujifilm has added a new Focus Lever (something first seen on the X-Pro 2), just beneath the Q button.

AF controls on the XT-2
The new Focus Lever control (left). As on previous models, the focusing mode is still chosen with the switch on the front plate (right).

The primary purpose of this new control is to allow for the focus point to be shifted more easily than before. It moves up, down, left, right and diagonally, and pressing it into the camera allows you to quickly return the focusing point to the centre of the array.

It also serves another purpose; when manually focusing the lens, you can shift this to the point where you want the camera to magnify into the scene beforehand. Once this happens, you can also use the rear command dial to magnify further into the scene for extra precision.

Continuous Focus

Although the X-T1 did a very good job to track moving subjects, continuous focus has not traditionally been a main selling point for the X-series. Nevertheless, the X-T2 follows the similarly specified X-Pro2 in attempting to change that.

Fujifilm XT-2 AF tracking scenarios.
You can select one of five scenarios to help the continuous focus system (left) or program your own with settings to suit your subject (right).

Fujifilm has complemented the changes to the AF system with improvements to the continuous focus algorithm. The user now has the option to customise the system to suit five different scenarios. These are:

  1. Multi Purpose
  2. Ignore Obstacles & Continue To Track Subject
  3. For Accelerating/Decelerating Subject
  4. For Suddenly Appearing Subject
  5. For Erratically Moving & Accelerating/Decelerating Subject

Each option is designed with a different combination of Tracking Sensitivity, Speed Tracking Sensitivity and Zone Area Switching, although if you feel that none suit the subject, you can also design your own AF-C algorithm and store it as the sixth option.

Look familiar? This echoes the AF Configuration tools that have been included on Canon’s higher-end EOS models for some time.

Canon EOS 1D X AF System
The similar option inside the Canon EOS-1D X Mark II

Other features

Eye Detection AF wasn’t initially included in the X-T1, although this came along in the v.4.30 firmware update announced in February. Not surprisingly this feature has been included here as standard, although it is said to have been improved to provide more accurate results. You can choose to focus on either the left or right eyes, or leave it to an auto setting. Alternatively, you can use face detection without enabling Eye Detection AF.

Fuji X-T2 AF System
You can choose whether to spot meter at the selected focus point

The Interlock Spot AE & Focus Area option allows you to specify whether you want the camera to meter at the selected focus point when using spot metering.

You can also select how to assess depth of field using the Depth-of-Field Scale option. The Film Format Basis option is suggested for those who will be printing their images to moderate sizes. The Pixel Basis, meanwhile, is intended for those who may be examining their images at 100% on a computer display. As the permissible circle of confusion becomes smaller when images are analysed in this way, this option is designed to provide the finest control for utmost accuracy.

Finally, an AF Assist illuminator is once again located on the front plate, and this kicks into action whenever the camera lacks the illumination required for fast autofocus. It is, however, possible to disable this, which is useful when you need to be discreet.

Hi, how can we help?