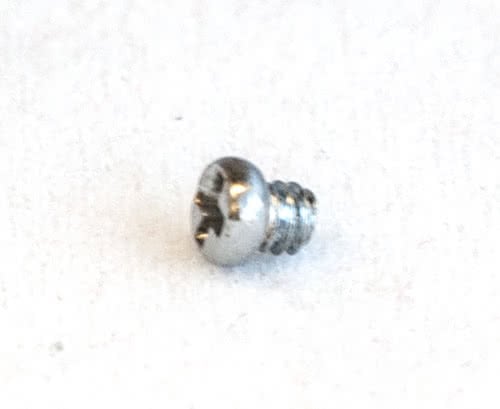
 Here’s a useful tip for Nikon users: You see this screw? This 2mm screw that can be found tucked on the side of the bayonet on all Nikkor lenses? Well, if it falls off it can cause a lot of expensive damage!
It’s designed to stop the lens from over-turning when it’s being attached to the camera, and occasionally these screws have a tendency to work loose and fall out.
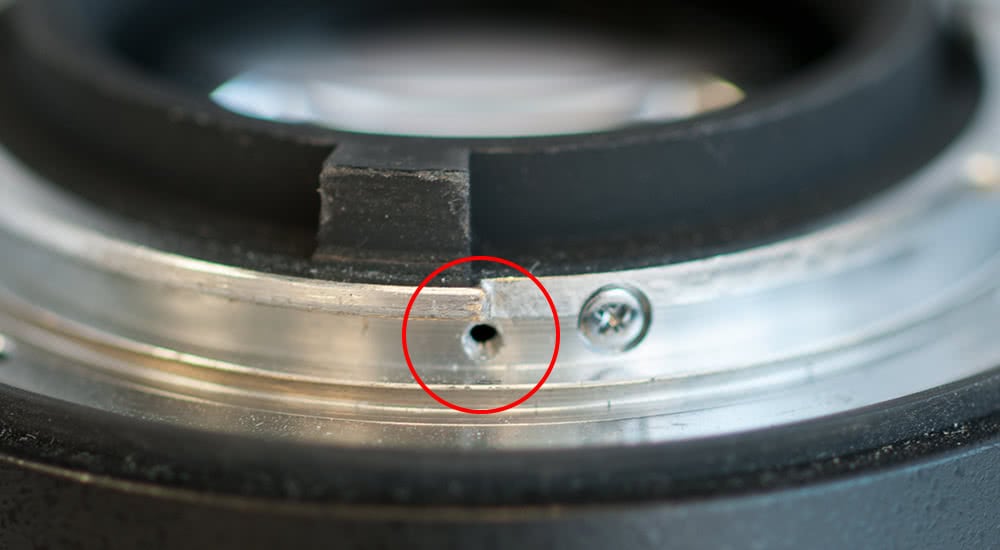 A Nikkor 50mm ƒ/1.4G with the screw missing
Its actual role is to physically stop the lens from being rotated too far when being mounted. If this happens, you’ll invariably feel a horrible grinding and the aperture coupling lever will become distorted. And of course, when you realise your mistake, the lever will get bent a second time as you attempt to remove the lens. A bent lever have an adverse effect on the camera’s ability to stop the lens down correctly at the time of exposure and can also cause any other lenses to jam as you attempt to attach them.
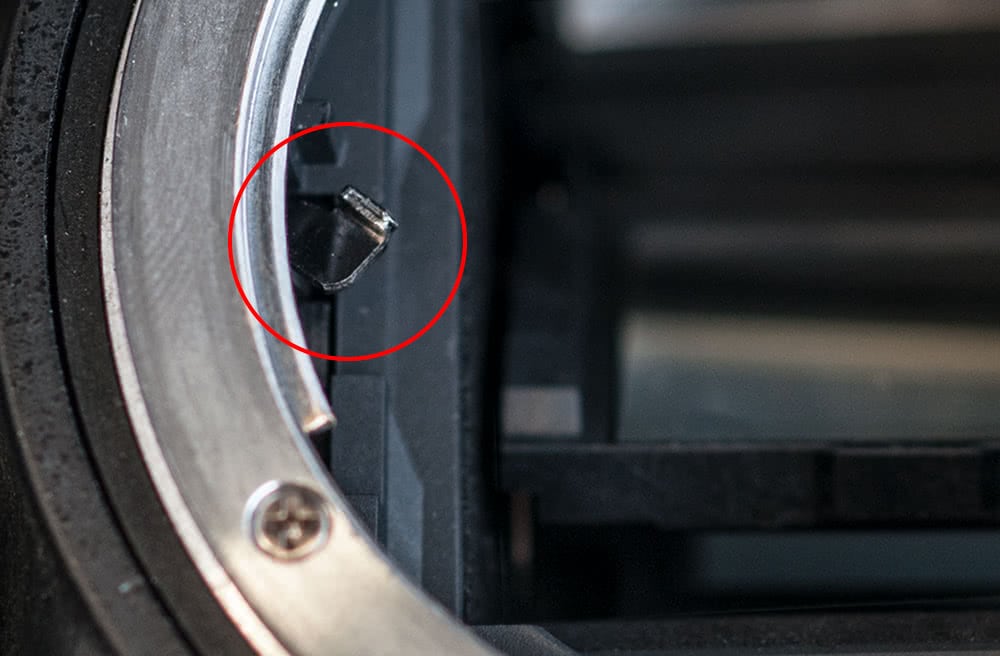 A D7100 with a bent lever. In normal conditions, the end of the lever would be straight
Correct lens mounting
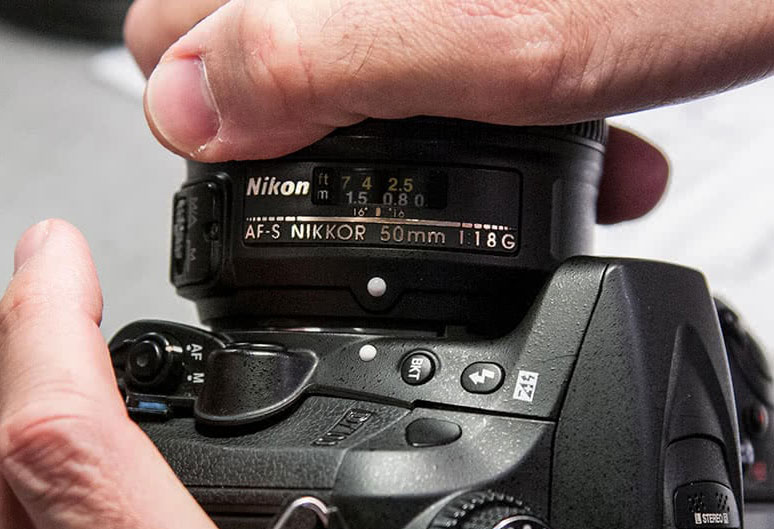
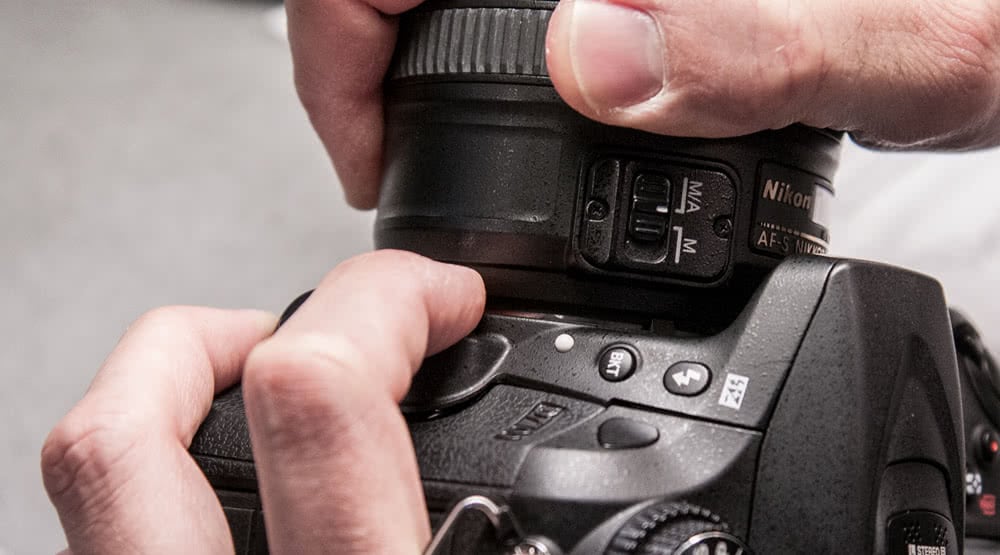
Aside from checking your lenses regularly to see if the screw is still present, another way to avoid damaging the control lever is to actually mount the lenses in the correct manner: there is no need to depress the lens release button when mounting a lens; it only needs to be depressed when removing a lens. Even if the stop screw has fallen off your lens, it is impossible to over turn the lens as it will lock into place via the release button pin. You’ll hear a click when the lens has mounted. However, the number of damaged cameras we see arriving at our workshop suggest that there are many Nikon users out there who insist on incorrectly depressing the button when mounting a lens. Just don’t!
 The correct way to mount a NIkkor lens WITHOUT depressing the release lever
 You’re asking for trouble if you mount your lenses this way!
Repairing a bent lever
In some cases our technicians can gently bend the lever back into shape, but they’re made of an alloy and will weaken considerably if they’re pulled around too much. In the majority of cases, the lever mechanism will need replacing and it’s quite an involved job. It’s mounted to the side of the mirror box and the camera has to be stripped down. And even though the lever is a small part, it is attached to a much larger mechanism that needs to be replaced in its entirety.
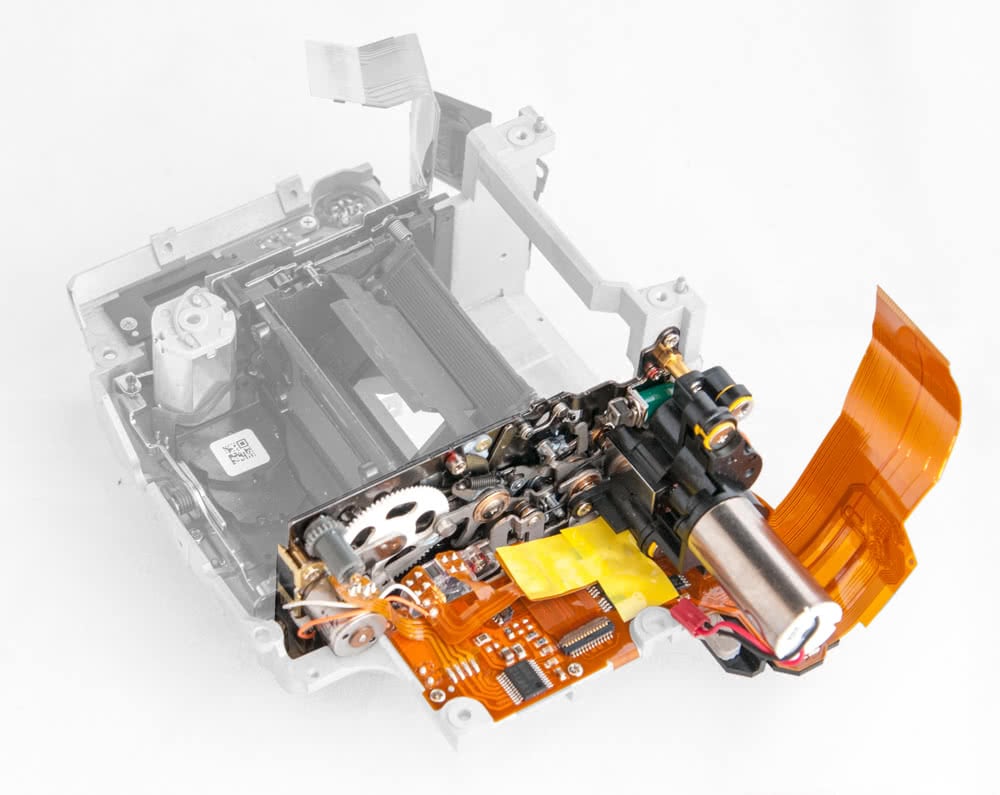 The replacement lever mechanism from a D800
It can cost upwards of £250 to replace the parts, so take a couple of minutes every month to check your lenses and keep your finger off that button!
Just found your website through desktop advert. How did I reach the age of 73 without knowing about you! Interesting regarding the 2mm screw on lens flange. I now know why my Nikkor 70-300mm lens stuck! But – can you supply me with a replacement screw?
Many thanks for this advice – much appreciated.
Thanks for that! I have been lucky so far. Time to mount them properly!
Info like this is very useful. If there are more to be had, please send
CLICK Affixing Lenses Great reminder Advise Thanks ..