A How-To Guide for Different Genres of Photography

A How-To Guide for Different Genres of Photography

Photography is a highly varied discipline, and there are many different genres of shooting you may want to explore. Some photographers spend their entire careers only working in one genre, while others like to chop and change and try new things. However, before you embark on any new style of shooting, it’s important to get a handle on the basics – and that is what this guide is all about.

Here, we’ve provided a quick overview of some of the most popular genres of photography, as well as offering a few tips for getting started with each one. Tips for excelling in any one of these genres would fill a book by themselves – and indeed they have filled many books – but if you’re just looking for a few quick pointers to get started, here’s where you’ll find them.

So, let’s look a little closer at the main genres of photography, and the basics of each one…


Sports photography: the basics

Sports photography
Sports photography

Sports photography is definitely challenging. It’s the art of capturing action, of freezing split-second moments – but more than that, it’s about conveying the feeling of watching a sport through a still image. Sports photographers need to think about conveying the fluidity and motion of a game they are documenting, and about capturing the intense emotions felt by both players and supporters.

Here are a few tips for getting started with sports photography…

  1. Use a fast shutter speed. To freeze action, you need to use a fast shutter speed. Start with a shutter speed of at least 1/500th of a second and adjust as needed. 
  1. Choose the right lens. A telephoto lens with a long focal length is ideal for sports photography, as it’s likely you’re going to be working at a considerable distance away from where your key subjects are. Using a telephoto lens with a reasonably long focal length will allow you to get close to the action and fill the frame with your subject. Focal lengths like 70-200mm and 100-400mm are very popular in sports photography. 
  1. Anticipate the action. Sports photography is all about capturing the decisive moment, and often that means you need to be thinking ahead. In a game of football, for instance, you may have more luck getting shots if you start trying to think about where the ball is going to be, rather than where it currently is. Get a feel for the momentum of the game, and you’ll find your hit-rate improves. 
  1. Use tracking AF. For fast-moving subjects, you’re best off using the continuous autofocus (AF-C) mode on your camera to track them as they move. This will help you keep the key people and objects in focus. 
  1. Look for interesting angles. Don’t just shoot from the sidelines. Look for interesting angles, such as finding a higher vantage point or getting down low to the ground. Move around during a game and experiment.
  1. Shoot in burst mode. Sports photography is all about capturing the moment, so shoot in burst mode to capture a series of shots. This will increase your chances of getting the perfect shot.
  1. Pay attention to the light. Sports events can take place in a variety of lighting conditions, so be prepared to adjust your camera settings accordingly. Use a wider aperture in low-light situations, and don’t be afraid to punch up your ISO if necessary. A grainy shot with some digital noise is better than no shot at all.
  1. Be aware of your surroundings. Sports events can be crowded and hectic, so be aware of your surroundings and be respectful of other photographers and spectators.

With practice and patience, you can capture great sports photos that tell a story and convey the excitement of the event.


Portrait photography: the basics

Whether you’re shooting portraits professionally or just for your own enjoyment, getting perfect people pictures can be a tremendously rewarding challenge. A good portrait isn’t just a picture of a person – it’s an image that conveys its subject’s personality, and as such, there are many things to think about beyond the simple act of pointing the camera at someone and pressing the shutter.

Portrait photography

Here are some things to think about when it comes to portrait photography…

  1. Choose the right lens. A lens with a focal length of 50mm or longer is ideal for portrait photography, as it compresses a subject’s features in a way that’s more flattering than a wide-angle, and helps to throw out the background. On that note, a wide aperture (low f-number) can help create a shallow depth of field, meaning your subject pops vividly against an artfully blurred background.
  1. Find the right location. The location you choose can greatly impact the mood and style of your portrait. Consider the lighting, background, and overall atmosphere of the location, and think about how they relate to your subject. If your subject is a champion skateboarder, they will probably be suited to a different location than a prize-winning head chef, or a Fortune CEO.
  1. Start off with natural light. Portrait lighting is a big, complex subject. If you’re just starting out, rather than investing in flash units and LED panels, try getting your feet wet by shooting in natural light, as this can still result in beautiful, flattering portraits. Look for soft, diffused light, such as that found during the golden hour (the hour after sunrise or before sunset). Avoid harsh midday sunlight, which can create unflattering shadows.
  1. Choose the right camera settings. Shoot in aperture priority mode and use a wide aperture (low f-number) to create a blurred background. Use as low an ISO as possible to minimise noise and maintain image quality.
  1. Direct your subject. Good portrait photography requires good communication with your subject. Give clear directions on posing, expression and positioning. Make your subject feel comfortable and relaxed, and try to capture their personality and individuality.
  1. Edit your photos. Editing your photos can help enhance the overall look and feel of your portraits. Adjust the exposure, colour, and contrast to create a polished final product.

With practice and patience, you can create stunning portraits that capture the essence of your subject.


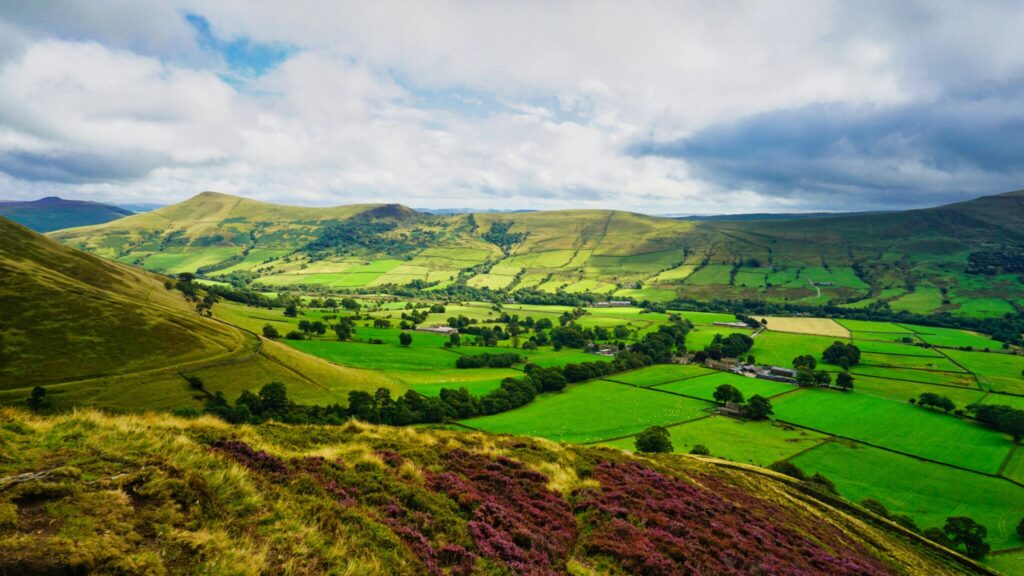
Landscape photography: the basics

Landscape photography is one of the most popular forms of photography, especially in the UK. A landscape is an enormously flexible thing, and can refer to an image of a forest, a beach, a rock formation, a lighthouse, a cityscape or any number of other fantastic subjects.

Landscape Photography

Once you get the landscape bug, you may find yourself hopelessly addicted to travelling the country to chase that perfect light in that perfect location! But before that happens, here are some tips to help you get started:

  1. Scout your location. Before heading out to shoot, do some research and scouting to find the best locations for the kind of landscape photography you want to shoot. Look for interesting features such as mountains, waterfalls or coastlines – and don’t forget about the city. Urban landscapes can be incredibly striking and unique.
  1. Get the right equipment. A sturdy tripod, a wide-angle lens, and a polarizing filter are essential for landscape photography. The tripod will keep your camera stable, the wide-angle lens will help you capture a wider field of view, and the polarizing filter will help reduce glare and increase colour saturation.
  1. Consider the time of day. The quality of light can make a big difference in landscape photography. Once again, you can definitely try to shoot during ‘golden hour’ which is the hour after sunrise or before sunset when the light is warm and soft – but don’t be restricted to just these times, as great images can be found at any time of day.
  1. Try the rule of thirds to start out. The rule of thirds is a composition technique that involves dividing the frame into thirds vertically and horizontally and placing the subject on one of the intersections. If you’re new to landscape photography, this can be a good way to get your brain thinking along compositionally creative lines, and avoid falling into the trap of just plonking every subject slap-bang in the middle of your shot.
  1. Experiment with depth of field. Depth of field can play a big role in landscape photography. Use a smaller aperture (higher f-stop number) to create a greater depth of field and keep more of the scene in focus. 
  1. Pay attention to foreground, middle ground, and background. A strong landscape photo will have elements of interest in the foreground, middle ground, and background. Look for interesting textures, patterns or leading lines to add depth and interest to your photos.
  1. Be patient and persistent. Landscape photography often requires waiting for the right conditions, such as the right light or weather. Be patient and persistent, and don’t be afraid to return to a location multiple times to capture the perfect shot.

Remember to have fun and experiment with different techniques and compositions in your landscape photography. With practice and patience, you’ll be able to capture stunning images of the natural world.


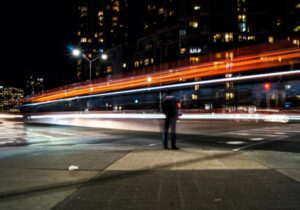
Street photography: the basics

Street photography is a popular genre that involves capturing candid, generally unposed images of people and scenes in public places. Pioneered by legendary photographers like Henri Cartier-Bresson and Vivian Maier, street photography is fundamentally about capturing moments. It requires quick reflexes, an observational eye, and a certain amount of bravery.

Street Photography
Street Photography

Here are some tips for getting started with street photography:

  1. Choose the right gear. Street photography is often fast-paced and unpredictable, so choose a camera and lens combination that is portable, easy to use, and allows you to shoot quickly. Many street photographers prefer small, lightweight mirrorless or rangefinder cameras with wide-angle lenses. Compacts can be a good bet, too.
  1. Find interesting locations. Look for busy public places such as markets, parks, and city streets with interesting architecture and backgrounds. Keep an eye out for interesting light and shadows that can add depth and texture to your images.
  1. Capture candid moments. Street photography is all about capturing candid, unposed moments that tell a story about the people and places you encounter. Be patient, observe your surroundings, and wait for interesting moments to unfold. It can be worth lingering in the same place for a while to allow yourself to blend in, rather than moving a lot and drawing attention to yourself.
  1. Be respectful. When photographing people in public places, be respectful and mindful of their privacy. Avoid taking photos of people who don’t want to be photographed, and always ask for permission if you plan to take a close-up portrait.
  1. Play with perspective. Experiment with different angles and perspectives to add interest and drama to your images. Try shooting from a low angle, or from above, or get close to your subject for a more intimate portrait.
  1. Edit with intention. When editing your street photos, focus on enhancing the mood and atmosphere of the image. Think about how contrast, shadows, and colour can come together to create a cohesive and compelling story. Make judicious use of the crop tool to remove extraneous elements for clean, clear images. 

Remember, street photography can be challenging, but also rewarding. Practise patience, observation, and experimentation to develop your own unique style and vision.


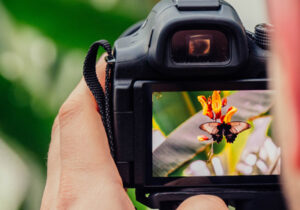
Macro photography: the basics

Macro photography is all about getting in close. It’s the art of capturing small objects, such as insects, flowers, and other details in nature, and rendering them larger than anyone would have seen them with their naked eye. When done well, macro photography can feel like a portal to another world, showing the viewer untold natural wonders.

Macro Photography
Macro Photography

Here are some tips for getting started with macro photography:

  1. Use the right gear. Macro photography requires specialised gear. A macro lens should have a magnification ratio that renders objects at life-size on the sensor plane – these are referred to as “true” macro lenses. Extension tubes can be an acceptable substitute if a macro lens is out of your budget. A tripod is also recommended to keep the camera steady.
  1. Find interesting subjects. Look for small subjects with interesting textures, colours, and shapes, such as flowers, insects, and other details in nature. Think about what kinds of things will look interesting when seen very close-up.
  1. Use a reasonably shallow depth of field. A shallow depth of field (using a low f-stop number) can help isolate the subject and create a pleasing background blur. However, be careful not to make the depth of field too shallow or you may struggle to isolate the correct part of your subject within the narrow plane of focus. 
  1. Use manual focus. When shooting macro photography, autofocus can struggle to find the correct focus point. Using manual focus allows you to have more control and precision over your focus.
  1. Start by using natural light. Once you’re comfortable with macro shooting you can experiment with on- and off-camera lighting, but before you buy any new gear, get your feet wet by shooting with natural light, which can create beautiful and soft lighting for macro photography. Look for opportunities to shoot on cloudy days when the light is soft and diffused.

Macro photography is a technically challenging discipline, but the wonderful thing about digital photography is that you can make as many mistakes as you want to. Keep trying and practising and you’ll get the hang of the basics. 


How to travel with your camera

Travel photography is a little different to other genres, as it depends pretty substantially on where you’re going and what you intend to find there. Some people travel to capture landscapes, some people travel to cities for street shots, and some people love to photograph exotic wildlife. 

So, regardless of what you plan to shoot once you arrive at your destination, here are some tips for travelling safely with your camera…

Travel Photography
Travel Photography
  1. Choose the right bag. Invest in a camera bag that can protect your camera and lenses during travel. Look for a bag that has padding and adjustable compartments, and is constructed from weather-resistant material. It’s also important to choose a bag that is the right size for your gear and comfortable to carry.
  1. Pack your gear carefully. Make sure to pack your camera and lenses in the bag securely, using the internal dividers to wedge everything in securely. Use lens caps and camera body caps to protect the camera and lenses, and consider wrapping items in soft cloth for extra safety.
  1. Bring spare batteries and memory cards. Make sure to bring extra batteries and memory cards, especially if you plan to take a lot of photos. It’s also a good idea to back up your photos regularly to avoid losing them if your camera or memory card is lost or stolen – perhaps wirelessly transfer them to your phone for cloud storage at the end of each shooting day.
  1. Research local laws and customs. Different countries may have different laws and customs regarding photography, especially if people are involved – for instance, public photography laws in France are much more stringent than they are in the UK. Before travelling, research the local laws and customs to avoid any legal or cultural issues.
  1. Carry your camera with you everywhere. This might seem obvious, but it’s good to get in the habit of always carrying your camera when you’re travelling. Even if you’re just strolling into town for dinner, you never know when a photo opportunity might present itself. 
  1. Be mindful of your surroundings. When travelling, keep your camera and other gear close to you, and try not to be oblivious to your surroundings. Avoid leaving your camera unattended or in plain sight, especially in crowded areas.

Remember, travelling with your camera can be a great way to capture amazing photos and memories, but it’s important to take care. With the right preparation, you can enjoy your travels and capture amazing photos along the way.

How to use your camera: the basics

How to use your camera: the basics

How to use your camera: the basics

If you’re just starting out in photography, you’re going to want to learn how to use a digital camera. Learning to take control of settings like aperture, shutter speed, ISO and more is one of the most important first steps in learning to take photos properly, and it isn’t too difficult to do. This guide is here to help you get started.

Here, we’ve put together a series of quick guides to the most basic settings on a camera. If you’re not sure how to go about exposing an image – or even what exposure really means – then this is a perfect place to start. There are no stupid questions here, so feel free to drop in the comments if there’s anything you don’t understand.

How to set shutter speed on a camera

Light trails caused by longer shutter speeds

The shutter speed setting on a camera dictates the amount of time that the camera’s sensor is exposed to light. Longer shutter speeds allow more light to hit the sensor, allowing you to create a clear and balanced exposure when light levels are low. However, this extended time will mean that anything in the frame that moves will be rendered blurry. Also if you’re hand-holding the camera, the sharpness of the entire image may be compromised by camera-shake.  

Image stabilisation can help here, but for significantly extended shutter speeds, you’ll need to securely mount the camera on a tripod. Shorter shutter speeds are therefore useful when you’re hand-holding the camera, or when you want to freeze fast-moving action.

Here are the steps to set the shutter speed on most cameras:

  1. Select a shooting mode that allows you to change your shutter speed. Your best bet is Shutter Speed Priority (labelled as S or Tv), which allows the user to control shutter speed and automates all other settings. This may be on your camera’s top dial, or you may have to delve into the menus. Another option is Manual (M), in which all settings are dictated by the user, including shutter speed.
  1. Once shutter speed is selected, use the camera’s dial or arrow buttons to adjust the value. Shutter speed is measured in seconds and fractions of a second – 1/100sec, 1/500sec, 1sec, etc.
  1. Set the shutter speed to the desired value. A slower shutter speed will allow more light to enter the camera, while a faster shutter speed will let less light in. This will affect the exposure and the amount of motion blur in the image.
  1. If you are using the camera handheld, a general rule of thumb is that to keep your shots sharp, your shutter speed should be ‘1 / your lens’ focal length’. So if you’re using a 50mm lens, use a shutter speed of at least 1/50sec. If it’s 100mm, 1/100sec, and so on. If your camera and/or lens have built-in stabilisation you can push this a bit – the best way to figure out how much is to experiment with it.
  1. Check your camera’s exposure meter to make sure that your settings are giving you a proper exposure. If you are using shutter priority mode then your camera will automatically adjust the other settings to compensate; if you’re using manual, you’ll need to adjust them all yourself. Even in the former case, you’ll want to check your exposure is within tolerances – e.g. that you haven’t set a shutter speed so fast that the image is still underexposed even with other settings maxed out.

How to set aperture on a camera

Aperture Settings
Aperture Settings

When you adjust the aperture setting on your camera, what you’re actually doing is controlling the size of the opening in the lens. It’s measured in f-numbers, such as f/1.8 or f/11, and determines how much light reaches the camera’s sensor. The smaller the number, the wider the aperture, and therefore the more light is being let in.

Aperture speed has two main effects on your image. First, as mentioned it controls the amount of light that enters the camera, which affects the overall exposure. Having as wide an aperture as possible is hugely useful for shooting in low light. Second, it affects the depth of field, or the area of the image that appears in focus. A large aperture setting (such as f/1.8) creates a shallow depth of field, rendering the main subject sharp and the background out of focus. A narrow aperture setting (such as f/11) creates a larger depth of field with more of the image in focus.

One way that aperture differs from other settings is that it can in some cases be set on the lens, not just the camera. Some lenses offer aperture rings, which provide direct mechanical control of the opening; for many photographers, these provide a much more intuitive way of working with aperture. For this section, we’ll be assuming that you’re setting aperture on your camera, as many beginner lenses don’t have aperture rings.

Here’s how to set aperture on your camera:

  1. Choose your shooting mode. Aperture can be adjusted in Aperture Priority mode, commonly abbreviated as A or Av. In this mode, the user sets the aperture value, and the camera automates everything else (often you can set parameters, e.g. not to let shutter speed go below a certain value, or ISO above a certain value). Manual mode (M) allows the user to take control of all settings, including aperture.
  1. Decide on the desired effect: Your subject, creative vision and the level of available light, will all affect the aperture setting that’s best for your shot. For example, if you’re shooting a portrait, you may want to use a wide aperture setting to create a shallow depth of field and blur the background. If you’re shooting a landscape, you may want to use a narrow aperture to keep the entire scene in focus. If the scene is dark, you may simply need to use the widest aperture possible.
  1. Adjust the aperture speed. Use the command dial, the buttons or the aperture ring (if your lens has one) to adjust the aperture speed up or down in increments of 1/3 or 1/2 stops. Check using your camera’s metering system that you are getting a balanced exposure, and if you’re in Av mode, that your camera hasn’t raised the ISO too high, or set the shutter speed too slow or too fast for what you want to achieve.
  1. Take a test shot and review the results. Make sure that the exposure and depth of field are what you intended. If necessary, adjust the aperture speed further until you achieve the desired effect. Experiment with different aperture speeds to find the right balance of exposure and depth of field for your subject and creative vision.

How to set ISO on your camera

ISO settings
ISO settings

ISO is a system for measuring the sensitivity of a camera’s sensor to the available light. It forms the third part of the exposure triangle, along with aperture and shutter speed. The higher you set the ISO value on your camera, the more sensitive to light it will be. However, this increased sensitivity comes with a cost, as you also increase the level of noise in your images – the term ‘noise’ referring to digital artefacts and grain that can compromise image quality. As such, it is usually encouraged to keep your ISO level as low as the light conditions will allow.

ISO is expressed numerically – more or less all modern digital cameras will have ISO 100, 200, 400, 800, 1600, and 3200, with 100 producing the cleanest images and 3200 being the most sensitive to light. Many will also offer settings lower and higher than this, with maximum settings like 25,600 or 51,200 being common. The ISO value doubles with every stop of exposure gained – so a jump between ISO 25,600 and ISO 51,200 is not as enormous as it sounds, it’s actually just a single stop of exposure. Some cameras also offer ​​Extended ISO settings at the upper or lower end of their ranges – these can be useful if there’s no other option, but will usually severely compromise image quality.

Here are the steps to adjust the ISO on most cameras:

  1. Turn on your camera and select the shooting mode you want to use. Any shooting mode except for Full Auto should allow you to set your ISO, so feel free to use whatever you prefer.
  1. Locate the ISO button or setting on your camera. On most cameras, this is represented by a symbol that looks like a circle with a dot in the middle. Some cameras have a dedicated ISO dial on the top plate – many Fujifilm cameras offer this.
  1. Use the dial, wheel or arrow buttons to adjust the ISO setting. You may need to press a button or navigate to a submenu to access higher ISO values. A higher ISO value will make the camera more sensitive to light, while a lower ISO value will make it less sensitive.
  1. Check your camera’s exposure meter to make sure that your settings are giving you a proper exposure. If the meter shows that your photo will be over or underexposed, adjust the aperture or shutter speed accordingly.
  1. Many cameras offer range-limited auto ISO modes. These will automatically set the ISO value according to the input of the camera’s metering system, but never push it beyond a user-specified value, which is useful if you don’t want to have to keep fiddling with settings, but also don’t want the automated system to bump it too high and produce grainy images. This will likely be accessed through the same ISO menu.

How to adjust exposure compensation

Exposure compensation is a camera setting that allows you to adjust the brightness of your image. It’s typically represented by a +/- button or dial on your camera, and can be adjusted in increments of 1/3 or 1/2 stops. 

Photographers typically use exposure compensation in situations where they want to override their camera’s automated metering and make an image brighter or darker than the system recommends. There are many reasons you might want to do this – you may want to intentionally overexpose for an ultra-bright, dreamlike effect, or underexpose to accentuate a silhouette. 

Some scenes can also cause a camera’s metering system to think conditions are brighter or darker than they really are – snowy scenes, for instance, are often underexposed by automatic metering systems as the excess of white causes the camera to think they are brighter than they actually are. 

Here’s how to adjust exposure compensation:

  1. Choose your shooting mode. Exposure compensation can be adjusted in most shooting modes, including manual, aperture priority, shutter priority, and program mode.
  1. Locate the exposure compensation control on your camera. This may be a button or a dial depending on your make and model of camera. It is usually denoted by a ‘+/-’ symbol, so if in doubt, look for that.
  1. Press the button or turn the dial to adjust the exposure compensation in the desired direction. Each click of the dial typically represents a 1/3 or 1/2 stop change in exposure, and the setting will normally be denoted on the screen or in the electronic viewfinder as ‘+1’, ‘-1/3’, ‘+2/3’, etc.
  1. Check your results. After adjusting exposure compensation, take a test shot and check the results. If the image is still too bright or too dark, continue adjusting exposure compensation until you achieve the desired brightness.
  1. An important, often neglected step – once you have got your shot, remember to readjust exposure compensation back down to neutral. It’s one of the easiest settings to accidentally leave on, and it’s all too common for photographers to wonder why they are consistently getting overexposed images until they remember that their exposure compensation is still set to +1.

Remember that exposure compensation is just one tool for controlling exposure. It’s important to understand the basics of exposure and how aperture, shutter speed, and ISO work together to create a properly exposed image.

How to choose metering modes on a camera

Metering modes
Metering modes

The metering mode is a camera setting that determines how the camera measures the light in the scene to determine the appropriate exposure for the image. There are typically three metering modes available on most cameras: centre-weighted, spot, and evaluative/matrix. 

  1. Centre-weighted metering: This mode measures the light in the centre of the frame and applies greater weight to this area when calculating the exposure. This mode is useful for portraits, or any situation when the subject is in the centre of the frame.
  1. Spot metering: This mode measures the light in a small, specific area of the frame (usually in the center). This mode is useful when you want to expose for a specific part of the image, such as a person’s face.
  1. Evaluative/matrix metering: This mode measures the light in multiple areas of the frame and calculates an average exposure. This mode is useful for most situations, as it takes into account the entire scene and provides a balanced exposure. For street, documentary and general-purpose photography, this is a good, flexible metering mode to use.

When choosing a metering mode, consider the lighting conditions of the scene and the placement of the subject. For example, if the subject is backlit, spot metering may be necessary to properly expose for the subject’s face. If the lighting is even throughout the scene, evaluative/matrix metering may be sufficient. It’s also important to keep in mind that the metering mode is just a starting point, and you may need to adjust the exposure compensation or manually adjust the settings to get the desired exposure.

Ultimately, the choice of metering mode will depend on the specific situation and your creative vision for the image. Experiment with different modes and settings to find what works best for you.

How to set white balance on your camera

Setting white balance

White balance is an important setting in photography that ensures the colours in your images are accurate and natural-looking. 

Different types of light produce different colour temperatures, measured in Kelvin (K), which denotes how warm (orange) or cool (blue) an image looks. A Kelvin number of around 5,000 is considered ‘neutral’ or natural – this is the kind of light you’d expect to see at around midday on a clear day. Some types of light produce a warm, orange cast, such as candlelight, sunrise/sunset or incandescent bulbs – these have a lower K value of around 1900 to 4000. Higher K values denote a cooler, blue colour cast, which is common on overcast, cloudy days.

By adjusting the white balance on your camera, you can ensure that image colours look consistently natural in different lighting situations.

Here’s how to set up white balance on your camera:

  1. Navigate to the white balance setting on your camera. This may be accessed via the menu system, or your camera body may have a button labelled ‘WB’ or similar.
  1. Choose a white balance setting. Most cameras have several white balance settings, including Auto, Daylight, Cloudy, Shade, Tungsten, Fluorescent, and Custom. In most situations, the Auto setting will do a pretty good job of getting the balance right. However, if you are consistently getting an undesirable colour cast, try selecting the option that best matches the light conditions you are shooting in.
  1. If you want to get perfectly accurate colours, consider using a grey card. A grey card provides an accurate reference point for colour A grey card provides a completely neutral surface with no colour temperature or hue, meaning it can be used as a reference for colour temperature in any situation. Hold it in front of your subject and take a reference photo. You can now use this to calibrate your white balance – either in-camera using the ‘Custom’ setting, or in post-processing.
  1. To adjust the white balance in post-processing, you need to shoot in RAW format, as this allows you to completely alter the colour temperature and tint of an image as you see fit. Use the white balance tool in your photo editing software to adjust the colour temperature of your image. If you have a grey card reference image, you can use this to fine-tune your adjustments, then apply these settings to other images from the same shoot.
  1. Experiment with different settings. White balance is subjective and can vary depending on your personal preference and the mood you want to create in your image. Pay attention to the lighting conditions in your environment and adjust the white balance accordingly for the best results.

How to use burst mode

Burst mode (also known as continuous shooting mode) is a feature found on many cameras that allows you to take a series of photos in quick succession with a single press of the shutter button. 

It’s hugely useful for capturing images of fast-moving subjects such as wildlife or athletes, though can also be handy when taking group photos or portraits, as you may want to capture a variety of expressions and poses.

Here are the general steps of how to use burst mode:

  1. Set your camera to burst mode. How to do this will vary from camera to camera, but will usually involve selecting the burst mode option from the camera’s shooting mode menu.
  1. Frame your shot and prepare to take the first photo. If your subject is moving, try to think in advance about how you may need to move the camera to keep them in frame.
  1. Press and hold down the shutter button to start taking photos in rapid succession. The number of photos you can take will depend on your camera’s burst mode speed and buffer capacity. Some professional sports cameras have effectively unlimited buffer capacity, while others can only shoot in very short bursts.
  1. Review your photos. After taking a burst of photos, review them on your camera’s LCD screen to see which ones turned out the best. You can then delete the photos that you don’t want to keep. This is a useful habit to get into if you are spending a day firing off lots of bursts, as you can save time in the edit by getting rid of misframes and other useless photos as you go.
Vlogging Guide | Best Cameras For Vloggers 2024

The Ultimate Vlogging Guide | Best Cameras For Vloggers 2024

Welcome to Fixation’s guide to the best cameras for vloggers! If you’re looking to start vlogging, one of the first things to figure out is what camera you’re going to use. You can of course use a smartphone for vlogging – and many people do. However, a dedicated vlogging camera confers all sorts of advantages, both in terms of the quality of your footage and the ergonomics of your setup.

Best Cameras For Vloggers 2024

At Fixation, we repair, sell and lend out cameras of all different types and sizes, including many that are perfectly suited to vlogging. For this guide, our team of technical experts has picked out the cameras we feel offer vloggers the best value for money, providing a demonstrable advantage over shooting on a phone. 

Whether it’s a larger sensor for better low-light performance, an interchangeable lens mount for shooting flexibility or any of the other standout features of the cameras on this list, any of these models will form the backbone of a brilliant vlogging setup. So, without further ado, let’s get into the best vlogging camera to buy, starting with a fantastic option for beginners…


Best vlogging camera for beginners: Canon PowerShot V10

Canon PowerShot V10
Canon PowerShot V10

Key specs:

  • Compact camera
  • 20MP 1-inch sensor
  • 19mm (equivalent) f/2.8 lens
  • 4K 30p, Full HD 60p
  • Ports: Micro HDMI, 3.5mm mic input, USB-C

We’ve been really impressed by the pocketable Canon PowerShot V10 since its release in 2023, and if you’re looking for your first camera for YouTube, it’s an excellent place to start. It’s a compact camera, but as you may have already clocked, it doesn’t look like a typical example of the genre. Its slim, oblong body lacks a handgrip, there’s no top-plate loaded with buttons and dials. What’s going on?

The answer is that Canon has created a vlogging camera by going back to the drawing board and thinking about what vloggers and YouTubers actually need. And so, while the end result could use some refinement in places, it’s much more usable for quick, day-to-day vlogging than many cameras that cost considerably more. The slim body and flip-around screen make it perfect for filming yourself one-handed, while the built-in stand means you can set it up on a desk or other flat surface within seconds. The 19mm equivalent lens gives you a nice, wide perspective that’s exceedingly useful for general-purpose filming.

Video-wise, the PowerShot V10 shoots at a maximum resolution of 4K 30p, which is pretty standard for cameras at this level. Supposedly it can record continuously for up to an hour, though if you’re in a warm environment you may find yourself running into overheating issues before that time limit is up. There’s no optical stabilisation, but there is a digital stabilisation system available for shooting on the move. 

The PowerShot V10 isn’t perfect, but it’s a hugely promising concept, and the ergonomics of it make a lot more sense for the beginner vlogger than a lot of more conventionally designed cameras. For a simple, affordable and easy-to-use vlogging camera, this is definitely recommended. 


Best vlogging camera with a zoom lens: Sony ZV-1 II

Sony ZV-1 II
Sony ZV-1 II

Key specs:

  • Compact camera
  • 20MP 1-inch sensor
  • 18-50mm (equivalent) f/1.8-4.0 lens
  • 4K 30p, Full HD 100/120p
  • Ports: Micro HDMI, 3.5mm mic input, USB-C

Sony’s ‘ZV’ cameras represent the manufacturer’s dedicated vlogging range. While Sony E-mount mirrorless and compact cameras have been excellent options for video for a very long time now, the more recently introduced ZV models are specifically tailored to vloggers and YouTubers – offering extensive, flexible video functionality for a comparatively affordable price.

The Sony ZV-1 II is a compact camera equipped with an 18-50mm equivalent zoom lens, giving you a solid level of shooting flexibility. At the wide end of the lens, there’s an f/1.8 maximum aperture – this is especially useful for shooting with a shallow depth of field to throw out the background and keep the viewer’s focus on your main subject. Also, while the ZV-1 II has a 3.5mm socket to attach an external mic, its built-in three-capsule mic does a credible job, and will definitely be good enough for anyone whose beginning vlogging budget doesn’t have room for a mic. 

With a slim body and a rubberised grip, the Sony ZV-1 II fits nicely in the hand and is easy to use. It also has a much better touchscreen interface than the original ZV-1, with quick access to key features and shooting menus. Even if you’re never used a camera before, the ZV-1 II is relatively easy to get to grips with, which counts for a lot in a beginner vlogging model.

There’s no optical stabilisation on the ZV-1 II, though Sony’s ‘Active’ electronic stabilisation is available to help smooth out footage a little. A better solution, if your budget allows, might be to pick up Sony’s GP-VPT2BT wireless shooting grip, which provides additional stability.


Best mirrorless vlogging camera: Nikon Z30

Nikon Z30
Nikon Z30

Key specs:

  • Mirrorless camera
  • 20.9MP APS-C sensor
  • Nikon Z lens mount (DX)
  • 4K 30p, Full HD 120p
  • Ports: Micro HDMI, 3.5mm mic input, USB-C

The clever little Nikon Z30 is the vlogging-oriented member of Nikon’s larger Z-mount mirrorless family. If you have an interest in vlogging on Nikon kit, it’s unquestionably the best camera to start with. With a flip-around screen, sensibly laid-out controls, a pocketable body and an APS-C sensor that offers consistently excellent video quality, it’ll do everything you need and more. 

The Nikon Z mount on the Z30 gives you access to some absolutely sublime lenses. The Z30 also has a stereo microphone built into its top plate for decent audio straight out of camera – though serious vloggers will probably want to spring for an external mic and plug it in via the 3.5mm mic input. It shoots 4K video at up to 30p using the full width of its sensor – even the Sony ZV-E10, probably this camera’s closest rival, has to crop in a little to do the same.

The buttons and controls on the camera are customisable, meaning a little investment of time setting them up can allow you to get the camera working just the way you want it to. You also have plenty of internal shooting options too, with Nikon’s ‘Flat’ profile providing low contrast and low saturation in order to maximise flexibility when you come to colour grade your footage. It’s essentially a simpler alternative to Sony’s Log profiles, and as such may be quite tempting for vloggers who are starting to dip their toes into colour grading.

Overall, the Nikon Z30 is a well-priced and capable mirrorless camera that’s been cleverly designed to appeal to vloggers. It’s a great first step into one of the most exciting mirrorless systems on the market right now. 


Best action camera for vlogging: GoPro Hero 12 Black

GoPro Hero 12 Black
GoPro Hero 12 Black

Key specs:

  • Action camera
  • 27MP 1/1.9-inch sensor
  • Fixed lens with 156-degree field of view
  • 5.3K 60p, 4K 120p
  • Ports: USB-C. With Media Mod upgrade: micro HDMI, 3.5 mic input, USB-C

If you’re the adventurous type, someone who’s going to be taking your vlogging into tricky conditions, then an action camera could well be the best buy. With superb video quality and a fixed wide-angle lens, action cameras make for natural vlogging tools even when you set aside their tough and waterproof credentials. And for the best of the best in action cameras right now, you really can’t go wrong with the GoPro Hero 12 Black.

It’s likely you know the basics of what a GoPro is. The essential pitch of a little waterproof cube that shoots great-looking video has remained pretty much unchanged since the first Hero model hit the market, but has been refined and improved with every iteration. This means that the Hero 12 benefits from all the upgrades that have come before, whether it’s the class-leading HyperSmooth stabilisation system, or the 27MP 8:7 sensor that makes it easy to capture vertically oriented footage – perfect for TikTok – as well as classic 16:9.

The Hero 12 is a fairly iterative upgrade. The main focus here has been on improving the battery life, as well as opening up accessory options with additions like Bluetooth mic support and a 1/4″ tripod thread – great for vloggers as it allows the use of mini tripods like Joby’s flexible Gorillapods. 

Otherwise, down the line it’s another camera showcasing everything GoPro does best – great-looking video in a waterproof, shockproof, everything-proof body. 


Best mid-range vlogging camera: Fujifilm X-S20

Fujifilm X-S20
Fujifilm X-S20

Key specs:

  • Mirrorless camera
  • 26.1MP Fujifilm X-Trans IV APS-C sensor
  • Fujifilm X lens mount
  • 6.2K 30p, 4K 60p, Full HD 240p
  • Ports: Micro HDMI, 3.5mm mic input, 3.5mm headphone output, USB-C

The Fujifilm X-S20 is one of the best hybrid cameras ever made, and is a superb mid-range choice for the vlogger or YouTuber. Pairing a 26.1MP APS-C sensor with the Fujifilm X lens mount, the X-S20 makes it relatively easy to produce superb-looking, dynamic footage. At maximum resolution, it captures 6.2K video using the full width of its sensor, and with a broad range of presets, shooting modes and film simulation looks, it provides a lot of welcome shortcuts to making your shots look good.

As it’s a relatively recent camera, the X-S20 benefits from up-to-the-minute features. Its in-built stabilisation system is good for up to seven stops of effective compensation, providing you with a super-smooth shooting platform even while running and gunning. It also has subject-recognition autofocus at its disposal, and we came away especially impressed with the battery life of the camera, which has received a good bump from the previous iteration (the X-S10, still worth a look, especially second-hand).

Thanks to Fujifilm’s hard work expanding the X-mount lens ecosystem, users of the X-S20 will have one of the richest lens catalogues in the business to assemble their setup from. The camera is quite portable and balances well – though it’s worth being aware that it isn’t weather-sealed. 


Best full-frame vlogging camera: Panasonic Lumix S5 II

Panasonic Lumix S5 II

Key specs:

  • Mirrorless camera
  • 24.2MP full-frame sensor
  • L lens mount
  • 6K 30p, 4K 60p, Full HD 180p
  • Ports: HDMI, 3.5mm mic input, USB-C

If you have the budget and inclination to shoot on full-frame, you’ll be rewarded with handsome, crisp imagery, with improved dynamic range compared to crop-sensor cameras. It’s also easier to shoot at vlog-friendly wide-angles on a full-frame camera, as there isn’t the crop factor incurred by smaller sensor sizes. A 20mm lens that’s mounted to a full-frame camera behaves like a 20mm lens, allowing you to fit more into the frame. If you want a cost-effective full-frame vlogging solution, our suggestion is the Panasonic Lumix S5 II.

Released in 2022, the Panasonic Lumix S5 II brought something to the table that Lumix shooters had been desiring for some time – phase-detection autofocus. Finally kissing goodbye to the undeniably dated contrast-based ‘Depth from Defocus’ system, Panasonic gave the S5 II glorious phase-detection autofocus in stills and video, and it’s just so much better.

The S5 II records video at up to 6K resolution, using the full luxurious width of its sensor. This means you have enormous flexibility when it comes to cropping your footage for different formats and aspect ratio – or for cropping losslessly into a shot to provide some visual variation in the edit. There’s also a built-in cooling system that means recording times are essentially unlimited in all modes – it adds a bit of bulk to the camera, but it’s worth it in our book. The body itself is dust-resistant and splash-resistant. You wouldn’t want to dunk it in seawater, but it’ll certainly survive a rainshower.

Panasonic’s Lumix S system uses the L lens mount, developed in conjunction with Sigma and Leica. This means users of the S5 II are absolutely spoiled when it comes to lens choice, with some seriously standout lenses available from some of the best in the business.


Essential accessories for vloggers

Essential accessories for vloggers

If you’re looking for the kit you need to start vlogging, a lot of accessories will be pushed on you, billed as the things that will be the difference between success and failure for your channel. Some will be essential, some will be handy in certain circumstances, and some will be things you can almost certainly do without.

For this section of the guide, we’re going to recommend a few accessories we think are essential (or close-to), helping you build up your setup without having to spend a fortune. Remember, of course, that everyone is different, and there is no product that is universally suitable to every single vlogger on the planet. With that said, here are our top recommendations…


External microphone

Rode VideoMic Go II
Rode VideoMic Go II

All the cameras we’ve listed in this guide offer the option to connect an external microphone – most commonly via a 3.5mm input connection, though you can also often use Bluetooth. A dedicated microphone is the single best way to improve the audio quality of your vlogs at a stroke, and this is vital. Bad audio quality will kill a viewer’s interest in your video exceptionally quickly.

We recommend: Rode VideoMic Go II. Cheap, straightforward and easy to use, this plug-and-play microphone will make a dramatic difference to your audio quality.


Stabilising gimbal

DJI RS 3 Mini
DJI RS 3 Mini

Yes, many cameras have better and better stabilisation systems these days. However, if you’re engaging in run-and-gun filming, you really can’t beat a stabilising gimbal for reliably getting usable shots while you’re moving with the camera. These clever devices allow you to capture Steadicam-level footage with one hand, and many will also offer loads of handy extra functions, such as the option to quickly swap to vertical orientation. 

They’re not essential for everyone of course – if you’re doing all your shooting in the studio, there’s no need to bother. But if you’re spending time on location, or if you want to introduce dynamic, hand-held camera movement to your vlogs, a gimbal should be high on your priority list.

We recommend: DJI RS 3 Mini. Designed for smaller interchangeable-lens cameras, this portable gimbal delivers exceptional stabilisation. If you’re using a larger full-frame camera or longer lenses, consider upgrading to the full-size RS 3.


Tripod or stand

Manfrotto Element MII Aluminium Tripod

While you probably don’t need a full-size photographer’s tripod, getting hold of some way to keep your camera stable, level and freestanding is pretty much a no-brainer for a vlogger. A travel tripod will work well. Many vloggers like the flexible Joby GorillaPod for its versatility and ability to be set up pretty much anywhere. This is all true, though for pure stability, you may find you prefer a more traditional tripod. 

We recommend: Manfrotto Element MII Aluminium Tripod. A simple, inexpensive tripod from one of the most reliable manufacturers in the photo accessory business. This versatile camera support provides excellent stability, a generous working height and long-lasting durability.


LED light

Lume Cube Panel Mini

Video lighting is an immensely complex discipline once you really start looking into it. However, for most vlogging purposes, all you really need is a dependable, adjustable LED light that can give you a quick burst of illumination at the points where you need it. This doesn’t have to cost the earth, and plenty of manufacturers have jumped at the chance to offer affordable options in this space.

We recommend: Lume Cube Panel Mini. This panel is available at a tempting price, especially compared to market leaders like Rotolight, and it offers good ranges of brightness and colour temperature settings. Bear in mind you may also need to get a stand to mount the light on, so that you can position it wherever you need it.

Hi, how can we help?