You’d be forgiven for thinking that CamRanger are not that bothered whether you buy their products or not – they have zero presence on Instagram, and haven’t tweeted since 2015, updated their blog since 2016, or been reviewed since 2013.
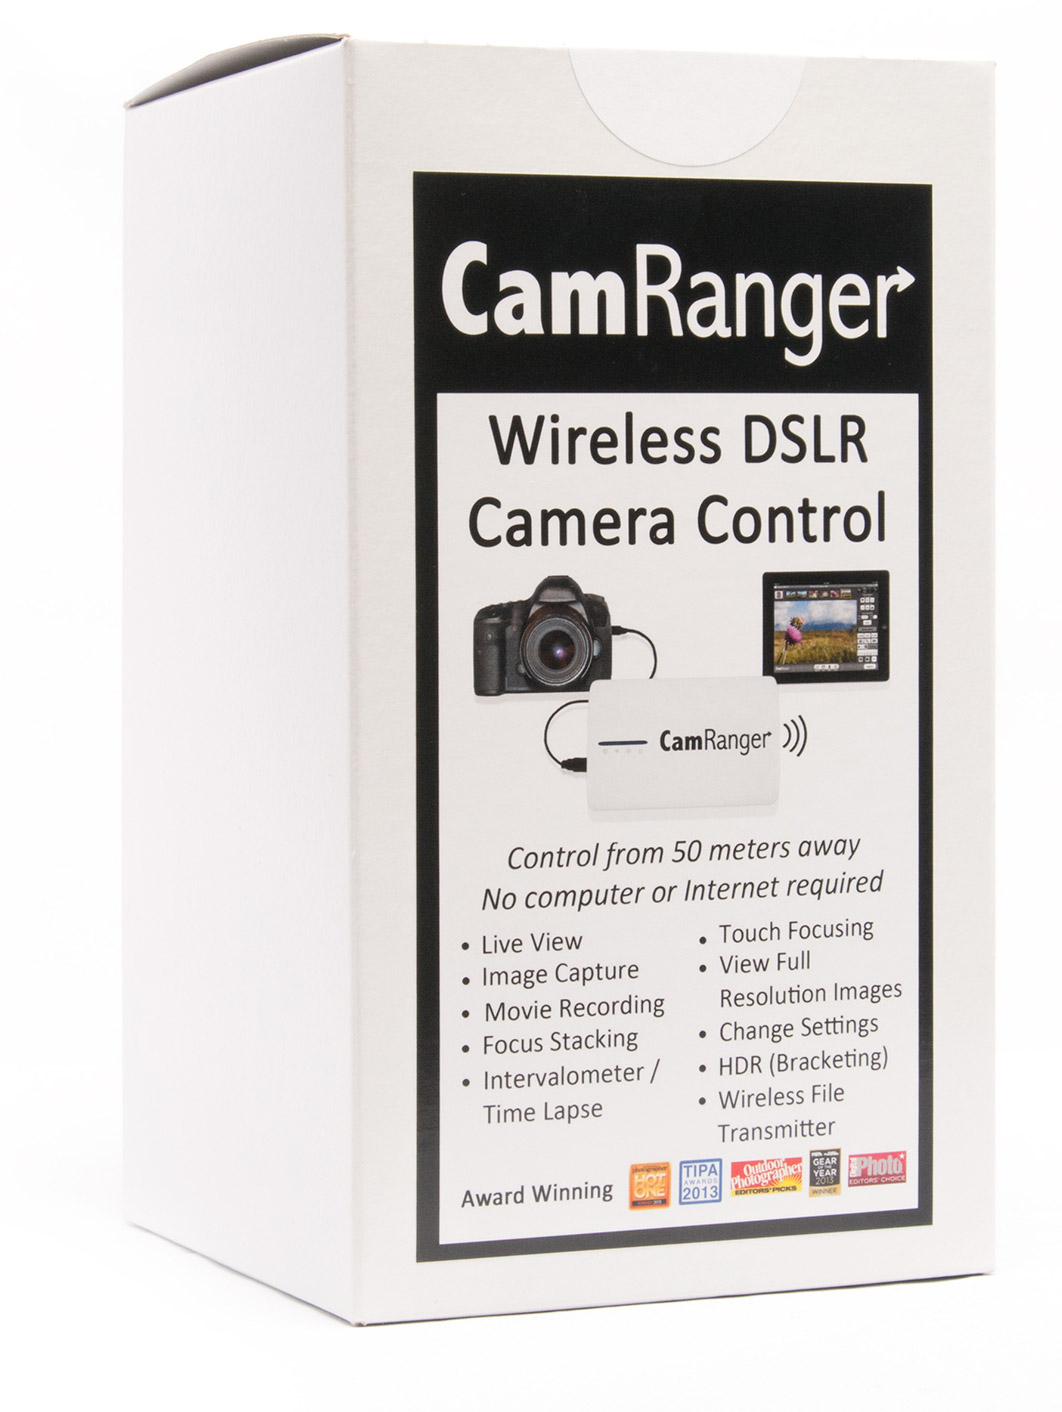 Perhaps you haven’t even heard of them. But then, how would you? Unless of course you’ve been looking to remote trigger your camera from a distance, because that seems to be the sell point on the CamRanger – it’s a wireless control trigger for photographers who want to control their Nikon or Canon from an iOS device. You can view and edit camera settings, record movies, set up timelapse, and capture images all from a remote device. Neat. But the thing they don’t sell you on is the CamRanger’s ability to work as a wireless tethering device. A simple function in many ways, tethering is an incredibly usable function for photographers, and one environmental photographers worldwide, would prefer to be wireless.
Wireless tethering seems to be hard to do well – reliability, connectivity and speed seem to be the hardest functions to excel in and there doesn’t seem to be the perfect solution.
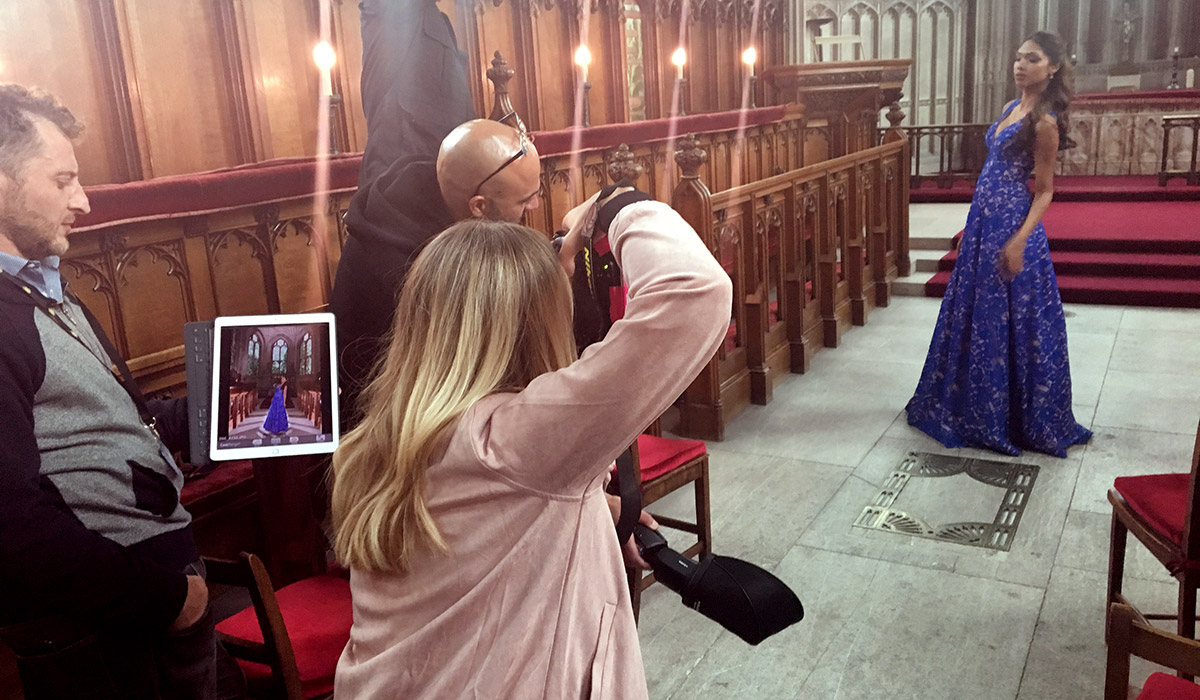
Firstly, let me say what I fan I am of the theory of tethering, the idea is great. Images sent to a large screen where you, your assistant and your clients can woo and wow at your excellent skills OR pick apart every part of your image and make endless suggestions of ways to tweak the shot. But still. Great. Myself and my assistant can check focus, and clients can be assured you’re getting what they want, how they want.
My experience with EyeFi mobiPRO cards has been tenuous. Even wired tethering leaves me short, as Nikon users will know, you can’t view both on screen and camera back when tethering, and camera back is not something I’m willing to sacrifice. Plus, the impracticality of being attached to a computer whilst I’m moving around a location, manoeuvring myself into small corners and standing on furniture makes being connected almost impossible (you want to see more of that, follow me on instagram @holly_wren). And my biggest fear of wired tethering – the potential loss of files, given that if you lose the wire you risk losing all the images – as the files are not being written to the card in your camera whilst attached to the computer. And losing the wire is easy, even jerk stoppers and alike don’t really help.
When most people think tethering, they think Tether Tools. A competitor to CamRanger, who do actually have their shit together – fancy website, nice branding, good product range and a social media presence to the tune of 90,000 Instagram followers. So why pick the very undersold CamRanger? I haven’t used Tether Tools “Air Case” wireless, so I can’t compare these products directly, but I have been told by reliable sources (clears throat, ahem, Fixation team) that the CamRanger is a tried and tested recommendation with other photographers. And looking at their website they seem to have a surprisingly good range of reviews and fans, perhaps CamRanger are just the best kept secret in professional photography?
Picking up the CamRanger, you’ll likely be completely underwhelmed. You’ll wonder what your £200 is paying for – not product marketing (as we established) and certainly not packaging or branding; the sticker looks like a 12-year-old designed it on word and printed it on their home computer. But should you care? No. Because the CamRanger to date provides the best wireless tethering I’ve tried.
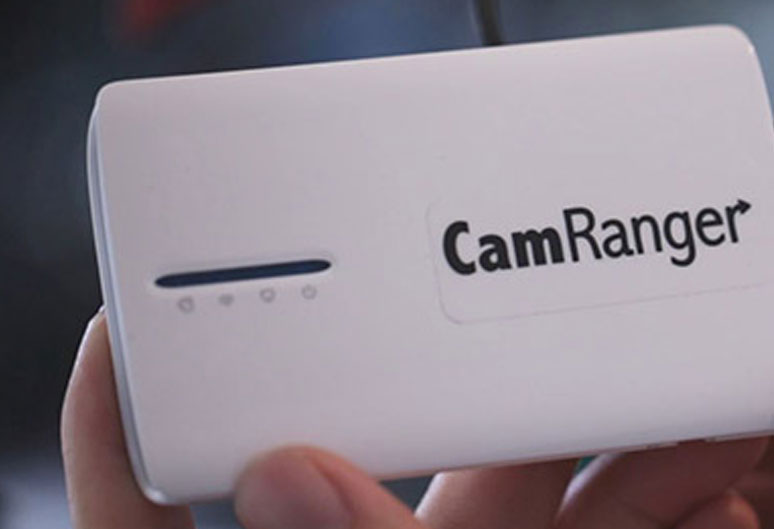
It’s a little white box with some simple slide switches and reassuring green lights, that flash similarly to those on a wifi box. It’s relatively compact and feels sleek (ignore the sticker).
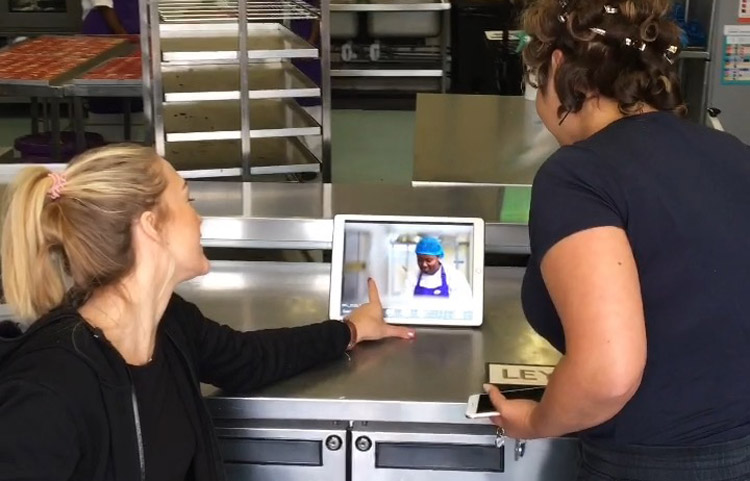
The connection is good, not perfect but almost. The CamRanger works by creating an ad hoc wifi network that your iOS device connects too. Once you get it turned on and connected via wifi (I use my iPad Pro), it’s a simple as firing and waiting for the image to appear – which happens quickly, seemingly only a fraction slower than when physically tethered. You can shoot RAW files + jpeg in camera, and the CamRanger receives only the jpeg. And you can view on your iOS device, but also, thankfully, still on the back of the camera. So no walking to and from the ipad unless you choose. I give the ipad to my assistant, or client, so they can see what I see. Occasionally I just place it in front of me, as an extra check, or show my model to feedback and adjust poses and framing.
The app is free, and you can share to multiple devices by downloading a secondary app – CamRanger Share, which is especially handy if you have multiple parties wanting to see the shots simultaneously – no more huddling around the one computer screen, or fighting with the client to see your own image. It also means you can select the images to share (or not) and use my favourite function “compare” which allows you to show two images side by side, especially useful when doing demonstrations or giving options on shots. By switching into Client Mode in app, you take away the camera controls, and like magic, it then works purely as a tether view tool.
You’re going to want to leave the CamRanger and your camera switched on where you can – otherwise you risk breaking the wifi connection and having to re-establish via settings on your device. A habit I have to get used to, turning my camera off when I’m not shooting is second nature to me in an effort to conserve battery.
Buffering seems to be minimal if you shoot at a steady pace, for my lifestyle work where I sometimes go slightly pap on myself, there is some lag. But there’s lag when I shoot like that tethered by wire. So I’ll take that on the chin.
I also like that nothing is stored on your device, and the session you are shooting on is wiped after a few hours, if you don’t re connect by opening the app. Meaning you don’t take up precious storage space, or have to see libraries of previous shoots when working with different clients (because I never remembered to wipe the last session on my eyefi app when I finished).
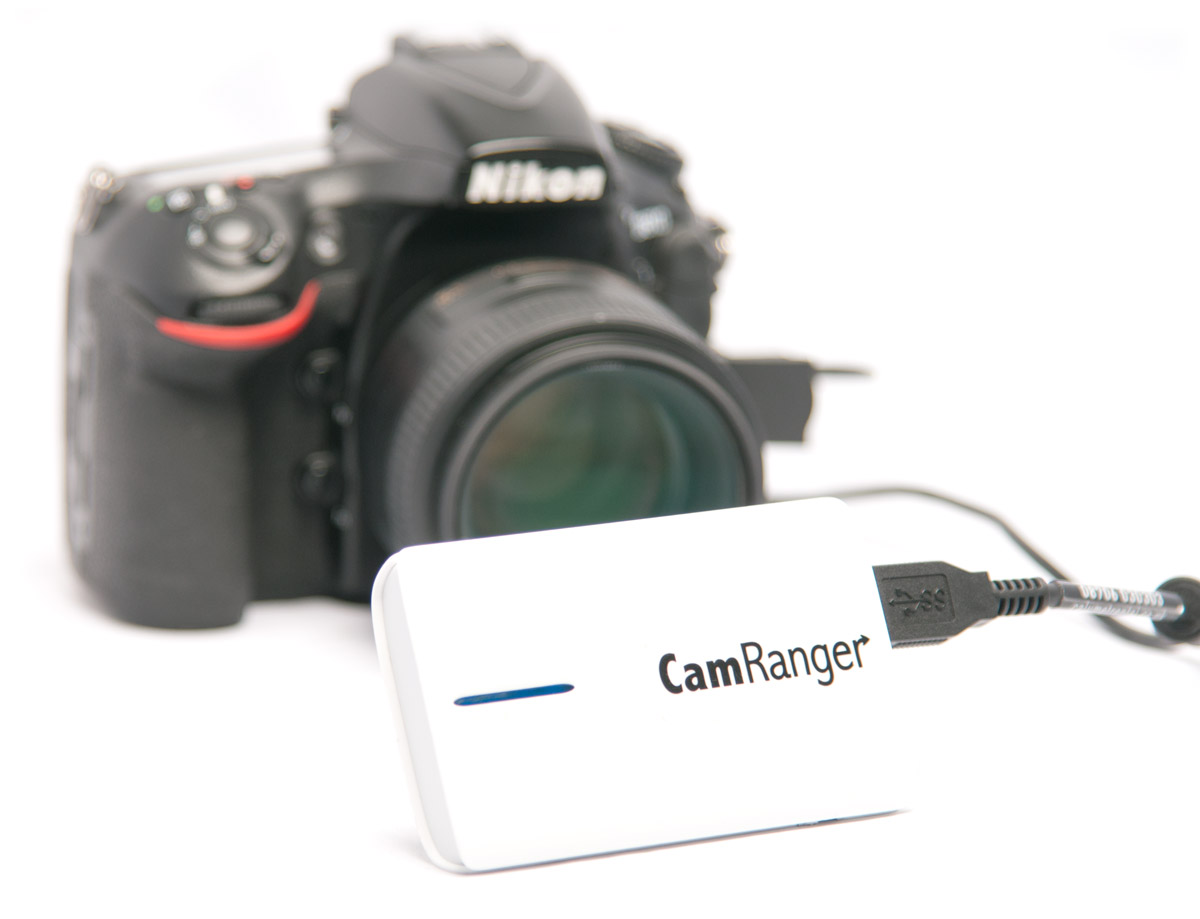
The bummer is, that the CamRanger connects via a USB cable that leaves the problem of where to put it whilst shooting. Others have suggested a longer cable giving you the option to put the small (phone sized) device in your pocket. But for me, that gives too much opportunity for the wire to be disconnected (at least with no risk of losing your images!). So my solution is to tape it to the bottom of my camera, and use the TetherTools Jerk Stopper to add an extra level of protection to the wire. That way, the CamRanger stays held by me alongside my camera. Despite my best efforts to make it look sexy using pink tape, it does not. And it’s not entirely practical – the tape can make it more challenging to change batteries and memory cards. But it’s workable.
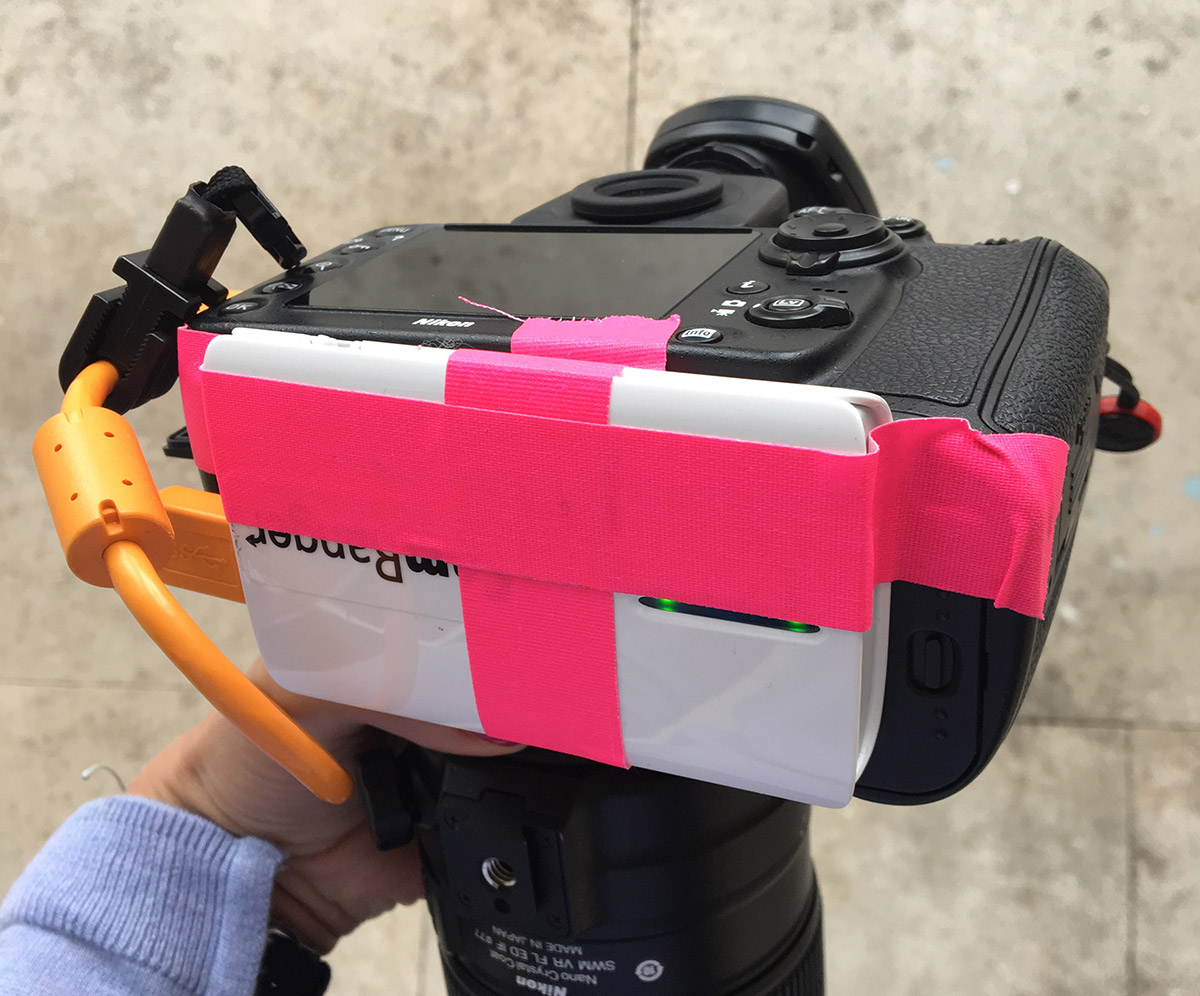
What’s that you say? TetherTools have the solution with their AirCase? Well, sort of. There Air Case actually fits in the hot shoe, or dangles from the camera on a string OR sits on an extension bar next to a flash units – but for those of us using Triggers to fire flash, that isn’t even an option. And also puts a bar across your line of view, or a unit dangling in the way of where you grip your camera. So I’m afraid the not-so-sexy solution of taping to camera is the best I’ve found thus far.
The unit runs off a battery, and if you feel the need, you can buy a spare for £30. But it charges fast, and in my experience of using it all day, hasn’t run out. But then I’m generally near-ish to some sort of power socket, and could get it charged quickly and easily. If you’re more paranoid and a little less frugal than me, and extra battery is probably worth the investment.
The CamRanger isn’t perfect, in my experience it can sometimes struggle with speed of connection in some locations, and I can’t tell you why – perhaps something to do with other Wi-Fi networks and connections? Plus, the inability to keep it near the camera without going guerilla style with camera tape doesn’t scream sophistication. But, as far as your choices go for now, it’s the best I’ve found! It’s easy to use, set up, the app is simple, the connection works and it’s portable. I can view back of camera and keep my clients happy. For me, it’s a no brainer. If you’re looking for a wireless tethering solution, this is it.
You can hire the CamRanger from Wex rental – and handily it’s provided with an iPad. Or you can spend your hard earned cash buying one. But don’t even think about getting one direct – they’re not shipping at the moment. As I said, it’s almost like they don’t want you to buy one!
You can download the full user manual here
Been using this and several triggers…..Pluto, MIOP’s and now The Arsenal and can safely recommend the Camranger to anyone with a supported DSLR with iPad Pro to get the best from it. If you own one then buy a TP Link TL-MR3040 and a couple of spare batteries, use the TP to charge the spare so you minimise downtime especially in the field, oh …. it’s less expensive. There is talk of a camranger 2 coming sometime in 2019, 5x faster, new interface and additional functions.
I use a Nikon D3S for which, although I’ve searched high and low, I gather there is no wifi CF card or CF to wireless SD adapter that fits and works (still happy to be told otherwise by those who know, of course!). From time to time, I want to be able to download a shoot to my iPhone or iPad and it looks like CamRanger might be the solution – albeit at a price.
I don’t like the sound of sessions being “wiped” after a while, though. Do they literally go on to the iOS device and disappear after a while? Is there no option to save them until the user decides to delete them?
Thanks.
Tom
The default mode shows the images on your smart device (or computer), and you can choose to auto-download images as well, so that a JPG copy is stored on there. It can do RAW, but they show a warning saying it’ll be slower, and they recommend shooting RAW+JPG. In this mode, the CamRanger will only download he JPG.
I’ve found it really handy for sending all photos on an annual multi-day shoot that we do for our company, although the software end of things isn’t as reliable as I’d like.
They have fantastic functionality, though, as you can have your CamRanger app open and downloading images, and then have another tablet or device running CamRanger Share that has a limited feature set. Give it to clients or potential customers so they can see shots as they’re taken!
The iOS apps seem to work a little better than the Android ones, and there are sometimes connection interruptions.
All of that being said, the developer is very responsive for support, and is happy to help!
A good piece about CamRanger. I use one mainly with a tall ‘mast’ camera support (up to 7m) and have found CamRanger robust and effective albeit occasionally idiosyncratic with its WiFi connectivity. That may be my iPad reception though, not the CamRanger itself. The article has prompted me to look afresh at what I can do in addition to remote ops. I may be missing a trick. Thanks for writing up your experiences. Next experiment for me will be looking at coupling CamRanger with a car rig to improve transport-related image capture without the cabling overhead (using a follow car for example – haven’t tried that yet…).
Thanks again
thanks Mark – sounds like you are really getting some good use out of it already! and try the new iPad pro if you don’t already, that really makes a difference to the viewing experience! Holly
Camera fi2 is £135 on Amazon.
It even fits on the camera hot-shoe.
Is this the real secret that is trying to be hidden?
Hi Dominic
I couldn’t find the product you mention. Do you have a link?