Fujifilm X-T2 unveiled image

Fujifilm X-T2 unveiled

Fujifilm’s new X-T2 offers super-fast autofocus, a weather-sealed body and exceptional image quality. Is this the moment to switch to mirrorless?


X-T2_BK_18-55mm_FrontLeft_White


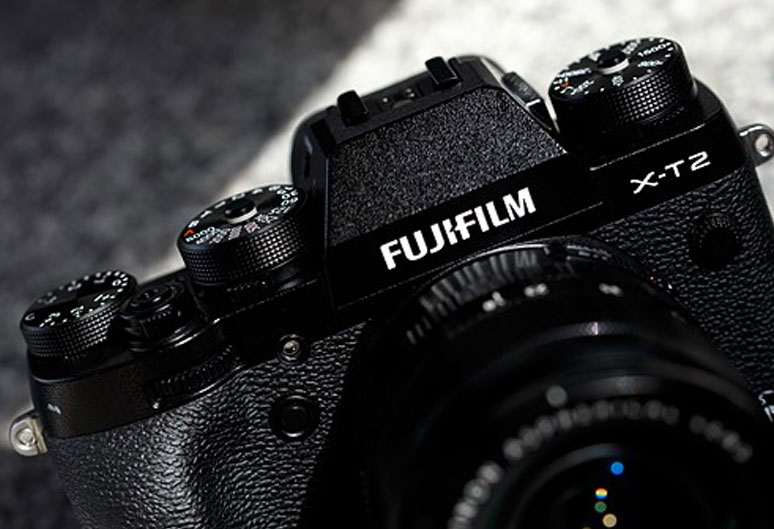
This morning Fujifilm officially announces its new flagship, the X-T2, which sees the mirrorless X brand gunning for a slice of the pro market.

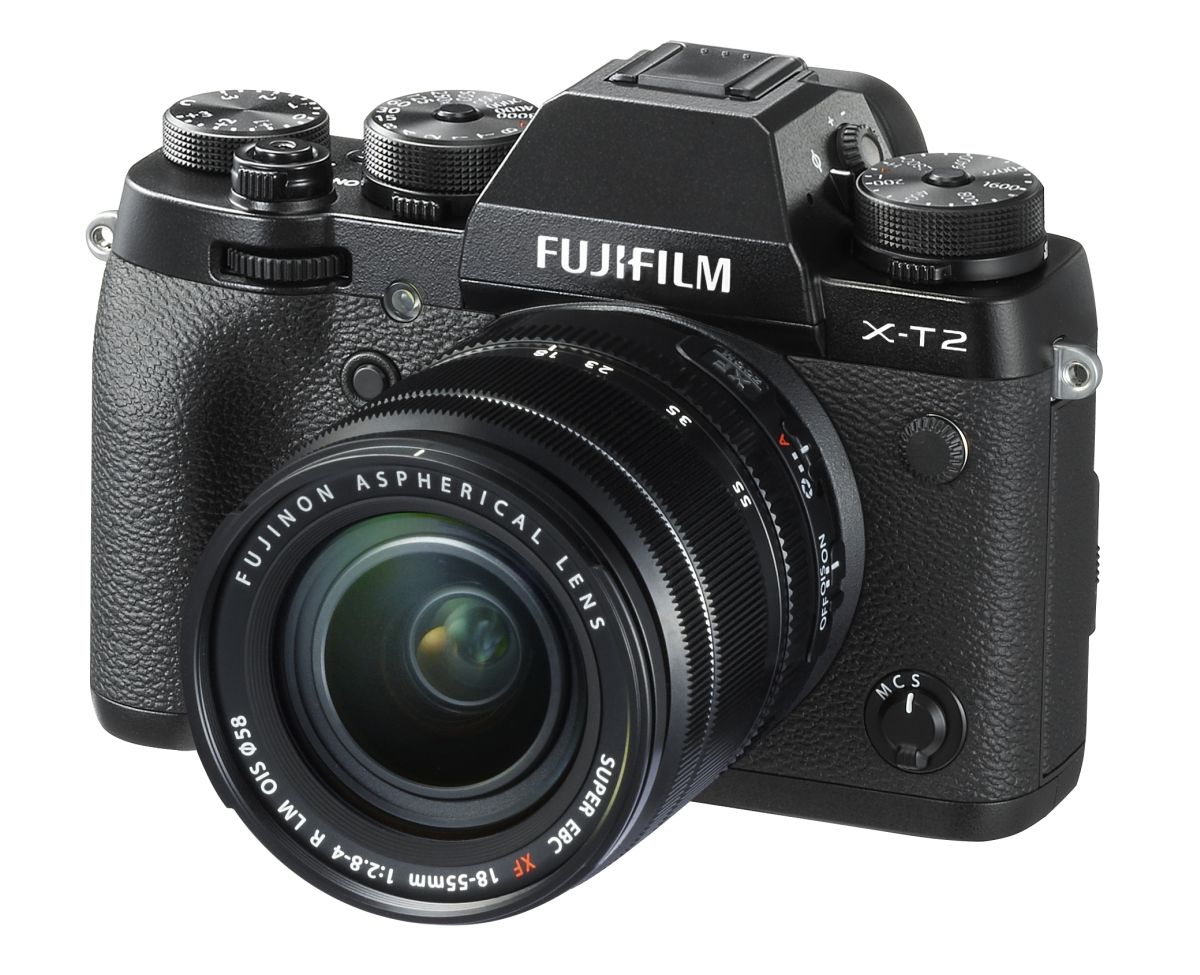
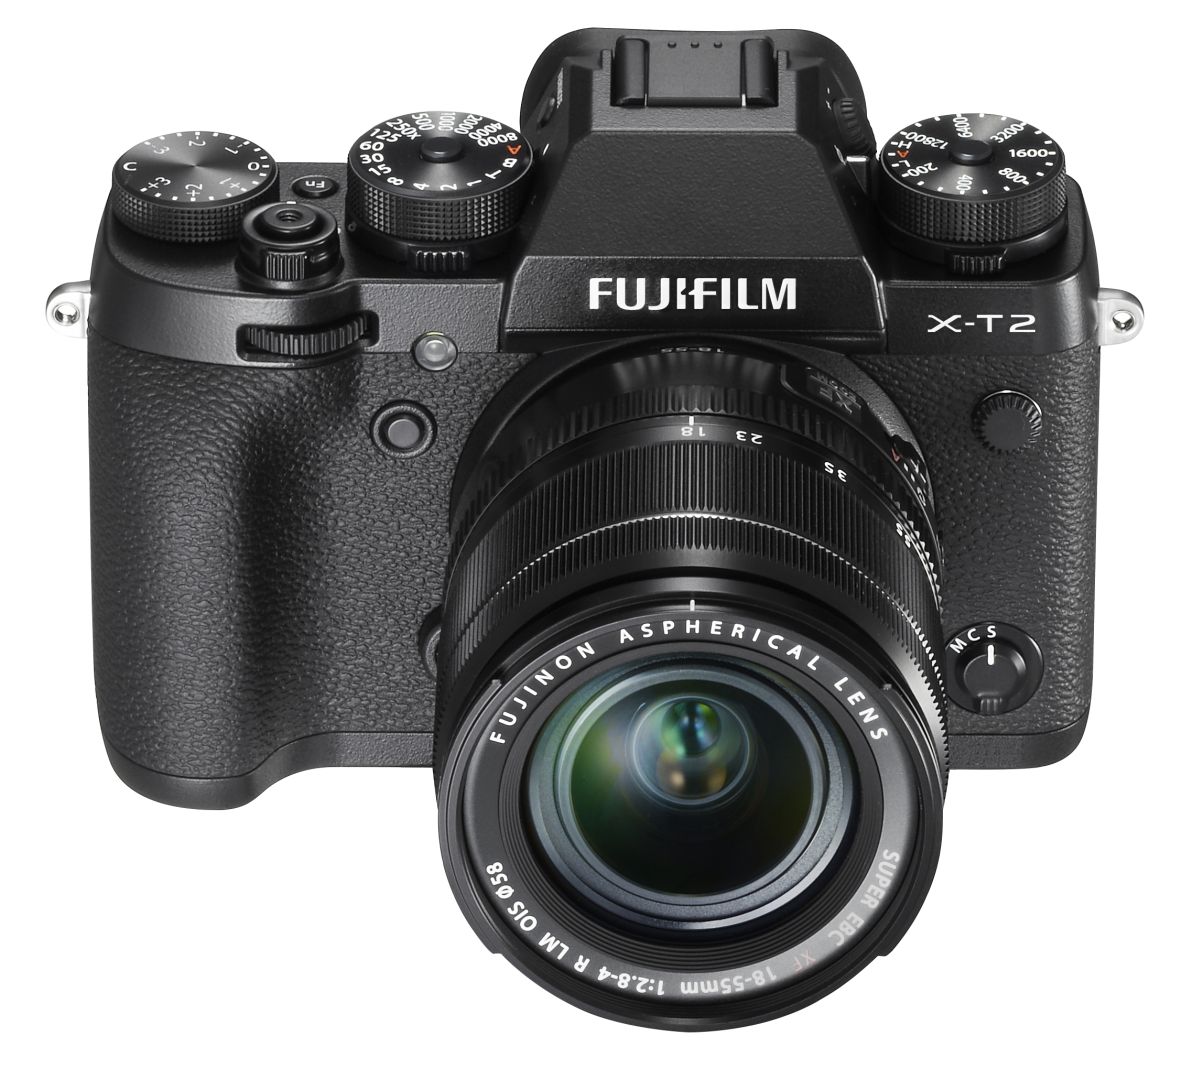
Closely resembling 2014’s X-T1 in design and build, the Fujifilm X-T2 has been upgraded with new imaging and processing technologies to deliver faster operational speeds.

It delivers a 24.3MP X-Trans CMOS III sensor, shoots 4K video with a Clean HDMI output and dramatically improves AF performance from previous models.

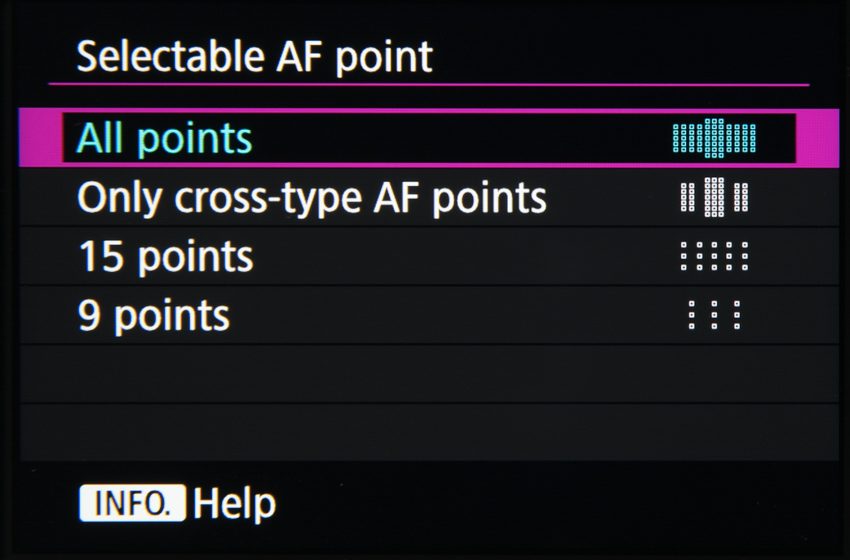
Whereas older X-series cameras utilised 49 AF points, the X-T2 ups this to 91. Approximately 40% of the imaging area is covered with phase detection pixels, allowing for fast and precise AF acquisition.

X-T2_BK_Back_White

Fujifilm says that in real terms, this enhances the X-T2’s ability to automatically focus on points of light, low-contrast objects and subjects with fine and delicate textures. This addresses previous weaknesses of phase-detection autofocus systems.

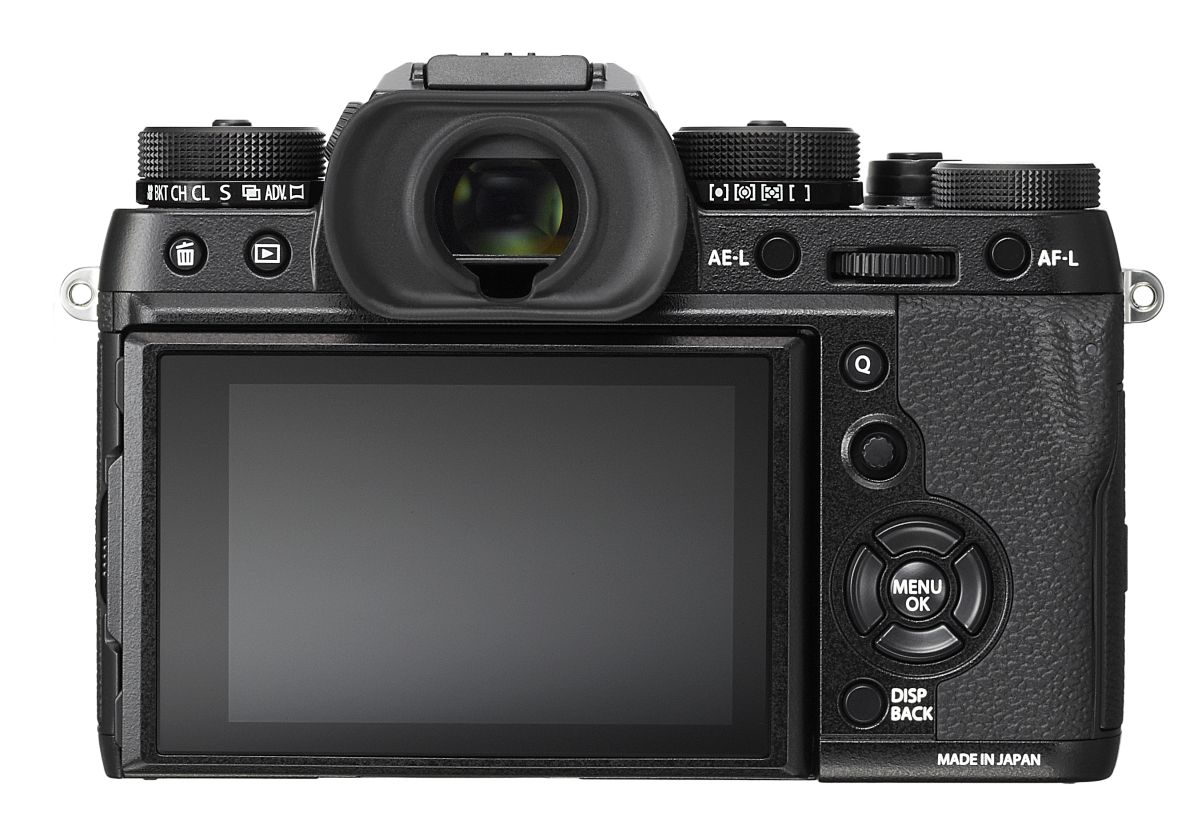
The EVF on the X-T2 has been further improved on the preceding camera. It’s a 2.36-million-dot high-resolution organic EL electronic viewfinder with a time lag delay of 0.005 seconds. Its maximum brightness is double that of previous models and it features Automatic Brightness Adjustment functionality which makes it easy to use even in strong backlighting. The EVF can refresh at a rate of 60fps, or 100fps in Boost mode (more on Boost mode below).

The body of the Fujifilm X-T2 is made entirely from magnesium alloy, meaning it is solid and durable without sacrificing lightweight portability.

Body-only, the Fujifilm X-T2 weighs around 500g. That’s about a third of the weight of a recent pro DSLR. And this is with weather-sealing at 63 points, making the X-T2 well-suited for rough outdoor work.

X-T2_BK_18-55mm_frontTop_white

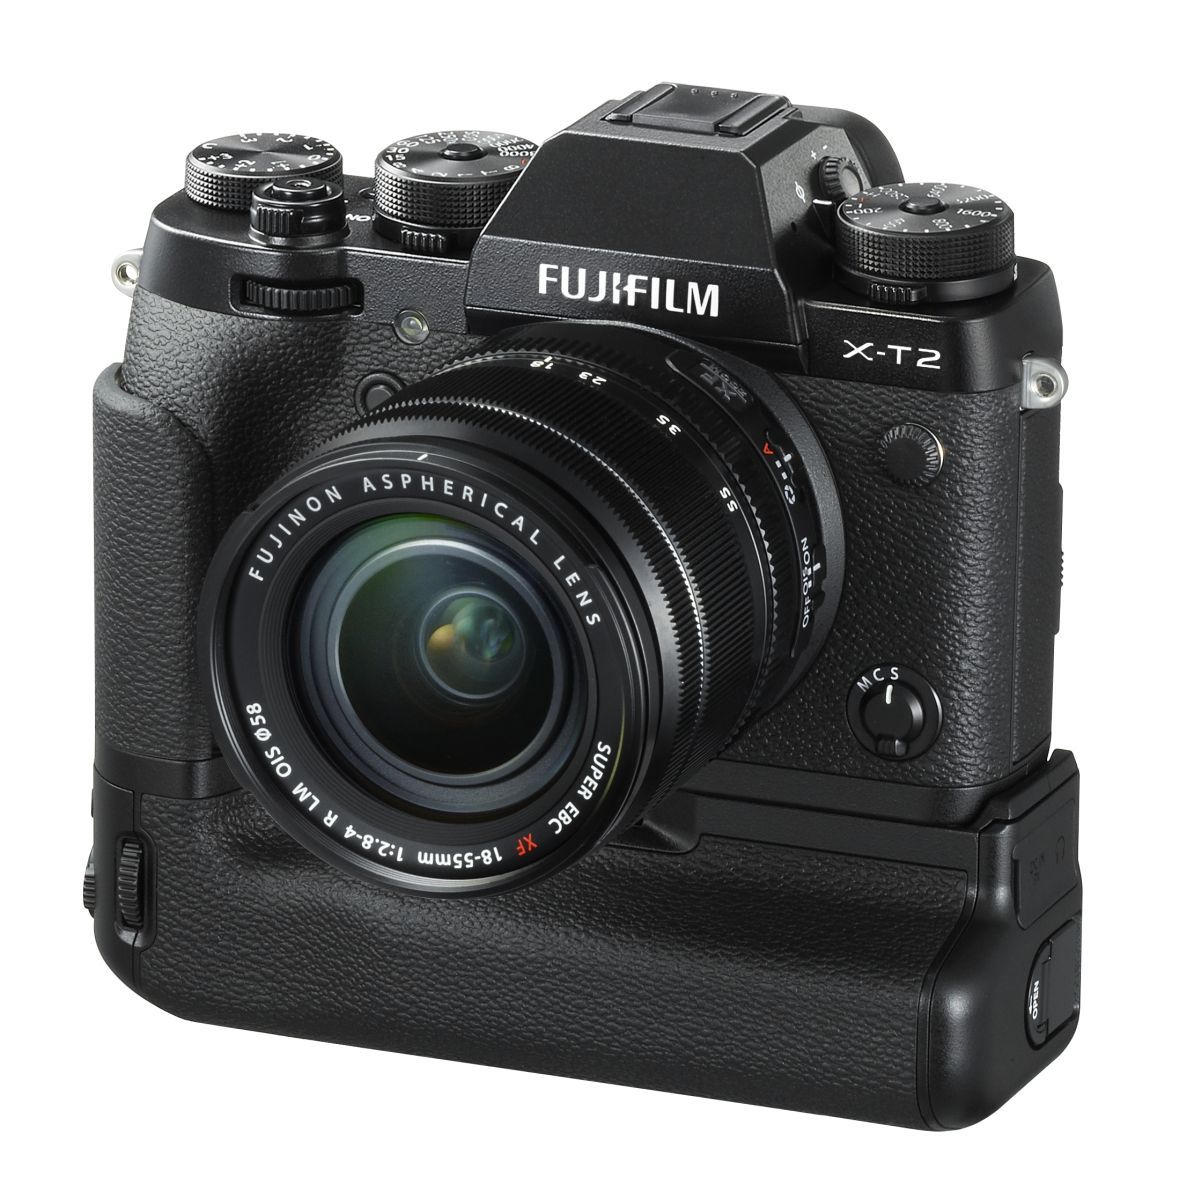
A new battery grip, named the Vertical Power Booster Grip or VPB-XT2, is to be released simultaneously and further cements the XT-2’s status as a serious option for the pro.

Packing in two extra batteries, the VPB-XT2 increases the Fujifilm X-T2’s shooting capacity to approximately 1,000 shots per charge, and its 4K recording duration to a maximum of thirty minutes.

The grip also features a selection of buttons (including shutter release, focus lever E-L button, AF-L button, command dials, Q button and Fn button) designed to make the X-T2 as easy to operate vertically as it is horizontally. The grip also features the same extent of weather-sealing as the X-T2 itself.

With the grip attached, the photographer can activate the previously mentioned ‘Boost’ mode. This uses the extra power from the additional batteries to improve the X-T2’s overall performance. In real terms this means faster continuous shooting and shorter shooting interval (up to 11fps with the mechanical shutter; 14fps with the electronic shutter), shorter shutter release time lag and blackout time.

X-T2_BK_VPB_18-55mm_frontLeft_Whitethumb

For more details, or to place an order, contact Fixation sales on 020 7582 3294, or by email at sales@www.fixationuk.com.

What’s your view? If you’re a DSLR user, does the X-T2’s spec sheet tempt you to start looking at mirrorless? Let us know in the comments.


Fujifilm X-T2 key specifications:

  • 24.3MP X-Trans CMOS III APS-C sensor
  • Dual SD card slots
  • Native ISO 200-12,800; extended ISO 100-51,200
  • 48-inch, 2.36-million-dot colour LCD viewfinder offering 100% coverage. Magification 0.77x; eye point approx. 23mm; built-in eye sensor
  • 3-inch, 1040k-dot, three-directional tilting LCD monitor
  • 14fps continuous shooting with electronic shutter; 11fps with mechanical shutter (only when fitted with VPB-XT2
  • 4K 3840×2160 movie recording
  • Rechargeable battery NP-W126S (Lithium-ion type)
  • 132.5 mm (W) X 91.8mm (H) X 49.2mm (D) (Minimum depth: 35.4mm)
  • 507g (including battery and memory card); approx. 457g (excluding battery and memory card)
  • 340 frames per charge (approx. 1,000 when fitted with VPB-XT2 and shooting in Normal mode)


CLOSE-UP: SONY A7S II VIDEO OPTIONS image

Close-up: Sony A7S II Video Options

We take a closer look at the video functionality on the Sony A7S II

Sony A7S II 4

Sony’s A7S II has fast become one of the most attractive options for the videographer from all current mainstream camera systems. In this article, we take a closer look at the wealth of functionality it offers for video users.

First – what is it?

The α7S II is the successor to the α7S compact system camera announced in 2014. It currently joins the α7 II and the α7R II in Sony’s full-frame mirrorless lineup, the former being a relatively affordable all-round option with a 24MP sensor and the latter camera’s 42MP sensor making resolution its priority (hence the ‘R’).

The α7S II, meanwhile offers the same 12.2MP pixel count as the model it updates, although Sony is said to have revised the circuitry and processing to enable better noise control.

Video resolution

The camera records 4K footage in the 4K UHD format (3840×2160) in contrast to the DCI 4K resolution of 4096×2160. The fact that the camera records 4K video footage is not in itself that special. After all, aside from pro-grade video cameras, this is now being offered by many other interchangeable-lens models, as well as compacts, GoPro action cameras and a growing number of smartphones. What sets the Sony’s α7S II apart from more mainstream models are two things: the way this is captured and the tools the videographer has at their disposal at every stage of the shoot.Sony A7S IISony states that the camera records video with full-pixel readout to improve quality and suppress aliasing artefacts such as moire, and this is the case whether you’re recording video in 4K or Full HD. This process means the sensor takes information from every pixel before the image processor downsamples it to 4K (or HD) resolution. This is in contrast to binning, where the values of multiple pixels are combined into one at the sensor level to boost the signal-to-noise ratio, and line skipping, where certain rows or columns are ignored.

Sensitivity

The ‘S’ in α7S II stands for sensitivity, and it’s this that made most of the headlines upon the camera’s announcement. When capturing videos, the camera’s sensitivity stretches over a respectable range of ISO 100-102,400, although this can be boosted to an option equivalent to ISO 409,600 when required.Sony A7S II

Codecs

The AVCHD codec that Sony has previously used for video is maintained on the α7S II, although this is joined by the more recent XAVC S codec. Based on the MPEG-4 AVC/H.264 format, the XAVC S codec is used to record 4K footage at 25fps, at either 60Mbps or a higher-quality 100Mbps, and stores this as an MP4 file.

The camera can also record Full HD footage where the higher resolution of 4K is not required, at frame rates between 25fps (50Mbps) to 120fps (up 100Mbps) for slow-motion-video recording, using the XAVC S codec. When shooting at the 120fps setting (or 100fps in PAL), the frame is cropped by a factor of 2.2x.

Sony A7S II

Recording internal and externally

Unlike the previous α7S, which required an external recorder to actually record 4K footage, the α7S II follows the α7R II in being able to do this internally. You can, however, use the Dual Video REC option to output clean (uncompressed) 4K video through the HDMI-out to an external recorder, while recording 4K footage to a memory card inside the camera. You can also use this to record XAVC-S and MP4 or AVCHD and MP4 video to the memory card.

There is another benefit to recording through the HDMI output through to an external recorder, namely 4:2:2 chroma subsampling. When recording 4K or Full HD video internally, chroma subsampling happens at 4:2:0. However, one caveat is that, when outputting 4K footage to a recorder, the rear display goes dark.

You can record video continuously for around 29 minutes at a time, although this varies with temperature, with higher temperature shortening this. Should the sensor get too hot while recording video, a warning will appear on the display to indicate that it should be stopped.

Gamma and Picture Profiles

The α7S offered the S-Log2 option for recording video, this is joined by the S-Gamut3.Cine/S-Log-3 and S-Gamut3/S-Log3 alternatives on the α7S II.

Sony states that these options offer better tonal reproduction in shadows to mid greys, with 14EV stops of dynamic range. This latitude potentially makes it better when it comes to editing footage.

Sony A7S IIOrdinarily, this footage would appear flat and lacking in contrast on the rear display, making it hard to accurately assess focus and exposure. This is where the Gamma Display Assist option steps in; this uses the Rec.709 standard to provide the user with a more natural rendition of recorded footage when the camera is set to either the S-Log2 and S-Log3 settings.

Sony has also revised the previously seen Zebra function to make it easier to gauge correct exposure, whether or not you’re shooting in one of the Log settings.

Sony’s Picture Profiles allow you to specify how footage is recorded with respect to the colour, gradation and so on. This gives you the control to either get the footage right in camera for immediate use or to create the most appropriate file for grading.

Audio

As we’d expect from a camera targeted towards professional video use, the α7S II has both built-in stereo microphones and the option of attaching an external one through a 3.5mm port at its side.

Sony A7S II

There’s also a port for attaching headphones so that you can monitor audio while recording. A separate control allows you to choose whether to have audio levels displayed on the monitor.

You can disable audio recording where not required and there is also the option of a wind noise filter, which is effective with the in-built microphones (ie not external ones).


Other advantages

One of the other major advantages of the α7S II over other models is its 5-axis image stabilisation system, which works over pitch, yaw and roll, as well as shifting in vertical and horizontal directions. The fact that this is located at the sensor gives it the benefit of being compatible with all mounted lenses, which is just as well as the camera can accept a range of lenses from other manufacturers via adapters.

Focus peaking is also on hand for those wanting to use manual focus. This gives you the option to change colour between red, yellow and white (which you may want to change depending on what it is you’re recording), as well as the peaking level, which can be set to high, mid and low settings.

The camera also offers an Auto Slow Shutter option. When this is enabled, shutter speed is reduced when the camera deems necessary in order to better balance the exposure during video recording. Time coding support is also provided should you wish to use it.

Sony A7S II 1

HANDS-ON WITH THE CANON EOS 1D X MARK II: PRO SPORTS PHOTOGRAPHER DICKIE PELHAM

Hands-on with the Canon EOS 1D X Mark II: Pro Sports Photographer Dickie Pelham

We grab a quick chat with pro sports photographer Dickie Pelham about his time with the latest Canon flagship DSLR

FC Barcelona vs Arsenal. Champions League Round of 16 2nd Leg. Pic Richard Pelham. 16.03.16. Luis Suarez celebrates his goal.

All images in this post were taken by Richard Pelham on the Canon EOS 1D X Mark II

Pro sports photographer Dickie Pelham has had the opportunity to test out a pre-production sample of the EOS 1DX Mark II. Chief sports photographer for The Sun newspaper, he’s been using the camera in a variety of situations, from fast-paced football games and boxing matches to detailed studio work.

We managed to grab a little time on the phone with Dickie, as he headed to Manchester for his next job, to chat about his experiences with the camera. For a more technical breakdown of some of the EOS 1D X’s features, take a look at Matt’s close-up examination of the autofocus system. For a quick rundown of Dickie’s first impressions, read on…


IBF World Featherweight title LEE SELBY v ERIC HUNTER . Pic Richard Pelham

First impressions

Dickie says the first aspect of the EOS 1D X Mark II that impressed him was how much better it coped at high ISOs and in low light, which is a key factor when you’re shooting at ultra-fast shutter speeds.

‘You can really crank the ISO up on it,’ Dickie says. ‘And you don’t get any banding in the blacks, so you can really give it some. When I’m shooting boxing I can see beads of sweat coming off the boxers that aren’t disappearing into the background. On the 1D X Mark I you might not have got that.’

In the release announcement, Canon made much of the EOS 1D X Mark II’s beefed up autofocus, and in using the camera Dickie has found that the firm’s claims were certainly not exaggerated.

‘Autofocus is much, much better. It’s definitely been overhauled—it’s a lot faster, it locks on faster and stays locked on as well. I use it on the spot mode with the outer points as well, and it’s very nice.’


Leicester v Everton Barclays Premier League 7/5/16 Pic Richard Pelham.

Dickie says that while he was blown away by the RAW results achieved with the Mark II (the words he used to describe them were: ‘Wow. Very, very good’), it was also important to note that the JPEGs it produced were also of exceptional quality – a necessary feature for sports work.

All this was nicely complemented by another headline feature, the improved motor drive which allows the EOS 1DX to shoot at blistering maximum frame rate of 16 fps.

‘I slowed it down to twelve frames per second,’ Dickie says. ‘That motor drive is just so beautiful, and so responsive. The motor drive makes it a different camera completely – it feels beautiful to fire up.’

He also found that the streamlined operational speeds were a welcome boost to workflow.

‘File transmission is definitely, definitely faster than the 1D X,’ he says. ‘It makes a big difference as well when you use the new CFast cards – I was lucky enough to get some cards out of Lexar to try it with, and they were very, very good for workflow.’

ANTHONY JOSHUA V CHARLES MARTIN Ibf Heavyweight Championship of The World THE O2 09/04ƒ/2016 Pic Richard Pelham

While this is of course hugely useful for sports and news photographers who need to get work done quickly, faster image transmission will be welcomed by snappers of all disciplines.

‘I was recently doing a big, big studio job, and we had 4,000 images to handle and caption and it just got done so quickly,’ Dickie says.

Getting used to the camera

We suggest it sounds very much like Dickie finds the camera not only useful from a technical standpoint, but also genuinely enjoyable to shoot with?

‘It is, yes,’ he says. ‘Also, a couple of people have said to me that some of their lenses in the past have been a little bit woolly, and now with the 1D X II they have gotten a lot sharper. And I have noticed that my 70-200mm is a lot sharper now that I’m using the Mark II. So maybe the camera complements the lens.’

Carl Frampton v Scott Quigg IBF and WBA Bantamweight Championship of the world . Pic Richard Pelham.

Part of the enjoyment of the camera also sprang from the parts that Canon hasn’t overhauled. Dickie says he appreciates the “if it ain’t broke” approach that the manufacturer has taken to the menu system.

‘The menu has not changed one bit, so really you just take it out of the box and it’s like using an EOS 1D X Mark I,’ he says.

‘Old gits like me can’t be bothered to read manuals! You’ve got football mode, you’ve got cricket mode – you stick it on Number One and get on with it.’

Dickie switched to the original EOS 1D X two years ago, and while he says he’s never regretted that decision, the EOS 1D X Mark II has enough improvements to make the upgrade a no-brainer.

‘This camera has definitely gone up a gear,’ he says.

Leicester v Everton Barclays Premier League 7/5/16 Pic Richard Pelham.

Dickie Pelham is chief sports photographer for The Sun. He can be found on Twitter @DickiePelham and at his website dickiepelham.com.


Close-up: Canon EOS-1D X Mark II Autofocus System

Close-up: Canon EOS-1D X Mark II Autofocus System

The Canon EOS-1D X Mark II arrives with a revised 61-point AF system – we take a closer look.

Canon EOS-1D X II

Canon has refreshed its pro-level DSLR proposition just in time for the Olympics, and as a camera aimed at the sports and action photographer, a lot of focus has been placed on its focusing system. This article looks at the key things it offers as well as what’s changed from the acclaimed EOS-1D X it replaces.


The Basics

The EOS-1D X Mark II is equipped with a High Density Reticular AF II system, with 61 points in total and 41 of these being cross type. The remaining 20 have vertical line sensors, which means they are capable of detecting horizontal lines.

Canon states that, by moving the points further away from each other than before, it’s increased the array’s vertical coverage by 8.6% in the central bank of AF points and 24% in the left and right banks over the EOS-1D X’s system. It’s also boosted the performance of the AI Servo AF option so that it notices any sudden changes in subject-movement speed better than before.

Five central points – namely the central point and the two above and below it – are dual-cross-type points. This means that they have both vertical and horizontal sensors, as well as a pair arranged in a cross that are at a 45degree angle to these (essentially forming an asterisk), and these are sensitive down to fƒ/2.8.

All 61 points remain operational when a lens with a maximum aperture of f/8 is used, with the exception of five (mainly macro) lenses. This is an improvement of the f/5.6 limit on the EOS-1D X and useful to know if you wish to use the camera in conjunction with maximum aperture-reducing teleconverters. Additionally, 21 points remain cross type with such a combination.

The most central AF point is sensitive down to -3EV in One Shot AF, which bodes well for low-light shooting. This is an improvement on the -2EV central-point sensitivity on the EOS-1D X.

As on previous models, when using the AI Servo mode, the camera allows you to select one of six cases – subjects moving erratically, subjects accelerating or decelerating quickly and so on – to match the subject you’re shooting, with the option to fine-tune individual parameters such as tracking sensitivity.

Canon EOS 1D X AF System


AF Microadjustment

As with most pro-grade DSLR bodies, the EOS-1D X II allows for the fine adjustment of a lens’ focusing position, should you find a particular camera and lens focusing slightly behind or in front of the subject.

Canon EOS 1D X AF 1

As with the EOS-1D X, you can store up to 40 separate adjustments, with separate corrections for wide and telephoto settings when adjusting zoom lenses. Helpfully, the corrections are remembered by the serial number of the lens rather than just its type; theoretically this means you can adjust a number of the same model of lens and the camera will remember the appropriate amount of correction for each specific example, rather than have it be confused by the two different versions of the same optic.


AF during burst shooting

The EOS-1D X was no slouch with burst shooting, managing to maintain a rate of 12fps with autofocus and auto-exposure for up to 180 JPEGs or 38 Raw images. When using live view this figure increased to 14fps, albeit with the mirror locked up and focus and exposure fixed to that of the first frame in the sequence. Nevertheless, Canon has boosted this further here, giving a 2fps advantage to each mode.

With the EOS-1D X Mark II it’s possible to fire at 14fps with both autofocus and auto-exposure for up to 170 14bit uncompressed Raw frames, or an unlimited number of JPEGs, and 16fps in live view with the mirror locked up and focus and exposure once again fixed to the first frame.

Canon credits these increases to the two DIGIC 6+ processors that drive the camera, as well as a new mirror drive system, although in order to achieve the deepest burst depths you need to use a CFast 2.0 card (the camera accepts both CFast and CompactFlash media).


AF during movie recording

Aside from the option of 4K video recording, of the most significant changes between the EOS-1D X II video options and those in the model it replaces is that Dual Pixel CMOS AF technology now allows for continuous focus while recording videos. This is the first time the system has been implemented on a full-frame EOS body, having previously been included in a number of more junior APS-C-based models.

Canon EOS 1D X AF System

This can have its tracking sensitivity and focusing speed adjusted to match the subject being captured, and you can also program the camera to track faces if you happen to have people in the frame. This is also one area where the benefits of the camera’s touchscreen make themselves known. Although you can choose a focusing position through the more conventional controls, it’s possible to instruct the camera where to focus through the touchscreen. Doing this while recording also allows you to move focus between two points with ease.


AF Area Selection options

As with the EOS-1D X, the new model offers a broad choice of AF Area Selection modes. In addition to focusing automatically with either the whole array, a standard single point or a small pinpoint for more precise focus, you can program the camera to focus with and display the four adjacent points around a selected point to form a cross, or even the remaining four points next to these to form a 3×3 box.

The Zone option allows you to select one of nine separate areas of the array for focusing, while a new Large Zone AF option lets you specify which one the three banks – central, left and right – you want to use. So, you can opt for the central bank, for example, if your subject is always in the centre of the frame, preventing the camera from seeking focusing elsewhere as it may otherwise be tempted to.


AF point illumination

You can adjust the brightness of the focusing points in the viewfinder over two levels, which may help when capturing certain subjects.

Canon EOS 1D X AF 2

You can also now opt to have the relevant focusing points illuminated as you focus, so that you can continue to see these once focus has been confirmed. Usefully, when using AI Servo to four continuously, the camera can also keep these points illuminated as long as your subject is in focus.

Canon EOS 1D X AF 11

Another useful feature carried over from the EOS-1D X is the option to light up all cross-type points at the touch of a button so you can tell which are most sensitive in the array. This may find itself to be particularly useful when using a lens with a relatively slow maximum aperture, which may limit the number of cross-type points available.


New metering sensor

Canon has eschewed the EOS-1DX’s 100,000-pixel RGB metering sensor for a new 360,000-pixel RGB-IR alternative here, and also paired it with its very own DIGIC 6 processor. So how does this help focus?

Canon EOS 1D X AF System

Canon reckons the combination boosts the camera’s chances of recognising the subjects faster than before, which in turn means that it can focus and meter on them more precisely and in less time. This advantage is also said to benefit the Intelligent Tracking and Recognition system (iTR) when keeping a lock on a moving subject.


Other useful options

The camera presents many further useful focusing options. One of these is that you can register a frequently used AF point and program a specific button to activate it on demand.

Canon EOS 1D X AF System

It’s also possible select whether you want the spot metering system to stay with the central AF point or continue to work with any other points you choose.

Canon EOS 1D X AF System

You can also configure the display to show only a limited number of points, or even just the cross-type points.

Canon EOS 1D X AF 3

You can customise the body and certain lenses so that buttons access focus-specific functions of your choosing.

Canon EOS 1D X AF 10

Thanks to the inclusion of the Intelligent Viewfinder II, you can even choose exactly where to have AF status display in the viewfinder.

Canon EOS 1D X AF 9


Tether Tools in action

Tether Tools arrive at Fixation

tether-tools-full-setup-16-ed

Once solely the province of studio and fashion photographers due to the bulk of the kit involved, tethering is now portable enough to be achieved by photographers in any discipline.

Tether Tools offer some of the most comprehensive tethering packages around. Known for their distinctive orange cables, Tether Tools have come up with a huge number of innovations for making tethering easier and more secure.

These include the JerkStopper Camera Support (pictured below), which provides extra security to stop the cable from coming loose from the camera, and the Tether Table Aero System, which provides an all-in-one platform for tethered photography on the move.

cu5451 & JS020-jerkstopper-

We’re delighted to announce that we are now stocking Tether Tools products for you to try in the Fixation Showroom.

In the UK, distribution of Tether Tools products is handled by Hardy Haase of Flaghead Photographic. He’ll be coming into the Fixation showroom next week to provide a demo of the products on offer. As a longstanding Tether Tools enthusiast, Hardy is well placed to give us the rundown of how the products work.

‘I was using their tethering products long before I became the distributor,’ Hardy tells us. ‘They were recommended by several of my customers, all professional photographers. The cables proved to be the most reliable I had ever come across.’

Until you try tethered shooting, it can be difficult to know whether it’s appropriate for your workflow. The key with Tether Tools, according to Hardy, is that it’s simple to pick up and get to grips with even if you’ve never tried tethered shooting before.

‘No matter if professional or enthusiast, Tether Tools products make the process easy and reliable,’ says Hardy. ‘Photographers who are new to tethered photography will find everything they need to know on the TT website with step by step instructions on how to shoot tethered with their equipment.’


rstaa2-rock-solid-tether-tools-crossbar-side-arm-laptop-camera


More about Tether Tools…

We also spoke to Josh Kenzer from Tether Tools, to learn about what’s on offer and what we’ll be seeing in the future. Read on for our quick Q&A to find out more…

How would you briefly sum up Tether Tools products?

Josh Kenzer: Tether Tools offers a wide variety of products for all types of photographers. We are most known for our high-visibility orange tether leads, but we actually got our start with the Tether Table Aero. The Aero table allows photographers to set up a mobile workstation using stands or tripods that they may already have.

Besides for tethering, Tether Tools offers a wide range of camera, tablet, speed lights, and monitor mounting solutions. This helps photographers customize and create not only the best mobile workstation for tethering, but puts their gear where they want it, when they need it.

We have also recently introduced a line of power solutions to help keep cameras and gear powered while shooting.

What, in your opinion, do Tether Tools products achieve that other similar tools do not?

JK: Tether Tools prides itself on build quality and professional appearance.  We’ve listened to what photographers need and built products to meet those needs. Our products are rock solid and look great.

What kind of photographer would benefit most from using Tether Tools?

JK: For the tethering line of products, any photographer that needs to know they got the shot exactly correct whether that is in the studio or out on location. Typically, this would be commercial, fashion, architectural, and product photographers. We also see many macro and landscape photographers using our gear to shoot tethered.

For our mounting products, any photographer that needs easy and innovative ways to mount any type of gear on set. This includes the photographers listed above as well as wedding photographers who need to mount speed lights.

Our power solutions can benefit just about any photographer who needs to maintain power during a shoot. This includes those who don’t want to invest in proprietary batteries, shoot long time-lapse, video, or runs a photo booth.

Tether Tools Range at Fixation: Full List:

  • TetherTools JerkStopper Camera Support
  • TetherTools Rock Solid Battery Pack
  • TetherTools USB 3.0 M-MicroB R/A 15 Org
  • TetherTools USB 3.0 male-micro 15 Org
  • TetherTools Pro USB 3.0 ext 16 Orange
  • TetherTools Pro USB 2.0 Male-Mini 15 Or
  • TetherTools USB 3.0 Core Controller
  • TetherTools A/C Power Supply UK
  • TetherTools Jerk Stopper Ext Lock Orange
  • TetherTools Aero Tab S2 Uni Tablet Mount
  • TetherTools Aero XDC Black
  • TetherTools Aero Traveler 16×14 Black
  • TetherTools Studio Vu Monitor Bracket
  • TethetTools Proper Wallee iPad Case GRY
  • TetherTools Secure Strap
  • TetherTools StrapMoore – Laptop P/Brick
Hi, how can we help?