Close up | Sony a9 focus modes image

Close up | Sony a9 focus modes

With its Alpha series of mirrorless cameras, Sony is playing a calculated game of wooing different types of DSLR user over to its system. The Alpha 7R cameras, for instance, boast the kind of high megapixel counts favoured by landscape and studio shooters, while the Alpha 7S series are seriously impressive low-light machines designed to appeal to those who work in video (which they have done very successfully).

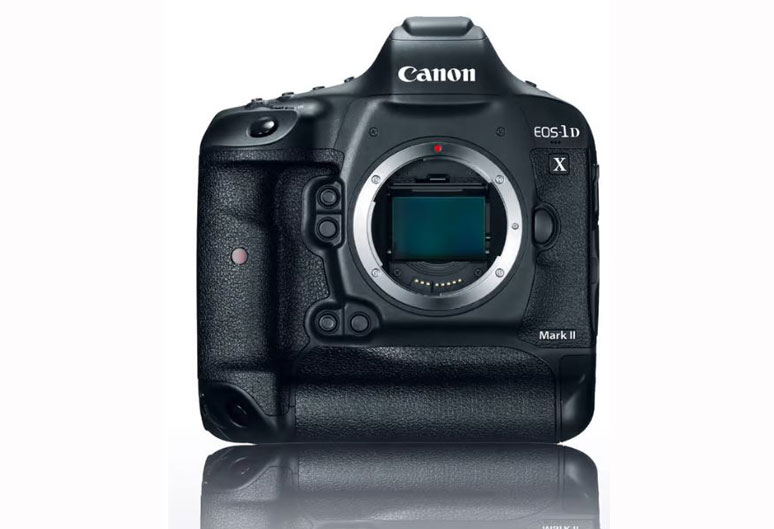
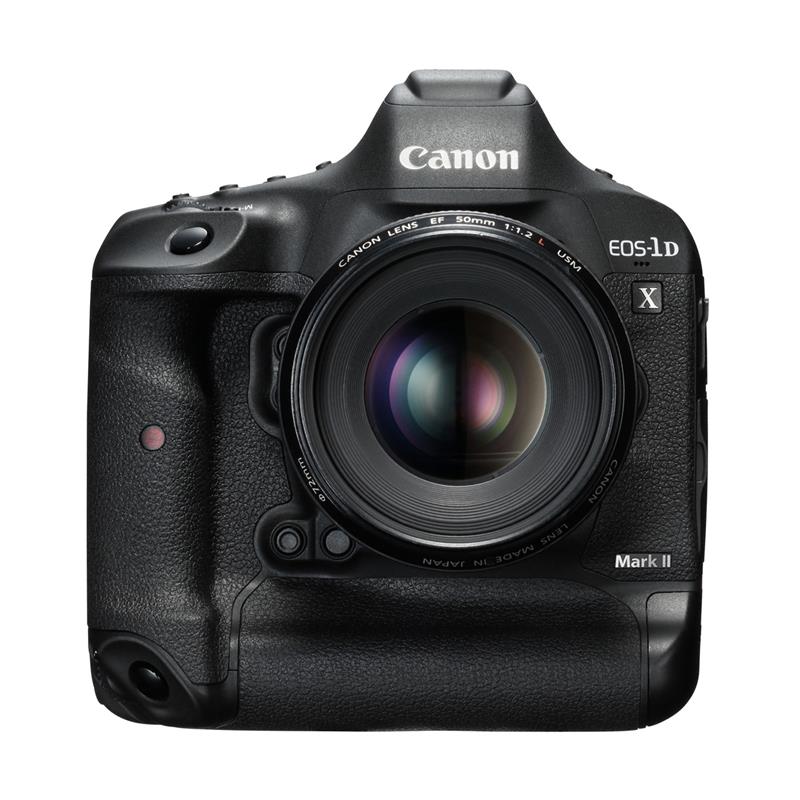
Until last year, there wasn’t much in the Sony stable to seriously tempt sports and action photographers. These are the kind of people who prize speed and accuracy above all else, the vast majority of whom you would find using cameras like the Canon EOS 1D X Mark II or the Nikon D5. That has now all changed with the arrival of the Sony a9.

The Sony a9 is available to buy from Fixation UK Ltd

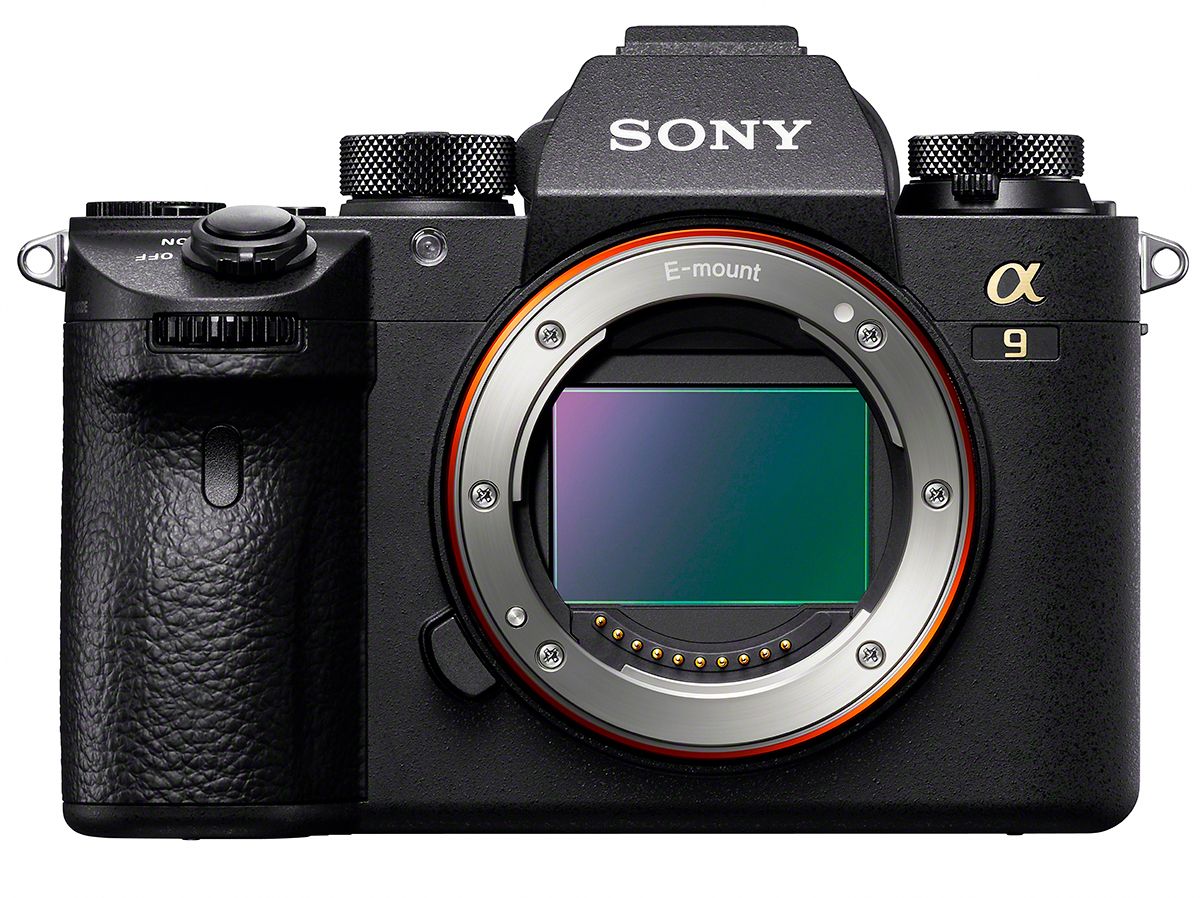
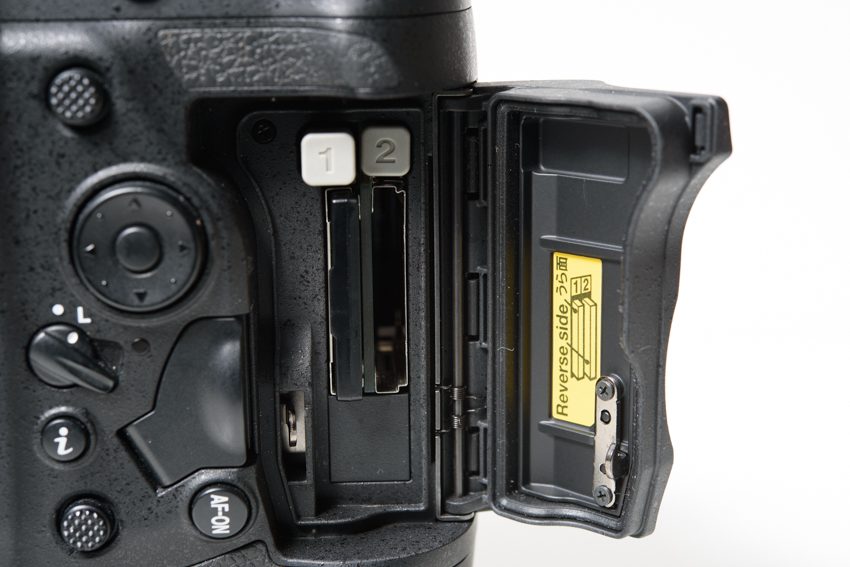
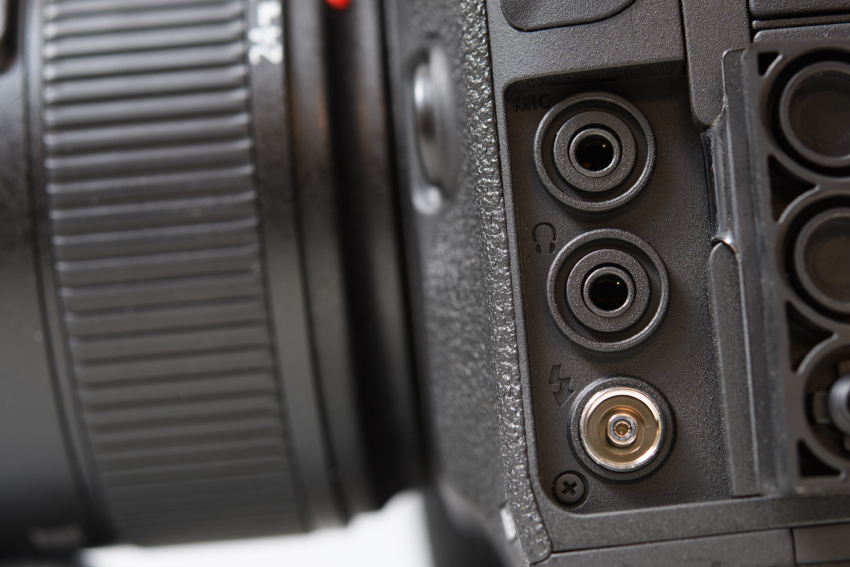
If you’re reading this, you’re probably at least somewhat familiar, so we’ll keep the recap brief. The Sony a9 is a speed demon, able to shoot continuously at up to 20fps with no viewfinder blackout, a feature complemented by its beast of an autofocus system that comes sporting 693-point focal plane phase detection points and is able to handle up to 60 AF/AE tracking calculations per second. All this is complemented by additional speed-oriented features such as a generous image buffer (241 Raws, 362 JPEGs), maximum shutter speeds of 1/32,000s, dual SD Card slots, and 5-axis in-body image stabilisation that provides a shutter speed advantage of up to 5 stops.

As you can see, the Sony a9 is a fearsome, complex tool for speed shooters. And like any complex tool, in order to get the most out of it, you have to know how to use it. That’s why we’ve put together this helpful guide to its many different focusing modes. We’ll give you an overview of each mode, and suggest some situations in which it could be put to good use.


Basic focus modes

[gdlr_row]
[gdlr_column size=”1/3″]
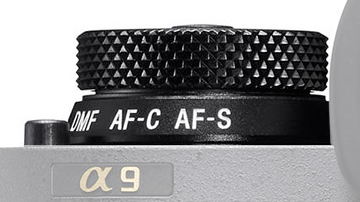
Sony a9 focus modes[/gdlr_column]
[gdlr_column size=”2/3″]Let’s quickly get the basics out of the way. The Sony a9 carries four general focusing modes, most of which you’d find on any camera of its class. They can be set using the marked dial at the top, and are as follows:[/gdlr_column]
[/gdlr_row]


[gdlr_row]
[gdlr_column size=”1/2″]

AF-S (Single-shot AF)

Focus locks in place once acquired. Useful for still subjects.

[/gdlr_column]
[gdlr_column size=”1/2″]

AF-C (Continuous AF)

The camera continues to focus when the shutter button is half-depressed. Useful for moving subjects.

[/gdlr_column]
[/gdlr_row]


[gdlr_row]
[gdlr_column size=”1/2″]

MF (Manual focus)

Focus is set manually by the user. Focus peaking can be turned on or off in the settings menu, providing a graphical representation of the focusing accuracy, and photographers can also make use of MF Assist, which provides a zoomed-in view of a selected focus point on the LCD screen and thus allows for even finer adjustments.

[/gdlr_column]
[gdlr_column size=”1/2″]

Direct Manual Focus (DMF)

A combination of auto and manual focus, DMF allows users to acquire focus with the AF system and then fine-tune it manually. No one would be using this on any subject that moves, but it can be very useful for applications like macro shooting, striking a nice balance between expediency and precision for situations where the photographer needs the plane of focus to be incredibly precise.

[/gdlr_column]
[/gdlr_row]


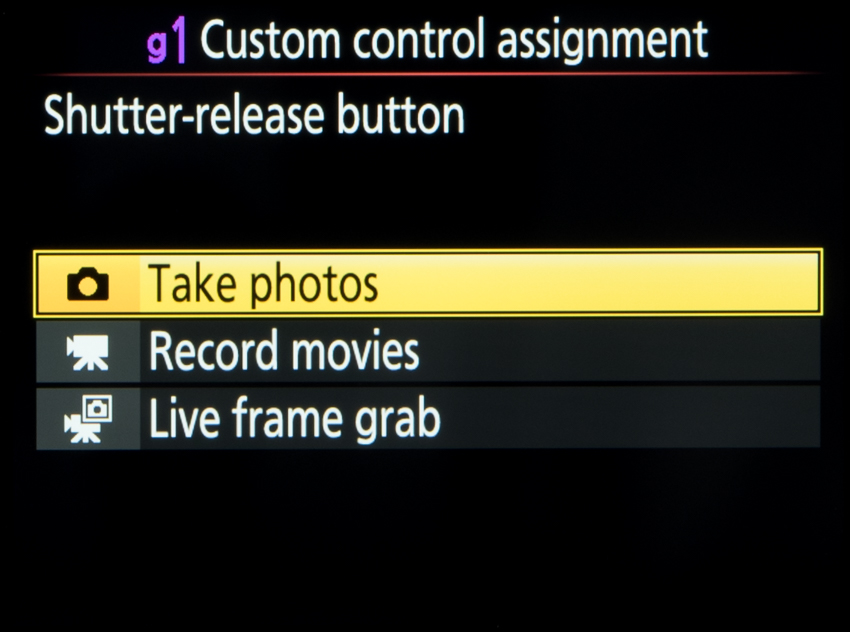
Back Button Focusing

Sony a9 rear AF button
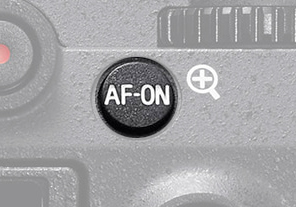
One thing that’s also worth noting before we delve into the autofocus modes is that if you don’t want to set focus with the shutter, you can set up the Sony a9 to perform back button focusing, i.e. using one of the rear buttons as the trigger for acquiring focus. This requires delving into the menus to turn off Shutter AF and then heading to the button customisation options to assign focusing to your button of choice.

While it is a bit of a pain to set up, it can be extremely useful to get to grips with Back Button Focus if you’re going to be photographing moving subjects – which, with your Sony a9, you probably are. It’ll mean your camera won’t automatically attempt to refocus if you accidentally lift your finger a little from the shutter release, and that you can recompose without losing your subject.

Autofocus

Stills shooters using a Sony a9 probably won’t be using its manual focus functions a whole lot. The camera is a speedster first and foremost, best for tracking fast subjects whipping across the frame, and that means that the vast majority of the time a stills photographer will be using autofocus.

To that end, Sony has provided an abundance of autofocus modes that cover the frame in different ways, and if you’re going to use the camera effectively, it’s very important to have a solid grasp of what these different modes do and when it’s most appropriate to use each one.

Let’s run through them.

Wide

This is the standard mode, the broadest focusing mode available. Putting the a9 on this setting tells it to use its autofocus system to search the entire frame to find a subject to focus on.

You’re going to want to use this in situations where you simply don’t know what’s going to happen – you have an unpredictable subject that’s moving erratically. However, you ideally also need this subject to be the only thing in frame, moving against a fairly uniform background. A single runner on a track, a bird in flight – these are good examples of when you might use the Wide mode. In any more complex situation than that, Wide may not hone in on what you want it to.

Zone

This is a more targeted mode. Here, the photographer uses the touchscreen or joystick to specify a rectangular segment of the frame where they want the camera to acquire its focal point. It’s useful for giving the camera a clearer idea of your intentions for a busy scene – say you want to get the player further away from you who’s likely to shoot, not the more prominent but less immediately interesting player who happens to be closer to you.

Centre

The camera uses a small, fixed rectangle in the centre for focusing. This is useful for when you’re firing off shots and simply need to focus and recompose.

This mode can be customised in the settings menu, with the option to switch on Center Lock-on AF. With this switched on, once the system acquires focus on the central point, it’ll continue to track that subject even if it moves to a different part of the frame.

Flexible Spot

This is a versatile, flexible focusing mode, and it’s well worth investing the time into getting comfortable with using it. With this mode, the photographer freely specifies the precise point where it wants the camera to focus. This can be done with the joystick, but is so much more fluid and intuitive when done on the touchscreen – simply tap the point in the frame where you’d like the focusing rectangle to go, and you’re set. Once you get comfortable with it, you can quickly focus, shoot and refocus with incredible precision. The size of the Flexible Spot can also be adjusted, with three settings available: Small (S), Medium (M) and Large (L).

This mode can also work with Lock-on AF, allowing you to track the subject that’s been acquired using the Flexible Spot.

Expand Flexible Spot

This is the same as Flexible Spot, but with a wider target area that’s designed to be a little more forgiving. It’s useful if your subject is difficult to pick out against its background.

Detection modes

The Sony a9 also comes with some focusing modes designed to make it easier to photograph people.

Face Detection

This is the standard face detection mode that comes on most sophisticated cameras (and smartphones) these days, and it can be turned on or off in the settings menu. The Face Detection modes can track faces its detected – once there’s a lock, it’ll follow the face around the frame.

What’s interesting on the Sony a9 is that it comes with a Face Registration system, which allows the user to teach the camera to recognise and prioritise specific faces in crowds. Wedding photographers in particular likely sat up a little straighter upon reading that – simply grab a quick pose from the bride, groom and other key players at the start of the day, and you’ve got some assurance that the camera will hone in on the most important people in every scene.

It’s worth noting, however, that Face Detection will not override other focus modes, so if it detects a face outside of the point you’ve specified with Flexible Spot or whichever mode you’re using, it’ll register that face (and mark it on your LCD), but won’t focus on it unless you move your point to cover it. This is useful for maintaining a degree of control over what the camera is doing. If you’d like the focus point to be entirely governed by Face Detection, you can simply set the autofocus mode to Wide, which as you’ll recall will encompass the whole frame.

Eye Detection

A more precise version of Face Detection, this does exactly what it sounds like – detects eyes in the frame, and focuses on them. It can also track a person’s eyes around the frame, and this function works very, very well [link]

This is a really useful function for portrait photographers, who need to get the eyes dead-on and are also working with very shallow depths of field. The tracking feature also expands the possibilities of a shoot – if you want your subject doing something a little more active than sitting perfectly still, Eye AF means you can track them in motion without sacrificing pin-sharp focus or your shallow depth of field.

Further reading

Sony has provided a useful chart on its website as to the specific sports and situations you might want to use different a9 focus modes for [link], but the best way to find out is of course practice! Use your a9 in different situations, experiment with its focusing modes and find out what works for you.

We hope you found this guide useful. Are there other functions of the a9 you’d like to know about? Let us know in the comments or on social media!

Canon 5D Mark IV image

Close up | Canon 5D Mark IV 4K specs for video

Canon’s EOS 5D Mark IV lists video recording as one of its main features – we take a look at what it offers the videographer.

Canon EOS 5D Mark IV

The Canon 5D Mark IV 

Resolution and frame rate

The Canon EOS 5D Mark IV is currently one of only a handful of DSLRs that records 4K quality video. This is captured in the DCI 4K format, which records at a resolution of 4096 x 2160 pixels (as opposed to the more common UHD 4K format that records at 3860 x 2160-pixel resolution).

The 5D Mark 4 RAW video setting is made possible thanks to the Dual Pixel photodiode innovation. But with double imaging comes double the usual file size of usual RAW.

The camera offers the user a choice of 24fps (23.98fps), 25fps and 30fps (29.97fps), when recording 4K footage in the PAL format. The camera also offers Full HD (1920×1080) and HD (1280×720) options, at up to 50fps.

High speed shooting at up to 100fps is also possible, and this output at 25fps (a quarter of the speed).

When set to NTSC, frame rates on offer are 30fps (29.97fps), 24 fps and 23.98fps, with an additional 60fps option when recording in Full HD. High-Speed footage, meanwhile, is captured at 119.97fps and output at 29.97fps.

Crop factor

To record DCI 4K footage without pixel binning, the camera only uses a central portion of the sensor. This requires a crop factor of 1.64x, relative to the full-frame. So, using a 28mm lens when recording 4K footage will give you an effective angle of view that’s closer to that provided by a 46mm lens.

When recording HD or Full HD footage, the camera uses the entire sensor (without a crop being applied, and so that angle of view of whatever lens you’re using will be maintained). This also means that if you find yourself limited while shooting in 4K by this, you have the option of switching to Full HD (obviously at the expense of high resolution).

Canon EOS 5D Mark IV SensorThe EOS 5D Mark IV records 4K video using a central portion of its 30.4MP sensor.

Aspect ratio

As the horizontal DCI 4K resolution is slightly higher than that of UHD 4K, the aspect ratio of recorded footage is approximately 17:9 rather than the more standard 16:9 ratio. This changes to 16:9 when recording in either Full HD or HD options.

Sensitivity

This Canon camera’s ISO range can be adjusted over a range of ISO 100-12,800 as standard when capturing 4K footage, and ISO 100-25,600 when capturing Full HD videos. In both cases this can be controlled in 1/3EV increments.

If you want the camera to automatically select higher ISOs, this needs to be enabled through the menu system beforehand. The options here allow you to set a range of ISO 100-Hi1 (51,200 equivalent) or ISO 200-Hi2 (102,400 equivalent).

This extended Lo setting, which is equivalent to ISO 50, is not available when recording 4K or HD footage. This means that in the particularly bright conditions in which you may want to use it, you will either need to stop down your aperture or use an ND filter.

Canon EOS 5D Mark IVThe camera’s ISO can be directly controlled from a button on its top plate.

File formats

The camera records in both MOV and MP4 formats and is one of only a handful with built in GPS. When recording 4K footage it employs the Motion JPEG codec, which records at a bit rate of approximately 500Mbps. When recording HD or Full HD footage, however, you have the option of choosing ALL-I and IPB compression options, with a further IPB Light option if recording using the MP4 setting.

As there is no way to record 4K footage at a different level of compression, Canon recommends using a CompactFlash memory card rated to UDMA 7 with a write speed of 100Mbps or faster. It also states that UHS-I Class 3 SD-format cards can be used, although these only guarantee a transfer rate of of 30Mbps.

If you use a slower-than-recommended memory card to record video, the camera may display a five-bar indicator as the card fills up, eventually stopping video recording. The camera will also notify you if the sensor becomes too heated through prolonged use.

Card formats

As with the Canon EOS 5D Mark III, the model is designed with dual card slots: one for SDHC and SDXC media and one for CompactFlash. The SDHC/SDXC slot supports UHS-I cards (but not UHS-II) while the CompactFlash slot supports cards conforming to the UDMA 7 specifications.

Canon EOS 5D Mark IVThe camera accepts both SDHC/SDXC and CompactFlash media.

Chroma subsampling

The camera records with YCbCr 4:2:2 chroma subsampling when shooting in 4K, and 4:2:0 when recording in HD and Full HD formats. When outputting HD footage via the HDMI output, this is set to 4:2:2.

Frame grabs

While it’s not possible to capture images while recording movies, the Canon EOS 5D Mark IV allows you to extract individual frames from 4K footage and save them as JPEG files in camera. This happens at a resolution of around 8.8MP – slightly higher than other 4K-enabled cameras on account of it recording in the DCI 4K format (rather then UHD 4K).

Touchscreen

The Canon EOS 5D Mark IV follows the EOS 1D-X Mark II in offering a touchscreen on its rear, and this can be used for a variety of purposes when recording video.

At a basic level this can be used to select options on the screen, such as ISO and the Q menu that brings up the audio recording level and volume for external monitoring although, perhaps more usefully, this can also be used for focusing (explained below).

Canon EOS 5D Mark IVThe camera’s touchscreen can be used for a range of purposes, including shifting the focusing point while recording.

Autofocus

One of the advantages of the camera’s Dual Pixel CMOS AF system is that it can continue to focus using phase-detection AF (performed on the main imaging sensor) while recording videos. This also allows for continuous autofocus while recording, with control over tracking speed and sensitivity offered to better suit your subject.

The partnership of this technology with the camera’s touchscreen allows for two key things. First, you have the option of keying the subject on which you want the camera to focus on the screen, prior to recording. It has 61 AF points selectable distributed on the viewfinder. Here, it focuses it swiftly but fluidly, much more so than with a standard contrast-detect AF system. This also means that you can use it in live view while capturing stills.

Another benefit of this is that you can use this touchscreen functionality while the camera is recording videos, which means you can shift focus from one subject to another simply by touch. This means that you don’t need to physically pull focus using the lens.

Audio

The camera is equipped with a monaural microphone, which is positioned just beneath the camera’s name badge on the front plate, although any professional that wants to record sound at its best possible quality will no doubt use an external microphone. This can be connected to the camera though a 3.5mm stereo mic port at its side.

Both wind-cut and attenuator filters are selectable through the camera and control over audio levels can be set to manual (over 64 levels) or auto options. A headphone socket is also provided for monitoring audio, and the camera allows you to adjust volume here too.

Canon EOS 5D Mark IV

The EOS 5D Mark IV is compatible with external stereo microphones such as Canon’s own DM-E1 model.

HDR movie function

A feature that appeared on the recent EOS 760D and EOS 80D is HDR Movie Recording, and this has made the cut here too. The Canon 5DMK4 video specs is designed for the same kinds of conditions as you would use it when shooting stills – ie. scenes with a naturally broad dynamic range, which may exceed the sensor’s capabilities. This option records at 60fps and outputs footage at 25fps (PAL) and 29.97fps (NTSC), although only at Full HD resolution.

HDMI out

The camera is equipped with a Type C, HDMI mini port around its side, and this allows you to output clean (uncompressed) footage to an external recorder. The only caveat here is that this is only possible at a maximum full HD resolution, as opposed to 4K.

Canon EOS 5D Mark IVThe camera is fitted with a The Canon 5D Mark iv ports: The camera is fitted with a Type C HDMI mini port, along with USB 3.0, microphone, headphone and flash-sync sockets.

Time-lapse footage

You can also use the EOS 5D Mark IV to for time-lapse recording, with the individual frames stitched together in camera and output as Full HD files.

As with the HDR movie option, this is output at 25fps (PAL) and 29.97fps (NTSC), and control is provided over the interval between each frame and the number of images captured in total. Usefully, as the camera is stitching together the time-lapse video itself (rather than just capturing the individual images), it will also inform you of the length of time required and the length of the final movie in advance, as well as whether you have enough room on your card to achieve this.

Time limits

As with other DSLRs, the maximum length of footage than can be recorded without interruption is 29mins and 59 seconds. When using the camera’s High Frame Rate mode, this is reduced to 7 mins 29 seconds.

Close Up: Canon EOS 5D Mark IV Video Settings image

Close Up: Canon EOS 5D Mark IV Video Settings

Looking at the Canon EOS 5D Mark IV for video? Here’s what to expect using our short Canon Mark IV tutorial

Canon EOS 5D Mark IV

Canon’s EOS 5D Mark IV is the first model in Canon’s long-popular EOS 5D line to feature 4K video, a feature that has been rolled out over many cameras in recent years.

An important thing to remember, though, is that not all 4K cameras are equal. Aspects like compression options, frame rates and output possibilities all vary from camera to camera, and all have an impact on the kind of footage you can produce.

If you’re thinking of picking up a Canon EOS 5D Mark IV, it’s worth knowing exactly what the camera is capable of accomplishing. In addition to the usual Canon EOS 5D picture quality, there are a host of options for video that make it a compelling buy. Here we take a look at some Canon 5D Mark IV tips for what it can do.

The Basics

Like the recently announced EOS-1D X Mark II, the EOS 5D Mark IV records in the 4K DCI (4096 x 2160) resolution, rather than the more common 4K UHD (3840 x 2160) resolution.

The difference? 4K DCI is the standard for professional cinema production and digital projection, putting out a resolution of 4,096 x 2,160. However,  4K UHD refers to Ultra High Definition and is essentially the next step up from Full HD. If you’re planning on shooting video to professional standards then 4K DCI is a must.

Canon EOS 5D Mark IV

It’s worth being aware, however, that the Canon EOS 5D Mark IV only uses a central portion of its sensor to record 4K footage (ie without pixel binning). This means that there is a crop factor of around 1.74x to consider. You’re changing the effective focal length you’re using, just as you would if you were using an APS-C-designed lens on a full-frame body.

When recording Full HD and Standard HD footage, the camera returns to using the full width of its sensor so there’s no crop factor to worry about. However, one thing to bear in mind is that the aspect ratios of 4K DCI and Full HD are slightly different, the 4K DCI being 17:9 and Full HD recorded at the more common 16:9 aspect ratio.

ISO

Canon EOS 5D Mark IVYou can set separate sensitivity ranges for 4K and HD videos, with a base ISO as low as ISO 100 and a top speed of Hi2 (equivalent to ISO 102,400). This is useful if you want to limit the maximum sensitivity to reduce noise from appearing in footage.

Noise reduction is only possible when recording footage in Full HD, and is on by default when set to the Auto exposure mode. Otherwise,  it can be adjusted over their levels for optimal noise performance. It is not possible to use noise reduction when the camera is set to record in 4K quality, however.


Autofocus

Canon’s Dual Pixel CMOS AF system has made autofocus during live view and video recording much more usable than on previous cameras, opening up new possibilities for shooting fast-paced video with accurate focusing

Best of all, the live view focusing marries perfectly with the 5D Mark IV’s touchscreen. You can simply press the screen where you want the camera to focus, and the camera will acknowledge your selection with a white box. The camera will now be able to track this the subject as it moves around the scene.

Canon EOS 5D Mark IV

You can adjust both the tracking sensitivity and speed of the Canon 5D Mark IV autofocus video if you wish, meaning it can be customised to exactly the right settings for your subject.

For more considered shooting, many videographers will no doubt be using manual focus instead. It’s worth being aware that focus peaking, a feature that’s found on an increasing number of other systems, isn’t natively available on the Canon 5D Mark IV. If you want to use focus peaking you’ll need to get hold of an external display that supports it: something like the Atomos Shogun would work well.

Exposure and lens corrections

You can use Canon’s Auto Lighting Optimiser and Highlight Tone Priority for the Canon 5D Mark iv settings when recording video, and they can prove useful for keeping your exposures balanced and your highlights in check.

You can also enable both peripheral illumination and chromatic aberration correction, although Canon’s other corrections for distortion and diffraction, as well as the Digital Lens Optimiser feature, are not available for video.

Physical Controls

Canon EOS 5D Mark IVIf you’re wondering what a 5D camera is, simply put it was the first model to give full-frame DSLR capability into a standard body camera. With the advent of Mark IV, Canon has made impressive progress.

You can customise the physical controls of the EOS 5D Mark IV, mapping specific functions to specific buttons. The shutter-release button, for example, can be set to either focus on and meter a scene, or just to meter it. Alternatively, you can set the shutter button so that it simply locks the exposure when pressed – essentially, AE lock for movies.


If you want, you can also customise either the SET button and Depth Of Field Preview control to initiate movie recording or cease Movie Servo AF.

On-screen controls

You can also use the touchscreen to control a handful of recording features.

Canon EOS 5D Mark IV

Before to recording, you can adjust things like Picture Style, White Balance and recording quality, either through a combination of touchscreen and physical controls or just through the touchscreen alone.

Once you’ve started recording, your options are more limited, although it’s possible to change adjust aperture and exposure compensation, and also the volume of the audio through the headphones. 

Recording Media

Canon EOS 5D Mark IVIn contrast to other models that support the XQD and CFast formats, the EOS 5D Mark IV sports separate card slots for SDHC/SDXC media and CompactFlash media. Presumably, with a maximum frame rate of 25p in 4K (or 30p in NTSC), one of the newer formats is not required.

The SDHC/SDXC slot supports cards up to the UHS-I Speed Class 3 (U3) standard while the CompactFlash slot supports UDMA 7 cards. You need to use one of these for 4K video recording as the camera will otherwise stop recording after just a few seconds. Interestingly, the camera does not support UHS-II type of SDHC and SDXC cards.


Time-lapse shooting

In addition to time-lapse photography, Canon 5D Mark IV provides time-lapse video. Time-lapse recording is also possible with the EOS 5D Mark IV. Here, you have control over the interval between images (at a minimum of a second and a maximum of a second under 100 hours between frames).  The total number of images that can be recorded is up to a maximum of 3600. This is an upgrade from the time-lapse photography of the Canon 5D Mark III.

Canon EOS 5D Mark IV

Usefully, the total capture time and playback time of the footage at your chosen settings are displayed in advance, as is the time left on the memory card in use. The feature lacks some of the more advanced options seen on other cameras, such as Nikon’s Exposure Smoothing option that attempts to maintain balance between images should there be any sudden changes in the scene. 

Post-capture editing

There’s not much in the way of editing footage in camera once you finish recording. You’re limited when post processing to trimming the beginning or end (or both) of any videos, and you can either save this as a new file or overwrite the original version.

Canon EOS 5D Mark IV

Frame Grab

You can, however, extract 8.8MP frames from 4K footage and save them as JPEGs. Footage can be played back frame-by-frame to help you decide on the most appropriate point. As the camera uses Motion JPEG for capturing 4K footage, images do not display the same kind of artefacts that you tend to find when extracting frames from videos compressed in other ways.

This can be a great way of making sure you capture the exact right moment from a sequence of fast action and continuous shooting even at high continuous shooting speeds.

That said, it’s worth being aware that noise reduction is not available when capturing 4K footage, so any frames extracted from high-ISO footage are likely to show noise.

Audio

The camera has a built-in mono microphone just underneath its name badge, and offers the option of attaching a 3.5mm stereo microphone through a port at its side.

Audio can be left to Auto, controlled more precisely on Manual, or disabled if you don’t need it. A wind filter and attenuator can also be accessed through the menu system (although the former is only effective with the built-in microphone rather than external models).

Canon EOS 5D Mark IV

Thanks to a headphone port you can also monitor audio while it’s being recorded, and you can use the touchscreen to adjust the volume being output to the headphones. Accurate audio monitoring is hugely important, and the EOS 5D Mark IV makes it pleasingly straightforward.

HDMI Out

The HDMI port around the camera’s side allows you to output footage at a range of frame rates, including 24p. You can also append the time code to the footage as this happens.

Close-up: Nikon D5 Video Options image

Close-up: Nikon D5 Video Options

Nikon’s first full-frame DSLR to sport 4K video recording comes with many useful video-specific features. We take a closer look.

Nikon D5

4K video has finally come to Nikon’s pro-grade “D” series of cameras. Nikon has added additional controls and clever extras to make shooting and output easier. In the following article we examine the options available to the video user and how the camera can be customised for video shooting.

The Basics

The Nikon D5 has a broad selection of video recording options with regards to resolution and frame size, including 4K UHD footage (3820×2160 pixels) at 30fps (29.97fps), 25 fps and 24fps (23.976fps) settings. The 4K recording has a crop factor of 1.5x, which means that a lens with focal length of 28mm will actually provide an effective focal length of around 42mm. In other words, you may end up needing to use a wider lens than you initially anticipate.

 Nikon D5 Video Options

Full HD (1920×1080 pixels) recording at 60fps (59.94fps), 50fps, 30fps and 25fps and 24fps is also provided, as is Standard HD (1280×720 pixels) with 60fps and 50fps options. Additionally, all of the Full HD options can be recorded at a 3x crop factor, which is useful for distant subjects such as wildlife or sports.

Nikon D5 Video OptionsAll video footage is recorded in the MOV format using the H.264/MPEG-4 codec, with 8bit 4:2:0 chroma subsampling. This results in 4K footage recorded at a maximum bit rate of 144Mbps, with Full HD footage recorded with a maximum 48Mbps bit rate. When recording Standard HD or Full HD footage, you can also select a ‘Normal’ recording quality as an alternative to the ‘High Quality’ option, and this has the effect of halving the maximum bit rate.


To refocus during recording you have the following options:

  • Press either the AF-ON button or the shutter release control
  • Let the camera refocus automatically by setting it to Full Time Servo (AF-F)
  • Press the touchscreen where you want the camera to focus
  • Use manual focus instead

All footage is recorded to either XQD or CompactFlash media, depending on which model you have (the D5 is available in either dual XQD [below] or Dual CompactFlash formats).

Nikon D5 Video Options

Colour and white balance

Many of the same controls that are available when shooting stills, such as white balance and Picture Style, are available when recording videos. These include the Flat Picture Style first seen in the D810 that has been designed to produce low-contrast footage that’s more appropriate for grading.

When setting white balance and Picture Style, you can select ‘Same as Photo Settings’ rather than selecting a particular preset. This is helpful when capturing stills in the same conditions and particularly useful when using a setting that has been customised (Auto White Balance with a slight bias, for example).

Nikon D5 Video Options

You can also bring up video-specific options by pressing the ‘i’ button when in the video mode. This allows you to quickly view and amend settings like headphone volume, frequency response for example.

Image capture

When using the Live Frame Grab option, the D5 allows you to capture an image as you’re recording footage, by pressing the shutter release button.
The images are saved without interruption and at the recording resolution. Without the Live Frame Grab option selected, pressing the shutter release button has the effect of terminating the recording to take the image.

Nikon D5 Video Options

As with other 4K-enabled cameras the D5 allows you to extract an image from recorded footage, with images output at an 8MP resolution.

Movie editing and playback

Pressing the ‘i’ button during playback allows you to specify a start and end point for footage. This can either be saved as a new file or over the existing footage. You can also rate footage and send it to another card or folder.

One nice touch when playing back footage is the option to initiate playback by pressing a large virtual Play button in the centre of the display, rather than any physical buttons.

Nikon D5 Video Options

Audio

The Nikon D5 has stereo microphones located on its rear panel, although an external microphone with a 3.5mm jack can be plugged into its side for better quality recording. Regardless of the microphone used, the user can adjust sensitivity manually over 20 levels or leave it to an auto setting, with levels for each displayed on the rear monitor.

 Nikon D5 Video Options

It’s also possible to adjust the frequency range between wide and vocal settings, call upon a wind noise filter as well as disable audio recording. You can also monitor audio while recording, through a set of headphones via the 3.5mm jack port on the camera’s side.

Nikon D5 Video Options

ISO

With the exception of its three ‘Lo’ settings that are available for stills capture, the D5 is capable of using its full native and extended ISO range when recording video. This runs from ISO 100 up to the Hi5 option that is equivalent to ISO 3,280,000. You also have the same control over Auto ISO as you do when shooting stills, and you can specify a maximum sensitivity if you’re concerned about noise levels.

Nikon D5 Video Options

Recording limits

Upon its launch, the D5 could only record three minutes of 4K video at a time, although the v1.10 firmware update announced in June took away this limitation to extend recording time to a maximum 29mins and 59secs. Any recording that generates a file larger than 4GB (the limit for the FAT32 format) will be split across up to eight individual files. These can be stitched together in post production.

Physical controls

You can customise many controls around the body to serve a variety of functions that are useful when recording video. Index marking, for example, can be quickly called upon to place markers at specific points during video recording so that those points can be reached easily upon playback. Nikon’s Power Aperture feature, which closes/opens the aperture smoothly, can also be assigned to a function button.

Nikon D5 Video Options


Other settings

Nikon D5 Video OptionsThe majority of video-specific functions fall under the Movie Shooting Menu tab. These include the options to give files a specific three-letter prefix and to designate a card for videos if you use both slots. The card capacity in recording-time is indicated when selecting card slots.

Helpfully, should you make lots of changes and just want to go back to default options without resetting the camera entirely, you can do this with the first option in the video settings menu.


Timelapse

Nikon D5 Video OptionsAs with many previous Nikon DSLRs, the camera can be programmed to record images at regular intervals for the creation of time-lapse footage.

You can capture images as quickly as once per second and record for up to 7 hours and 59 minutes, with a maximum length of recorded videos set to 20 minutes. The camera also indicates how long it will need to capture the video at the settings you select and displays the proportion of the memory card required for this. Exposure smoothing is available, this attempts to even out exposures should there be any sudden changes in the scene between frames.

Electronic VR

Nikon D5 Video OptionsThe same firmware update that lifted the recording time limit also gave video shooters an electronic VR setting. The Electronic VR is not available when recording 4K footage or when recording in one of the cropped Full HD options. It also has the effect of very slightly reducing the angle of view.


HDMI out

Nikon D5 Video Options
The D5 is equipped with a Type C HDMI port around its side. This allows you to output uncompressed footage with 4:2:0 chroma subsampling.

Last but not least, you can simultaneously record to the card inside the camera while recording to an external device via HDMI.


Close-up: Canon EOS-1D X Mark II Video Options image

Close-up: Canon EOS-1D X Mark II Video Options

We drill deep into the video functionality offered by Canon’s 4K-shooting EOS-1D X Mark II

Canon EOS-1D X Mark II

Canon’s flagship EOS DSLR, the EOS-1DX Mark II, is one of the company’s few DSLRs to record 4K-resolution video, and this is supported by a range of additional control over recording, playback and output. We’ve gone deep into the menu system to find out exactly what’s possible, and how the camera can be set up to meet your requirements. 

The Basics

The EOS-1D X Mark II records DCI 4K-resolution footage (4096 x 2160 pixels) using the Motion JPEG format, with 8bit 4:2:2 chroma subsampling. Having a slightly higher horizontal resolution than UHD 4K, the DCI 4K format records with a 17:9 aspect ratio, and this happens at a crop factor of around 1.3x.

If, however, you choose to record in Full HD (1920 x 1080 pixels), this is recorded at an aspect ratio of 16:9 without any crop factor applied, with the camera using the MPEG4 AVC / H.264 codec instead. Incidentally, it’s not possible to select standard HD (1280 x 720 pixels) or VGA (640 x 480 pixels) recording; Full HD is the lowest resolution available.

Canon-EOS-1D-X-Mark-II-Video-Options

4K footage is recorded as a MOV file, at 50fps, 25fps and 24fps when set to PAL. Those recording in NTSC, meanwhile, have 60fps (59.94fps), 30fps (29.97fps) and 24ƒ/23.98fps options available to them. Motion JPEG takes up a fair bit of space next to more modern formats, which means that when set to either the 50fps (PAL) or 59.94fps (NTSC) options bit rate is around 800Mbps. Using the lower frame rates in 4K, meanwhile, causes this drops to around 500Mbps.

When recording Full HD footage, however, the user has the choice of MOV and MP4 recording. Here, the camera records 8bit 4:2:0 footage, with a choice of ALL-I, IPB and IPB Light compression options.

High-frame-rate recording

When set to Full HD the camera can capture footage at up to 119.9fps (NTSC) or 100fps (PAL), recording this at 30fps and 25fps respectively (ie a quarter of the speed) for slow-motion results.

Canon EOS-1D X Mark II Video Options

This records using the MOV format and ALL-I compression, at a bit rate of around 360Mbps, which should help to maintain better image quality than the IPB options.

As we might expect, audio is not recorded as this happens, while the time limit for individual clips is 7mins and 29secs.


Sensitivity

Just as you can set a specific range of available sensitivities when shooting stills, you can do the same for video. The camera provides the option of specifying a range for when the camera is set to its ISO Auto mode and a separate range when manually selecting ISO, and separate adjustment over 4K and Full HD recording is provided.

Canon-EOS-1D-X-Mark-II-Video-Options

It’s not possible to select the very lowest ‘L’ option, equivalent to ISO 50, for video recording of any kind, and, similarly, the highest H4, ISO 409-600-equivalent setting is also off limits.

Instead, you can choose a minimum ISO between ISO 100 and H1 (equivalent to ISO 102,400) inclusive, and a maximum limit between ISO 200 and H2 (equivalent to ISO 204,800) inclusive.


Time limits

The camera can record up to three minutes of 4K footage at a time, and up to 29mins and 59secs of Full HD footage. Interestingly, Nikon’s D5 also arrived with the same limitation, although this was later removed through a firmware update. Should you be using an external recorder, however, you can bypass this three-minute cap.

When recording 4K footage in camera, Canon recommends using a CFast 2.0 card – otherwise, it’s possible to record footage to CompactFlash media (up to UDMA 7) as the camera features a slot for each format.

In line with many other 4K-enabled cameras, you can also use the camera’s Frame Grab feature to extract individual frames from 4K footage before saving them as JPEGs in camera. With footage recorded at 4096 x 2160 pixels this equates to a file with a resolution of approximately 8.8MP. It’s not, however, possible to extract images from footage recorded in Full HD.

Autofocus

Canon-EOS-1D-X-Mark-II-Video-OptionsAside from the availability of 4K recording, one of the main advantages of the new model over the previous EOS 1D X is the inclusion of Canon’s Dual Pixel CMOS AF system. This feature has been included in many models much lower down in the EOS range, although the EOS-1D X Mark II becomes the first full-frame model to employ the system (now joined by the EOS 5D Mark IV).

Dual Pixel CMOS AF provides phase-detect autofocus from the main imaging sensor, something made possible by each pixel having two photodiodes.

This system allows for focus to be acquired quickly and for continuous focus (Servo AF) while recording video, and you can also set the camera to track faces with the Face Detection feature. 

Canon-EOS-1D-X-Mark-II-Video-OptionsThanks to the camera’s touchscreen, it’s possible to select the point of focus prior to or during recording by simply pressing the screen. Should you do this while you’re recording, the Dual Pixel CMOS AF system will gently pull focus to the specified point in the scene, much more fluidly than contrast-detect AF systems found elsewhere.

The touchscreen also allows for Servo AF to be stopped and started, thanks to a small virtual button in the bottom left hand corner than responds to touch.

Canon has provided the option to adjust the speed of the AF Servo mode to suit whatever it is you’re shooting. You can set this to focus quickly for everyday footage, where you want the camera to quickly lock onto subjects, or reduce the speed where you want to continue using autofocus for smooth and professional-looking focus transitions.

You can also vary the tracking sensitivity of the AF Servo system over seven levels. This adjusts the focusing system’s behavior in the event that it loses focus of the subject being tracked. “Responsive” will quickly engage the auto focus if your subject is lost. “Locked on” holds the focus position longer even if your subject is obstructed or moves briefly out of shot.

Canon-EOS-1D-X-Mark-II-Video-Options

On-screen controls

It’s possible to bring up a range of on-screen information when recording videos, from frame rate, white balance and Picture Style to the option of overlaying a two-axis virtual electronic level. You can also bring up a series of different grids to help with both levelling and composition, although this is not maintained once you start recording.

Canon EOS-1D X Mark II Video Options

Although video options are split across a handful of screens, you can also group many video-specific options together for quick access using Canon’s My Menu tab.

 Physical controls

On default settings, movie recoding requires you to press the Start/Stop button on the rear panel (with the collar around it set to the video option) although you can also configure the shutter-release button to perform the same action through the menu system, should you find this to be easier.

Canon EOS-1D X Mark II Video OptionsAnother useful video-centric feature is the option to control the camera silently whilst recording. When this feature is enabled you can use the touch pad around the Quick Control dial on the back to perform a number of commands. Ordinarily the sounds from pressing buttons and turning dials may be picked up by the camera’s on-board microphone.

The controls available depends on the shooting mode used. In the Manual exposure mode you can control shutter speed, aperture, ISO, audio recording level and the output volume, if using headphones to monitor sound.


Playback and output

The camera has a Type C HDMI mini port on it’s side, which allows for clean (uncompressed) 8bit footage to be output with 4:2:2 chroma subsampling and audio, although only at a maximum Full HD resolution.

YCanon EOS-1D X Mark II Video Optionsou can output this to an external recorder, stream it to an external display, or use a unit that combines the two. In fact, you may wish to use an external display anyway, as this can be used to provide features not present on the camera itself, such as focus peaking, false colour and zebra patterning.

Something else the camera allows is for 4K footage to be recorded internally while Full HD footage is output via the HDMI port. Time code can also be appended to recordings output via HDMI.

You can also choose to maintain the feed on the rear display when outputting to an external one, and decide whether the rear display should show shooting information.

Audio

With a built-in microphone, located on the front panel, it is possible record (mono) audio without any external microphones. For better quality audio there is a stereo microphone port available for a range of external microphones.

Canon EOS-1D X Mark II Video Options

If you shoot outside and choose to record using the built-in microphone, you can employ the wind filter to help reduce wind noise. The wind filter does not work with external microphones. However, you can use these in conjunction with more effective wind shields such as a dead cat.

There is also an attenuator, which can be used to keep audio balanced should there be any sudden loud noises. As with the wind filter, if this is engaged, an icon will show up on the rear display.

Last but not least, the 3.5mm headphone port beneath allows audio to be monitored during recording, a useful new feature which was not present on the original EOS-1D X.

Hi, how can we help?