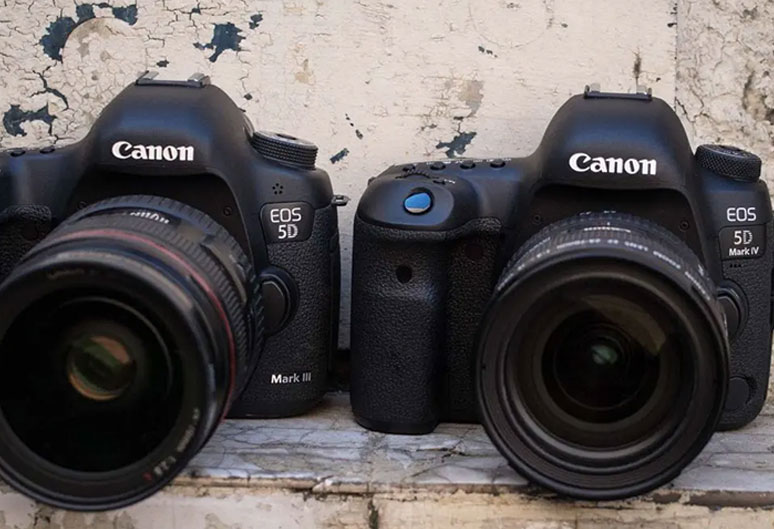
London based portrait photographer Nyla Sammons pitches the Canon EOS 5D Mk IV against her trusty 5D Mk III.
My first substantial investment as a professional photographer was a Canon EOS 5D Mk II, which later I upgraded to a 5D Mark III. I found the upgrade of the 5D Mk II to the Mk III to be a significant difference due to the photo quality, sharpness and adaptability to photos in low light with the increased ISO capabilities. I’ve been impressed with my Mk III for three years now, however the thought of a new camera upgrade will always make my heart skip a beat! Would the Canon 5D Mk IV be a game changer?
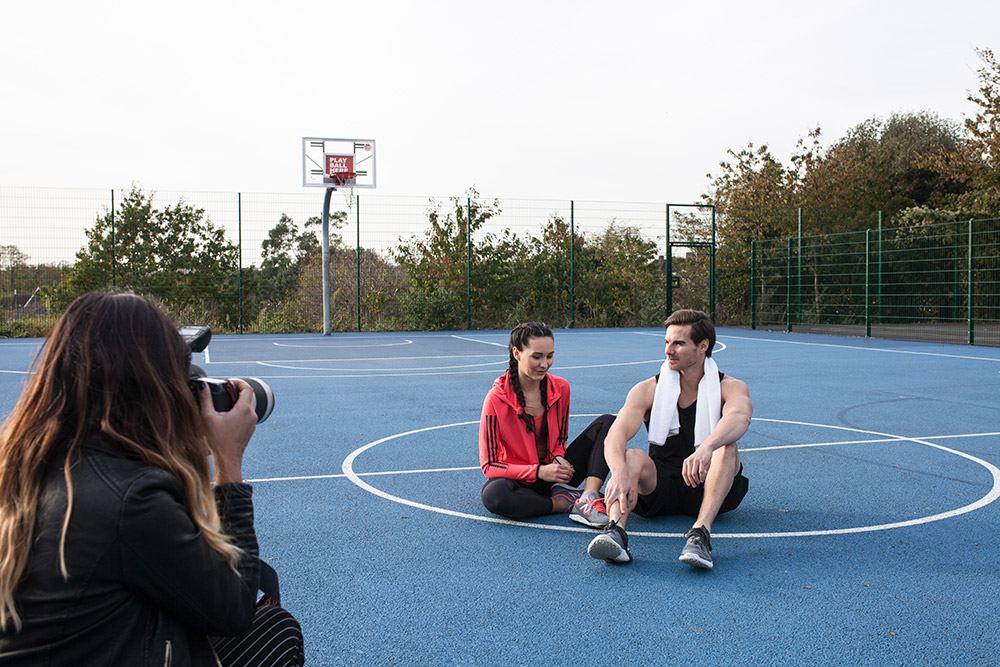
I had a sports shoot lined up and Fixation kindly lent me a 5D Mk IV to test. It looks pretty much the same as its predecessor; the button layout is nearly identical and a lot of the menu options are similar, so it felt comfortable having the camera in my hands. The battery and charger are the same as the Mark III, so no extra expenditure there, if you are upgrading. Music to my ears…
The camera has Dual Pixel AF at 30 megapixel resolution, a noticeable upgrade from 22.3 megapixels, giving you a lot more room to create very large, high-quality prints. Other noticeable improvements include the touch-screen, GPS and built-in Wi-Fi. The video capabilities have also been improved significantly, but I’m a stills photographer at heart, so I was less interested in the improvements there.
With the introduction of Dual Pixel RAW in the Mark IV you can use Canon’s digital photo professional image micro-adjustment to help increase sharpness in detail areas and reduce flare & ghosting. There has been a lot of fuss over this, and at some point I should take a crappy photo and see how well it can be salvaged in post-production.
For those who are interested, the specifications can be seen here
I can’t say that I saw much difference in the final images compared to my Mk III, but what I particularly liked about the Mark IV, is the built-in Wi-Fi. I’ve been on jobs where the client has asked to see some of the photos while on set, which has meant me downloading the images to my laptop, selecting the best ones and then emailing them over to the client. The Wi-Fi capability, allowed me to transfer the images without any fuss, using the Canon Camera Connect app. A huge bonus in my books!
However, one of the downfalls of the Mark IV – and possibly thanks to the WiFi – is the battery life and I found it seemed to drain a lot quicker compared to the Mk III. We all know how essential it is to carry spare batteries and the three I own are always in my camera bag. I would say as long as you own at least three batteries, that should be enough to see you through a day’s shoot; I went through two batteries during my test.
Overall I’m still happy with my Mk III. It delivers clean images, I can shoot in low light and not worry about noise and I can print large images and not lose quality. When I switched from the Mk II to the Mk III I saw a huge improvement in most areas, but nowhere near as significant on the Mk IV. I have my eye on a new lens, so for now I’ll probably stick with my Mk III and invest in the glass. Ask me in six months time, after I’ve bought that ridiculously expensive lens and the answer would probably be yes, my next investment will be the Mark IV. There is no denying the technology has improved both in terms of photography and video capabilities.
The Canon 5D Mark IV is currently available with 24 months interest-free credit. Contact our sales team for more info. It is also available to hire from our sister company Wex Rental
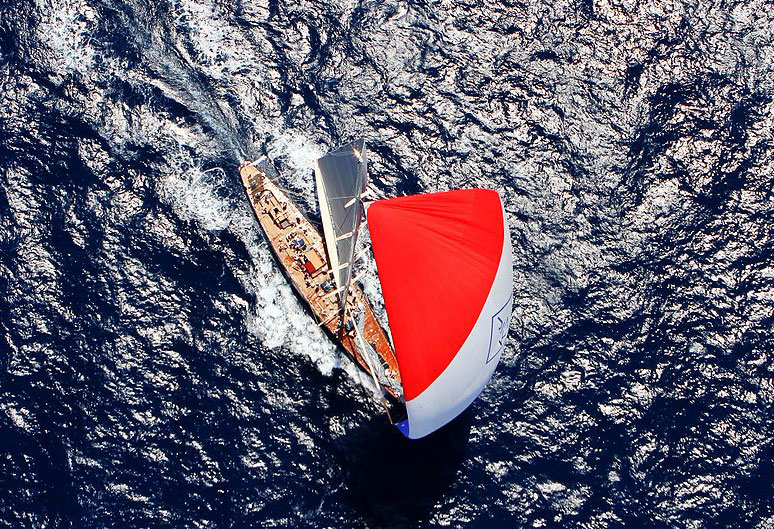
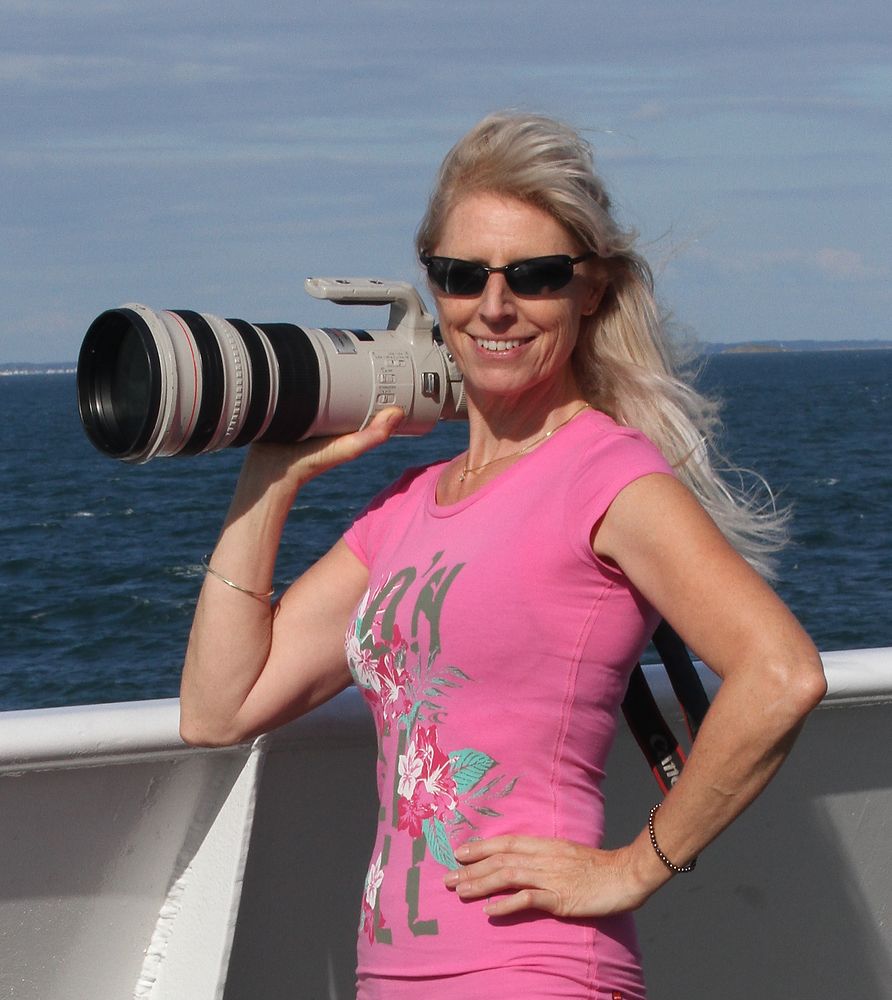
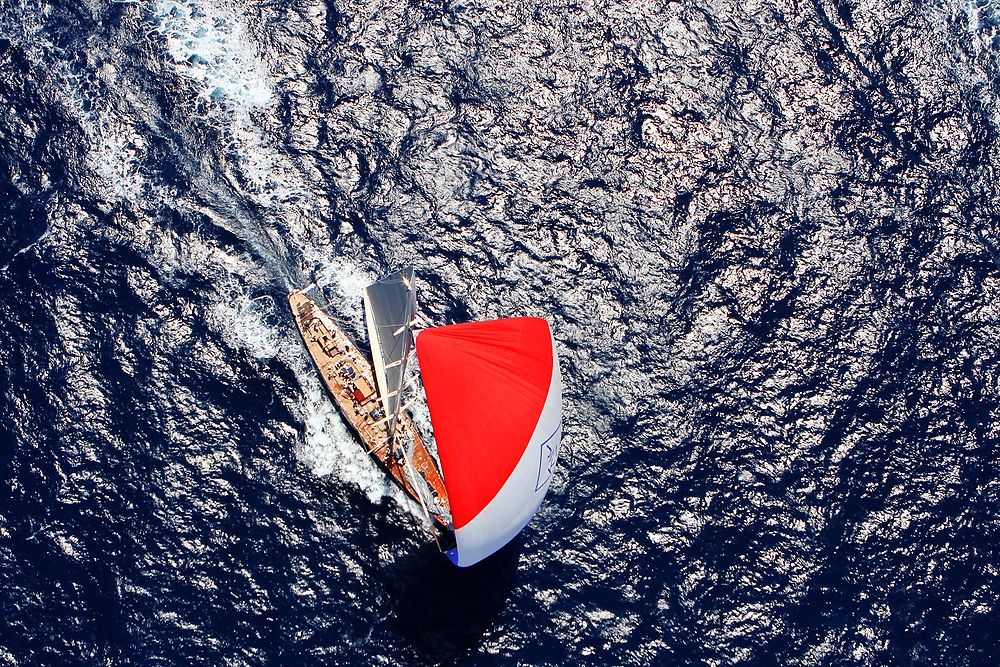
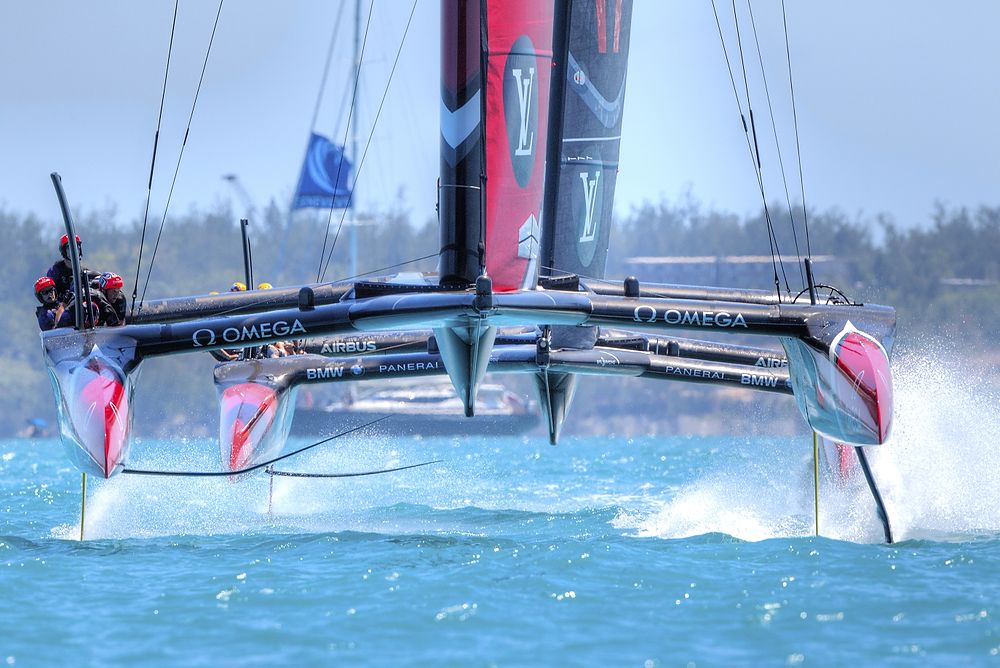
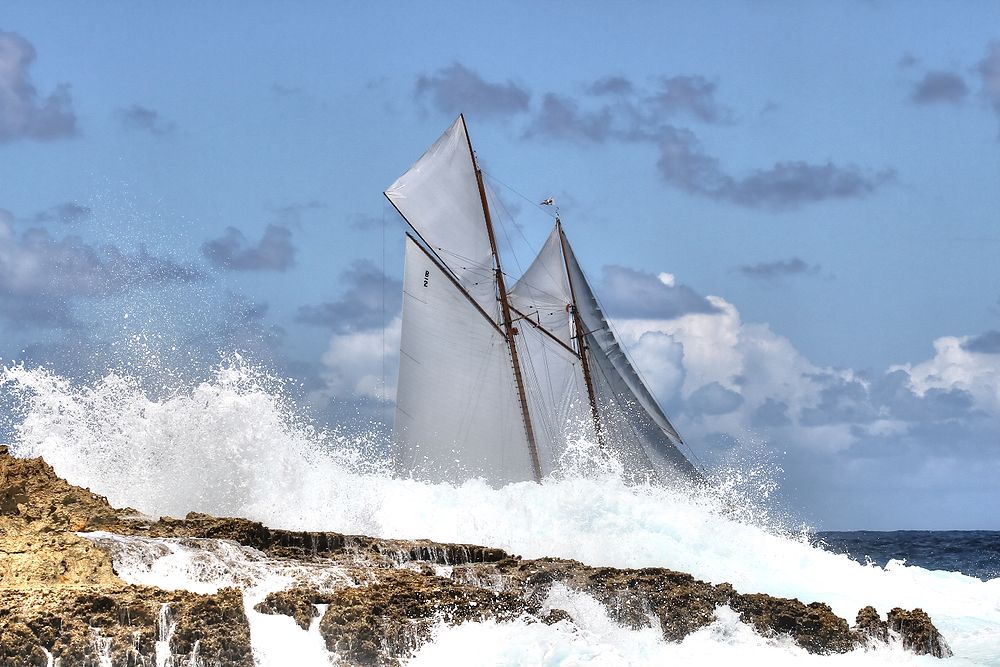
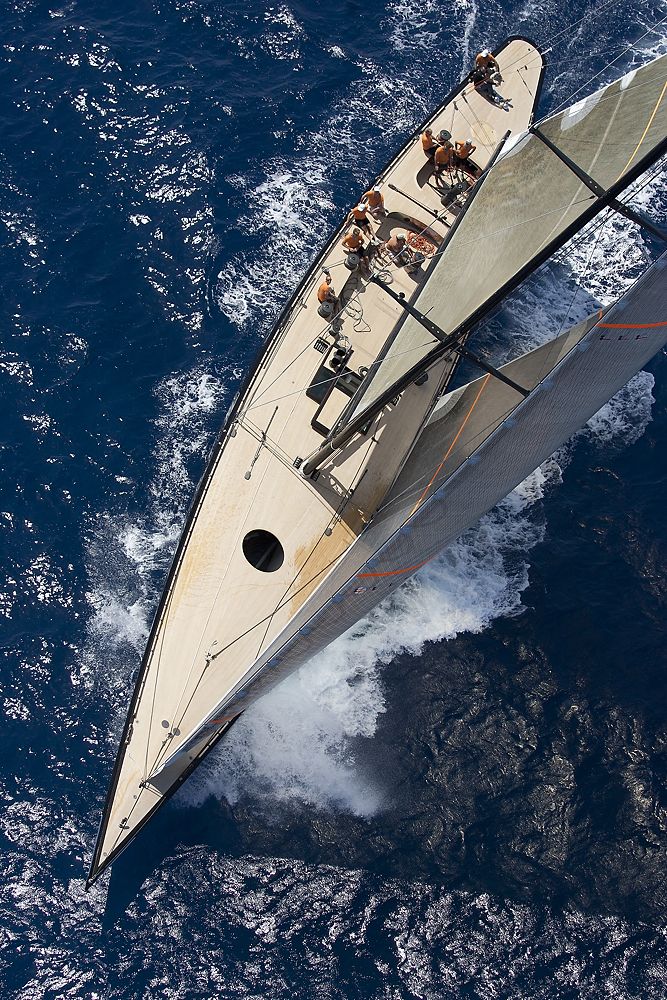
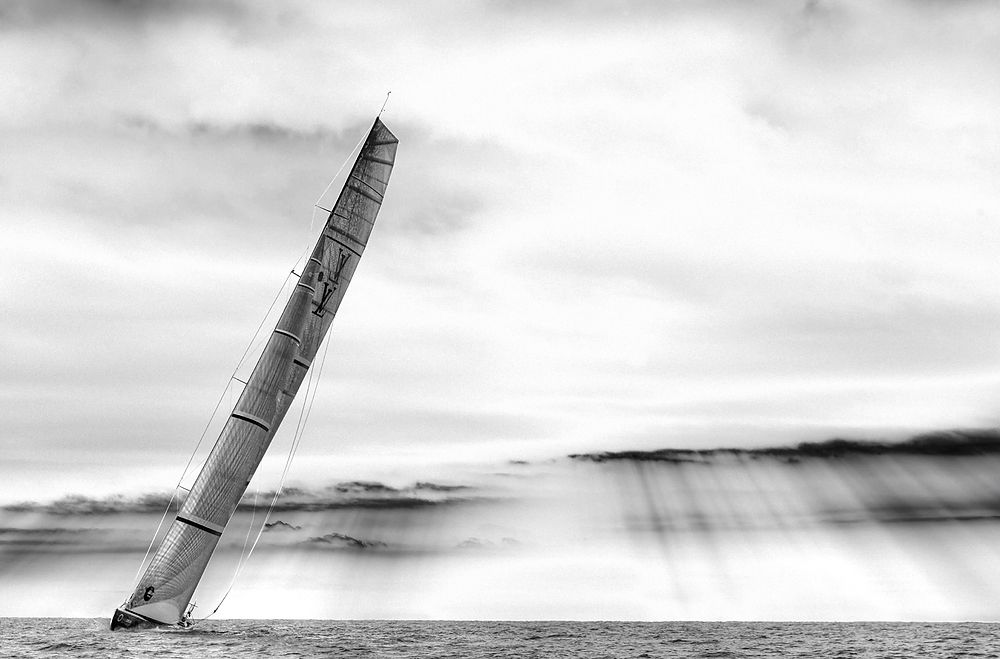
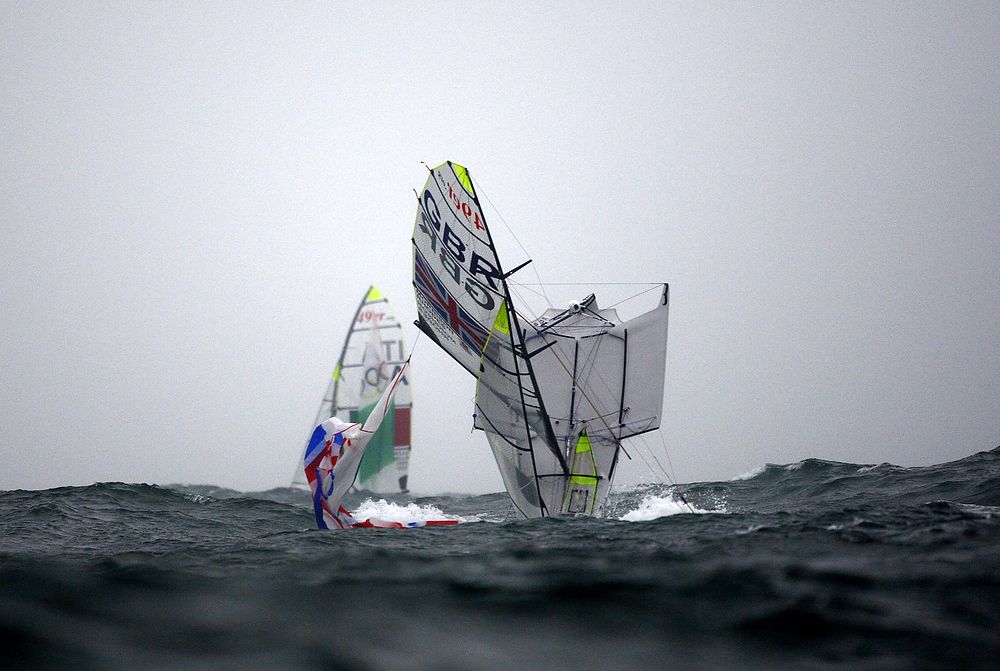
Ingrid Abery is one of the finest marine sports photographers working today. For the last 20 years she has photographed the sailing world’s most famous boat races and her work has featured in major yachting magazines all over the globe. I caught up with Ingrid recently over a coffee to ask her about her work and to find out what keeps her motivated.
Thanks for taking the time to chat to us Ingrid. can you tell us a bit about yourself?
I did a degree in photography and sculpture at Bath Academy before moving to London. I used to sail yachts for pleasure in between my studio photography, and fellow sailors began asking me to photograph their boats. After a while I realised that I much preferred this to sitting in my studio in London so began photographing yachts full time.
I understand you’ve just returned from a big trip. How much planning is involved?
Yes, I’ve just returned from Bermuda, shooting the Americas Cup which is the biggest and most prestigious race in the yachting calendar. The logistics of planning and arranging the travel and accommodation can be time consuming, but I’ve been doing it for years so it’s like second nature. Most importantly I make sure my equipment is in top working order and everything is cleaned and checked thoroughly before going on assignment.
How do you take care of your kit when you’re shooting in such wet conditions? I’ve seen pictures of you with your cameras, surrounded by water and it makes me wince!
Sometimes I use the old Aquatech neoprene housings and in fact, I still use one bought from Fixation probably 18 years ago. Mostly though, I find the housings rather cumbersome so I tend to shoot with nothing around the cameras. I use filters on the lenses where possible and just try and keep the kit away from water as much as possible.
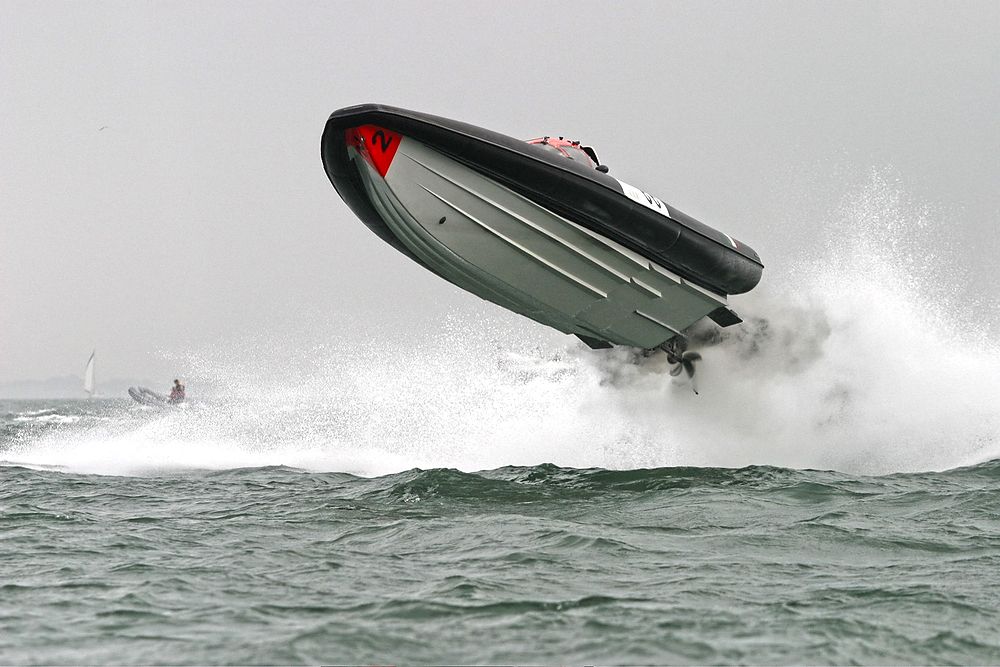
For part of the time, when you’re on a rigid inflatable, chasing a yacht at high speed, hanging on for dear life at speeds of up to 45mph, you go with the motion and can see if a wave is going to come and lift your equipment out of the way. Of course, there are those times you’re on your knees at the back of the boat, Peli case open while you change lenses, and a rogue wave will come over… a quicker reaction is required!
I imagine you’ve killed a few pieces of kit over the years?
(Laughing), Oh absolutely! Although I’d have to say that in 20 years of marine work I haven’t lost that much equipment. Saying that, recalling one occasion – Country Life had asked me to photograph a yacht race in Cowes. I arrived at the club and there was no driver for the chase boat, so they asked the club secretary (who’d served in the Navy and knew the ocean) to step in. We headed out to the start and tied up waiting for the race to start. I was getting a bit anxious as we were running short of time and the driver was enjoying his lunch with a couple of glasses of wine. Eventually we headed out to one particular mark and I managed to grab some shots as the yachts came round. We carried on to a second mark and after I’d photographed again, packed up my kit ready to head back. It was at this point he decided to accelerate and I was hanging on for dear life and then suddenly the boat flipped and I was thrown out! The only problem was that driver wasn’t aware of what had happened and he carried on full throttle towards the finish line about half a mile away. So there was me, given no lifejacket, treading water and holding on to my rucksack which I’d had my hand on when thrown out. My Peli case was still in the boat but I was desperately trying to save the rucksack and could see the fleet going past me at a distance but they were too far away to hear me shouting and at this point starting to think this might go terribly wrong. Luckily, a nearby boat eventually saw me and came over to see if I was okay. In the distance I could see the driver of my boat turn around, presumably to ask me something and realise I wasn’t there! He came pelting back and eventually picked me up. When I was safely back on the boat, unzipped my rucksack and the water just poured out. I’d had a bunch of lenses and a couple of bodies in there, including my brand new digital EOS. When finally back in London, I brought the kit to Fixation and as far as I can recall, everything was ruined apart from three of the lenses which you managed to save. In fact, one of those lenses I still use today. The memory card – luckily – was okay and the pictures eventually made the cover of Country Life.
You must have to take quite a bit of kit with you. What’s in your kit bag?
I try to balance it, depending on where I’m going, but generally have 3 to 4 Canon bodies, plenty of lenses – 24-70mm ƒ/2.8, my trusted 70-200mm ƒ/2.8 which is my favourite, an old 300mm ƒ/2.8 which is very tatty and misshapen but still does the job. I must have bought it over 15 years ago from Fixation. My 500mm ƒ/4 which is a dream, I use a lot and also take an 8mm fisheye for the odd interesting shot.
I shoot everything handheld, and try to wedge myself against the side of the boat for stability. I used to shoot with an old 600mm, which was a very heavy beast, but find the 500mm is much lighter and use it with an EOS 7D. The benefits of the crop sensor make it perfect for when shooting something like the Olympics or the Americas Cup. It’s useful to have a number of bodies around me so as to quickly put down and grab something with a different lens on without having to think. It also helps having strong arms!
It can be, but I wouldn’t have it any other way. To be a good sports photographer, you not only have to have a good eye for composition but speaking a few languages is useful and of course, a good level of fitness.
I would have to say it’s the drama, speed, action and intrigue that keeps it interesting for me and the boats are getting faster which makes it all the more thrilling. When you’re hanging out of a helicopter, chasing a yacht that’s going at 26 knots up Sydney Harbour, it’s an amazing feeling. I keep pushing myself and trying new techniques, new kit; as you may have guessed, I love speed so standing still is not an option.
I don’t sail as much as I used to because work takes up so much of my time. I used to try and race in between jobs, and always take a camera with me, but found I couldn’t focus on sailing as I’d always be seeing great missed opportunities because I was in the middle of something else.
Ingrid was talking to Tim Stavrinou. To see more of her work, visit her website: www.ingridabery.com
Gumball 3000: A mass collection of supercars, taking on a 3,000 mile journey from Riga to Mykonos in the summer of 2017.
The entrants have 6 days to complete the drive which is segregated nightly by parties and dinners full of glitz and grandeur. Crowds fill every city that the moving circus pulls into, with fans desperate to get a glimpse of the cars they have swooned over on Instagram. It’s a level of euphoria that is hard to explain without witnessing first hand with tens of thousands of people filling streets, squares, climbing trees and attempting to clamber over security barriers. Through past work with Gumball, Finn, Hugo and 8 Seconds Media were granted AAA for the entire event, so had free roam to shoot as they pleased, enabling them to cover the rally from a unique and embedded angle, with the help of Fixation.
In Hugo’s own words: Organising the logistics for the trip ourselves, we planned a 3 week route with Gumball sandwiched in the middle and the first stop in Thirsk to see long standing partners Twisted. Having picked up our beautifully re-engineered Land Rover defender, we boarded the ferry to Europe, the start of a huge triangular trip around Europe. Commissioned to shoot both film and stills, we used the Leica SL and M 240 and for film we used our own Sony A7S II and bolstered it with another A7S II and the Sony FS7 II with a couple of Sony 24-70mm ƒ/2.8 lenses. These were rented from Fixation and were chosen for the A7’s ‘run-and-gun’ abilities and ease to mount on the DJI Ronin-M, and the FS7 II for the higher frame rate and image quality.
Arriving in Riga, we planned our route through the 10 countries that comprised the rally. It was a surreal trip; it’s rare to be able to have the time to travel through each of these countries by car and actually explore them. Although driving circa 500 miles per day, the route dissected some of each countries most beautiful roads. Mountains, coastlines, plains and stunning rivers, it was amazing to watch the scenery change the further south we travelled. Staying each night in generally the capital city of whichever country we were in, we also had the job to capture the other side to the Gumball price tag; the wild and decadent parties that occur each night, laid on for the Gumballers. While only a certain amount can be disclosed and captured on film, safe to say it was an eye-opening and amazing experience.
A particular highlight was arriving at the Albanian border. Met by a huge convoy of police men and cars, one for every 10 Gumball super cars, we were under the assumption that it was going to be one of the more boring legs of the journey. Not only is Albania absolutely stunning but it seemed the the ‘creme-de-la-creme’ of police cars and drivers and been chosen for the role, while what felt like the rest of the Albanian police lined the road into Tirana (our stop for the night) to keep other traffic and people off the roads. There was not one point along the route in Albania that there were not fans in sight, desperate to see the cars. Back to the police cars, it seemed they had been instructed to drive at 110mph through the whole country, regardless of the then unimportant speed restrictions lining the roads, corners and other cars. There were moments that were effectively 170 super cars in a line/group speeding legally through some of the most beautiful countryside we’d driven through. To then be met by the crowds that awaited us in Tirana and the night that followed topped it off. A true Gumball experience, one that could not have been replicated in any way shape or form.
We spent the trip effectively moving from hotel to hotel and otherwise living out of the back of the Twisted, only just about enough space for the 4 of us, our kit and the ability to work and edit continuously while driving. With power inverters for the car, we also had all of our kit charging, definitely pushing the limits of what car fuses can usually handle.
Living out of a bag and shooting is something we’re used to but to do so while working the hours that were required each day was taking, not only for us but the kit too.
Our daily routine would see us up at 5.30am and we worked straight through until around 2.00am when we could finally hit the sack.
We finished up a laptop screen and a Sony RX100v down at the end, but the Sony A7S II’s (kept in Tilta cages or on the DJI Ronin-M) and the FS7 II kept in it’s supported bag were safe from the enduring amount of use they saw. Sony have an amazing range of cameras, of which the FS7 II and A7S II were perfect for this job. While the superior image quality and higher frame rate of the FS7 II were key for certain shots, we used the A7S II for the majority of the work, especially as we had one mounted constantly on the DJI Ronin-M. With our very-much run-and-gun approach to the job and lack of specific structure to the edit afterwards, the key for this project was to shoot as much as we could and build the edit’s story afterwards. This suited the A7S II hugely. It’s light, holds an SD card (great for quickly dumping footage onto an Macbook Pro) and is easily small enough to have sat with me while editing in the back of the car. I had it set up to shoot at 100fps continuously, giving me the ability in the edit afterwards to be able to slow footage down appropriately.
The FS7 II however, although providing beautiful footage and amazing dynamic range, was much harder to have as a run-and-gun camera. Almost too bulky to have out the window of the car while moving and definitely not the space to have it next to me while editing, the FS7 II lived in its case in the boot when not being used for setup shots at specific locations. Once on location however, it performed beautifully. With its built-in stabiliser function, the camera lived on my shoulder and even at 25fps shoots a very steady image with functions easy to manage without putting it down (once you had the menu system memorised!). With the FS7 II, we shot mainly in 150fps and had the camera set up (through a customised S&Q button at easy reach) so it took just one button to switch between 25fps and 150 fps, a very handy function to have.
Having grown up as a photographer, I’ve got used to constantly and manually managing light through ISO, aperture and shutter speed, dependant on the point of the shot. The A7S II works well for those that have evolved from stills photographers, apart from the added necessity of a variable ND. If you shoot in S-Log3, which has the best dynamic range, your minimum ISO is 3200, which therefore immediately requires a variable ND, even if you were to dare shooting at ƒ/22 and a shutter far too fast for the fps (to match the speed of you eye, your shutter speed should be double that of your fps e.g shooting 100fps, your frame rate should be 1/200 and similarly, if you’re shooting 25fps, your shutter speed should be 1/50). One of the beauties of the FS7 II however, is the easy switch between the terms ISO and GAIN and the use of the in-built variable ND, which operates seamlessly, great for variable lighting conditions.
Both cameras have well-discussed pros and cons that I’ve highlighted above and below, but using them in conjunction with one another was the perfect combination on such an event. Where the image quality and higher frame rate were needed, the FS7 II was the camera of choice, while the A7S II had the huge ‘run-and-gun’ advantages that were required more often the not shooting in night clubs, out of cars and in areas where bulkier cameras are less welcome/easy to operate. One of the beauties of having what looks effectively just like a stills camera is people don’t immediately react. The FS7 II doesn’t go unnoticed!
A7S II advantages:
Light and Easy to use
Great for night life with the low light capabilities
Great continuous autofocus capabilities with native Sony lenses attached
Great handheld image stability when not on the DJI Ronin M
A7S II disadvantages:
Complicated menu if it is not your own camera and difficult to quickly setup custom buttons
Noticeably lower image quality than the FS7 due to it’s 8Bit limit
Poor battery life
FS7 II Advantages:
Beautiful dynamic range and footage quality
Easy and smooth variable ND built into camera
With correct setup, easy to switch between S&Q Motion (High frame rate) and continuous 25fps 4k shooting
Good battery life
FS7 II Disadvantages:
Difficult to setup
Can only use constant high frame rate settings with specific software updates and v lock power pack
Bulky and therefore cannot use on the Ronin M or have it in a small rucksack or sitting on lap
Small monitor and hard to view in bright sunlight, imperative to use the eye-cup
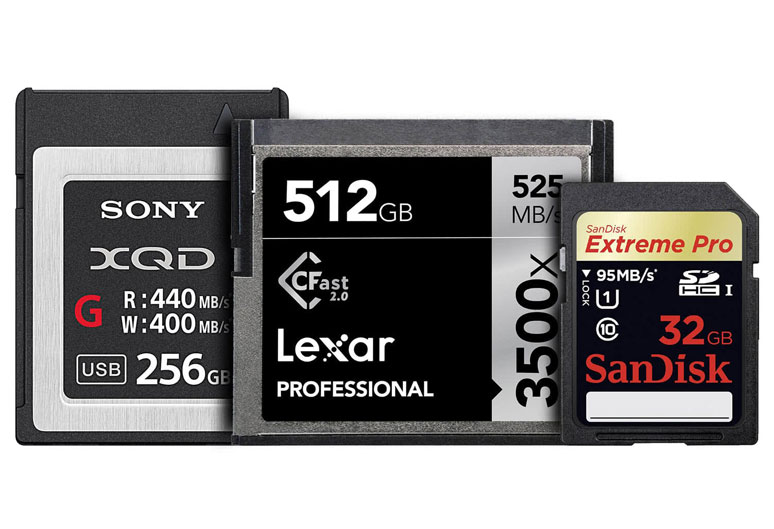
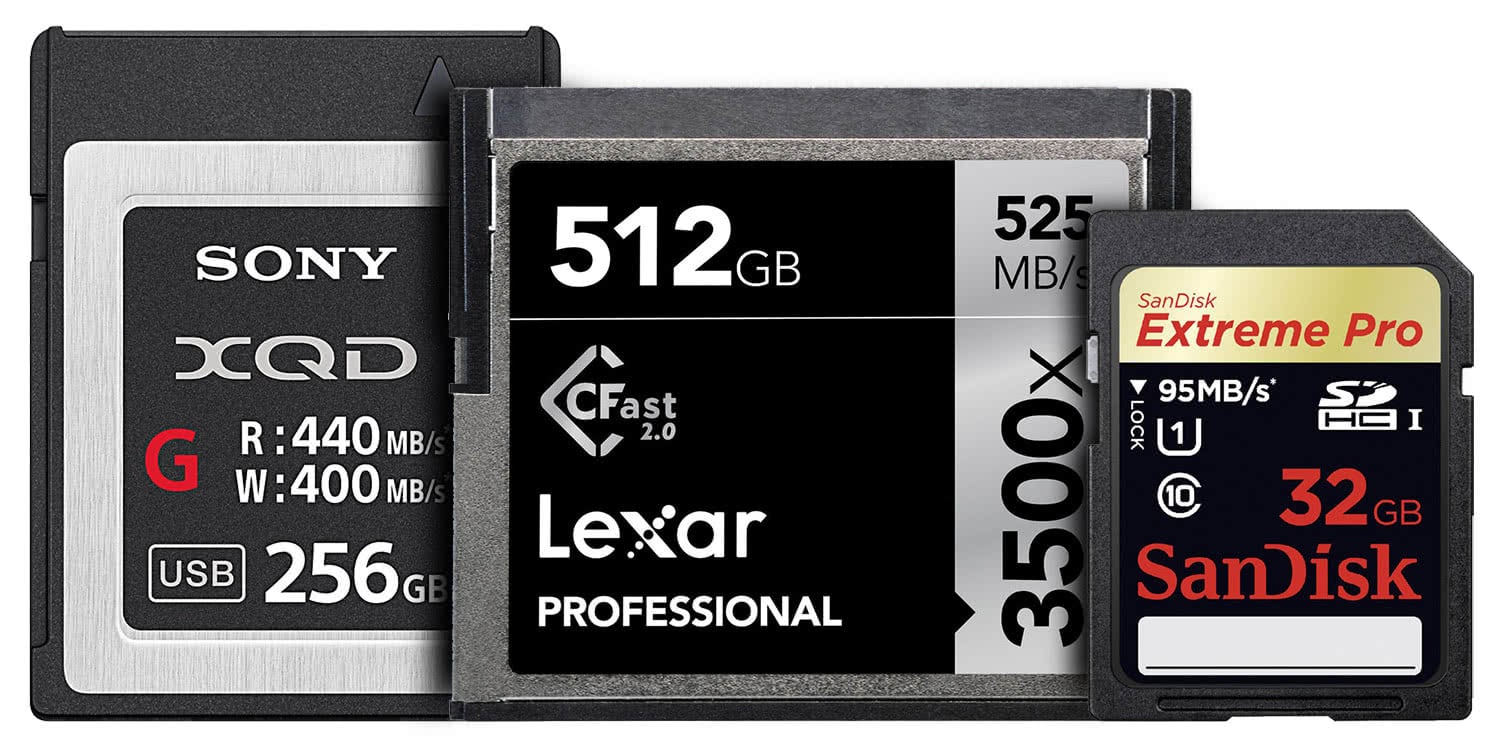
Memory cards are an inescapable piece of kit in any photographer’s arsenal and it’s ironic that in many cases, these small squares of plastic and silicon that we entrust with our hard earned images are often the cheapest item in our camera bags!
And it’s probably fair to say that a lot of us have also experienced that panic when the word ‘Error’ shows on your DSLR’s screen and you can’t access any of your images.
Memory cards, in all shapes and sizes, are built on a solid state architecture and despite having no moving parts, there are certain housekeeping processes that will ensure you minimise the risks of your cards failing.
Please note that the following processes are based on our experience with handling memory cards over the years and there are many opinions on how to correctly look after memory cards. We’re simply relaying information that we know works for us and has worked for many of our customers!
Regular formatting
Rather than deleting images, format the card on your camera (once you’ve checked that your images are backed up elsewhere). Even deleting single images as you’re shooting can cause problems with the database structure on the card, and can lead to card errors. Memory cards use the FAT32 or exFAT format, depending on the size of the card. Both these formats can be deployed on a Mac or PC, but it’s generally safer to format the card in the camera itself.
Our Nikon workshop manager, Barry Edmonds, has also come across issues in the past when customers are formatting cards on a Mac: “I’ve had customers reporting the storage space decreasing over time, even though they’re formatting their cards regularly. It seems that in some cases, the cards will retain ‘Apple .Trashes’ files on the directory, despite the cards being formatted in the camera. Formatting the cards on a PC seemed to clear the problem.”
Keep space on the card
The golden rule for computer hard drives is to always leave around 30% of the space free, and exactly the same principle applies to memory cards. The performance of the read/write speed will start to suffer as the card becomes full and you run the risk of data corruption as the remaining space becomes fragmented.
Don’t use cheap cards
Despite some common misconceptions, not all memory cards are created equal! There are different qualities of flash memory and controllers out there, and if a card’s cheap, it’s a good indication that perhaps that manufacturer isn’t using the highest grade materials. Yes, the likes of Sandisk and Lexar are more expensive, but do you really want to run the risk?
Use a card reader
However careful you are when the card is in the camera, when it comes to transferring your images to your computer, don’t use your camera. If your battery doesn’t have much juice left and it depletes halfway through the transfer process, there’s a good chance the files will be corrupted. A good quality card reader is a much safer option and is much more convenient too.
I’m extremely careful with my memory cards but I’ve still been on the receiving end of an error and now I can’t access my images
Unfortunately it’s a fact of life that no matter how careful you are, there will undoubtably be a time when you experience data loss. In that situation, your only option is to try and recover your images using a dedicated recovery application. AnySoftwareTools have some recommendations on image recovery software for both Mac & PC.
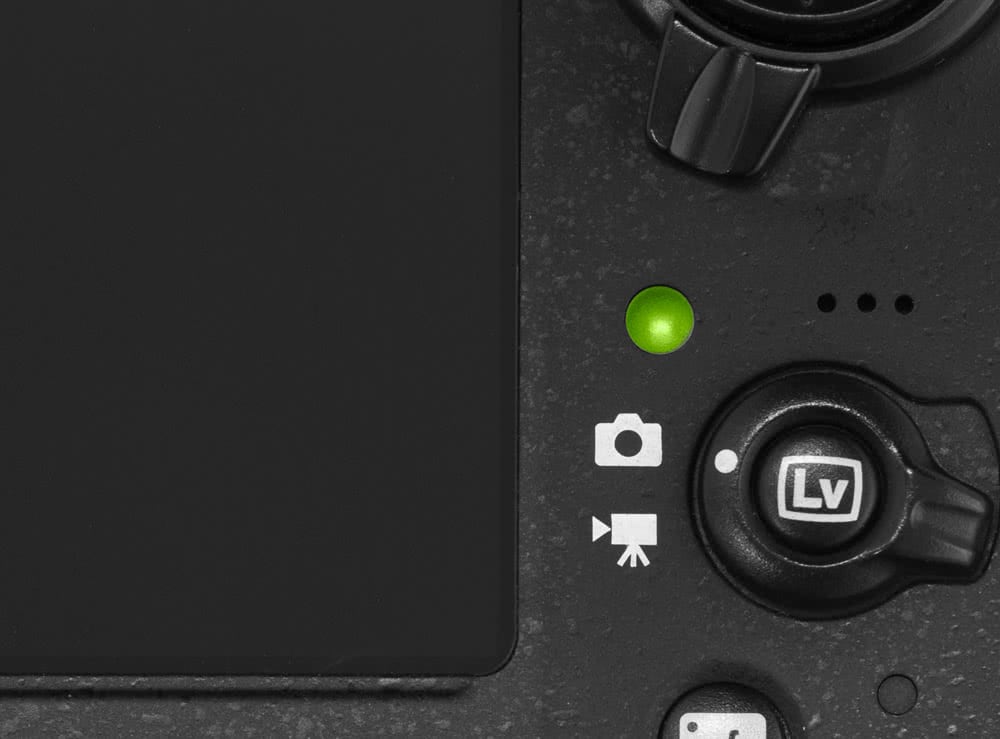
You’ll have all noticed the little light that blinks every now and then on the back of your DSLR; red on a Canon, green on a Nikon.
It’s there to indicate that the camera is accessing the card, either to write data when shooting or read data when previewing images. Something important to bear in mind though, is that you should never attempt to remove the card or the battery while the light is on.
If you’ve taken a large burst of images and your memory card isn’t particularly fast, you’ll notice the light on while the camera’s buffer writes the data to the card. If this process is interrupted you stand a very good chance of corrupting not only the images the camera is currently writing, but the entire contents of the card! The same principle applies if you remove the battery during the same process.
Nikon cameras have a green lamp
Canon cameras have a red lamp
Yes, there is software available that can access corrupt data, but it’s not a 100% guaranteed operation.
It’s perfectly safe to turn the camera off while the light is on; the camera’s power will actually stay on until the writing process is complete so there’s no danger of losing anything, just don’t get carried away and pop the card out early or remove the battery.
If you feel we’ve missed out any important tips, or would like to add anything to our suggestions, please feel free to leave a comment below.
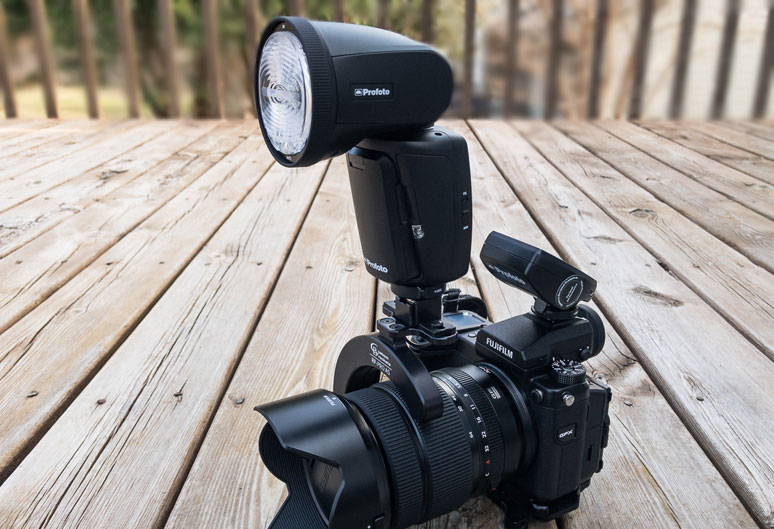
Profoto made a big splash recently when they released the A1 – dubbed the world’s smallest studio flash.
I was fortunate enough to get a hands-on training day with the A1 at Ashridge House in leafy Hertfordshire, where I got to play with the new flash alongside existing Profoto gear. Our tutor for the day was Holly Wren, a self-confessed Profoto fan and user of the brand. I caught up with Holly after the official launch to ask her views on the A1 and how she found working with it during the training sessions.
I understand you were privy to the A1 for a long period before the launch. What were your initial thoughts when you finally got to try it?
When they told me there was a new product they wanted me to try, I guessed that it would be a smaller light, an on camera solution; it made sense as Profoto’s range has become more compact and portable in the last few years with the B1X and the B2. Photographers want to bring the quality of their studio lighting kit onto their environmental shoots, and I think that ‘speedight’ market hasn’t been updated for a while, so I was eager to see exactly how they’d interpreted that.
My initial thoughts when I got my hands on the A1 were about how small and portable it is, and the standard of build quality, plus it’s ease of use – picking it up for the first time I was very quickly able to use it without reading a manual.
You refer to it as a Speedlight, but Profoto like it to be referred to as a studio flash, why the confusion? Where does this product fit in a photographers lighting kit?
Profoto like it to be referred to as a studio light because it has the features and technical sophistication of their location light be it in a smaller package; but in my opinion the fact that it is the same size and performs on camera like a speedlight, it is largely comparable to one. In fact, I think to not compare it to a speedlight is an injustice to just how well Profoto have done in their improvement on the traditional on-camera flash unit. For a lot of photographers it will replace their speedlight as it corrects some of the frustrations that a more traditional speedlight brings.
I see it as a true hybrid between my larger location lights and my speedlights. In some circumstances it replaces my B2 or B1, but in all circumstances it replaces my speedlight. In fact, I’ve already sold both my Nikon SB910’s, which is a testament to this product.
You can use it as you would a speedlight on camera, as a light off camera, or combine it with other Profoto kit such as the B1X or B2.
You’re a big advocate of the B2’s. How do you think the A1 will fit into your style of shooting, given that the output is lower?
What I’ve discovered using the B2’s is often that I don’t use them on anywhere near full power, often they are set on the lowest power. Primarily that’s because I use them to add an extra bit of clean, beautiful light into an already well lit, natural light led set up. So if I’m using them on the lowest setting, I can substitute them for an A1 easily, without being short of power.
In addition, I sometimes use the B2’s to add a hair or rim light or to light something within a scene, the A1’s are perfect substitutes for this, being small and discreet.
Are there any particular features of the A1 that you feel set it apart from other on-camera systems? Do you ever shoot with Speedlights, and if so, will the A1 replace these for you?
Absolutely. I have used speedlights throughout my career. The A1’s key selling points are clear, and in my opinion means the A1 outperforms its competitors in this on-camera market.
The first is its use of Lithium batteries – meaning you can recharge, see how much battery you have left, and expect consistent power to the end. Farewell to piles of AAs in the bottom of my kit bag and the uncontrollable urge to replace barely depleted batteries with new ones before key shooting moments.
Second is the recycle time, you need to see it to believe it but the A1 literally doesn’t miss a shot. Firing at 12 fps on the D4 you will see no drop off in flash (as long as you’re not at full power on the A1), and anyone shooting events will understand the frustration of getting the shot but it not being lit correctly because the flash cannot keep up with the shooting speeds. That really blew my mind.
Thirdly is it’s much softer and gradual light fall off. I’ve shot portraits with this light on camera, with the flash pointing at my model. Something that I think is a pro- no, no! Profoto are known for their beautiful light, and the A1 delivers this.
Finally, my favourite feature is the ease of use. I honestly could not tell you what half of the menu does on my speedlights. But the A1 cuts the out all the unnecessary and goes straight to the important bits; the large wheel dial lets you easy adjust power or relative power in TTL. And the menu is self explanatory.
Off camera, before I owned the B2’s I used to use a speedlight in a Lastolite softbox (of varying forms) to take portraits which I moved away from because of connection issues, poor recycle times and lack of power consistency. But now the A1’s correct those issues I can go back to using the A1 off camera, instead of the B2s.
You demonstrated some interesting setups during the training – some simple and others more intricate. Did you devise these yourself?
Yes. The training was designed alongside the team at Profoto to demonstrate the main features of the product. We wanted to show its strengths, so I designed the set ups to encompass the range of situations that the A1 was capable of performing in, which is why I demonstrated it both indoors and outdoors. I also wanted to show that it could be used on and off camera, as well as for the key light on a portrait or as part of the Profoto system. I think it’s versatility of use is one of it’s key selling points – wedding, portrait, press, event and travel photographers will all have a use for this product for different reasons.
Was the A1 able to deliver the shots you imagined, or did you tailor the setups to accommodate any limitations?
The shots were built to show the A1’s strengths. We didn’t design any of it to show how it would fail!!!! But in terms of it’s limitations, there of course are some. I guess that power is the main one, it’s only a quarter of the power of a B2 so it doesn’t, for example, have capacity to overpower harsh midday sun from a distance, or to replace the flash speed of the D1’s or B1X’s in studio, but that’s not what it’s for. With all photography you have to use the equipment relevant to your needs, will the A1 outperform studio lights? No. But, will it be incredibly useful as an on location flash? Yes.
The best advice I can give, is try it! That’s the beauty of renting before you purchase – try before you buy. Find out if this is the light for you.
You seem pretty convinced that the A1’s will form a key part of your kit bag– what’s the catch? How could Profoto improve on them?
The only gripe for me at the moment is the modifiers you can use with the A1. Profoto have launched a range of magnetic ones that you can use to soften the light but for me it needs to go further. I want to see grids and soft boxes that can be used with this system. Which would allow me to go further with their use off camera.
Manfrotto do a handy little gadget called the ‘Snap Tilthead’ which allows you to use them on a lighting stand with an umbrella. I’ve used that set up on a few occasions and it goes that extra way to soften the light but I want to be able to do more!
It would also be nice to see them sold as a pair, I think that most people purchasing these will want two, or at least one with a TTL Air remote so they can be used off camera without buying the remote separately.
Finally, there is a lot of talk about the price, this is not cheap at £849, do you think it’s worth the extra investment?
Well firstly, when was buying any Profoto gear ever cheap? But in the same way you might choose to buy a BMW over a Skoda, you need to consider what you’re getting for the money, and whether that investment is worth it. If you want to travel from A to B, both cars will get you there, but it’s more the experience of the ride that changes. If you care about heated seats, better build quality and a quieter ride you might prefer to drive the BMW. If those things are irrelevant to you, you’d save the cash and buy the Skoda. Either is the right decision, it comes down to what’s important to you, your purpose of use and budget.
The A1 allows me to work quickly, more efficiently and more professionally. It solves the issues I have with speedlights and provides me with the quality of a studio light in a portable package. I can use it on location for portraits as well as on camera at events.
Those factors for me, make it worth the extra spend, but of course, people will decide how much those features are worth to them, and how much of a role the A1 will play in their kit bag.
Holly was talking to Tim Stavrinou.
For more information on the Profoto A1, contact our sales department, or to try before you buy, visit Wex rental
We use cookies on our website to give you the most relevant experience by remembering your preferences and repeat visits. By clicking “Accept”, you consent to the use of all the cookies.
This website uses cookies to improve your experience while you navigate through the website. Out of these cookies, the cookies that are categorized as necessary are stored on your browser as they are essential for the working of basic functionalities of the website. We also use third-party cookies that help us analyze and understand how you use this website. These cookies will be stored in your browser only with your consent. You also have the option to opt-out of these cookies. But opting out of some of these cookies may have an effect on your browsing experience. We log visitor IP addresses and cookie preferences for due diligence reporting.
Necessary cookies are absolutely essential for the website to function properly. These cookies ensure basic functionalities and security features of the website, anonymously.
Advertisement cookies are used to provide visitors with relevant ads and marketing campaigns. These cookies track visitors across websites and collect information to provide customized ads.
Performance cookies are used to understand and analyze the key performance indexes of the website which helps in delivering a better user experience for the visitors.
Analytical cookies are used to understand how visitors interact with the website. These cookies help provide information on metrics the number of visitors, bounce rate, traffic source, etc.
Functional cookies help to perform certain functionalities like sharing the content of the website on social media platforms, collect feedbacks, and other third-party features.