Fujifilm have today launched the Fujifilm Professional Service (FPS) and we’re proud to announce we will be an official Service & Support Centre, working in conjunction with Fujifilm to offer benefits to FPS members.
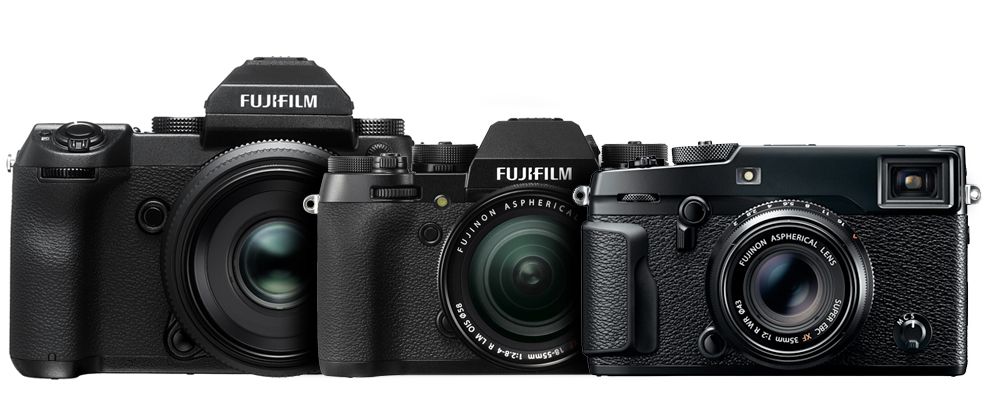
With the increasing numbers of professional photographers switching to Fuji mirrorless cameras like the X-Pro2 and X-T2, and also with the launch of the GFX medium format mirrorless system in March 2017, there is an increasing need to offer support to these photographers in a similar vein to services offered by Nikon & Canon.
As Fuji products have evolved and are now widely used by professional photographers, it is a natural development that Fixation should be able to offer service support for Fuji products. We are also proud to be a key supporter of the FPS programme. Fixation General Manager
The scheme is open to working photographers who own either a GFX system or at least 2 professional X system bodies and 3 XF lenses. Membership to FPS will be offered free of charge for the first 2 years.
Paul Stewart, long time Fixation customer and professional press photographer, switched to Fuji over a year ago and hasn’t looked back. ” I’m delighted to hear that Fixation will be the London Support Centre for FPS. It’s something I’ve been asking Fuji for and I’m glad they listened!”
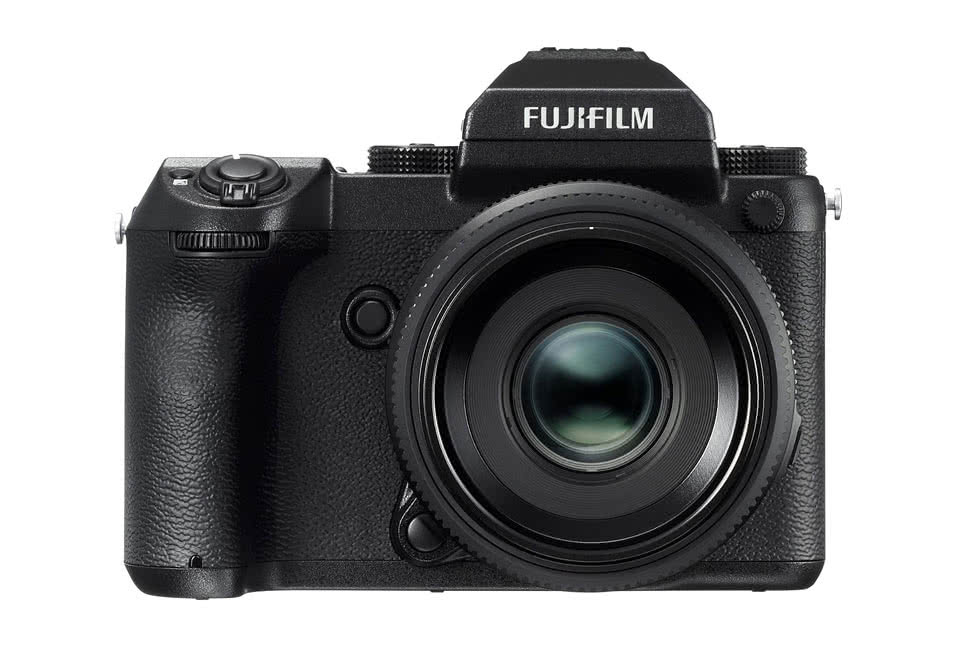
Fujifilm’s GFX, X-Pro2 & X-T1 models have been well received by professional photographers
Mick Edwards, Fixation’s Technical Manager will be heading up the Fuji service department: “We’re very excited to take on Fuji as an authorised service centre, allowing us to support our customers as we’ve always done.”
FPS members will be able to take advantage of while-you-wait sensor cleaning, cosmetic repairs and loan stock if equipment has to be sent away for more extensive repair.
For more information on which models we can service, click here.
For details on how to join the FPS, see Fujifilm’s page here
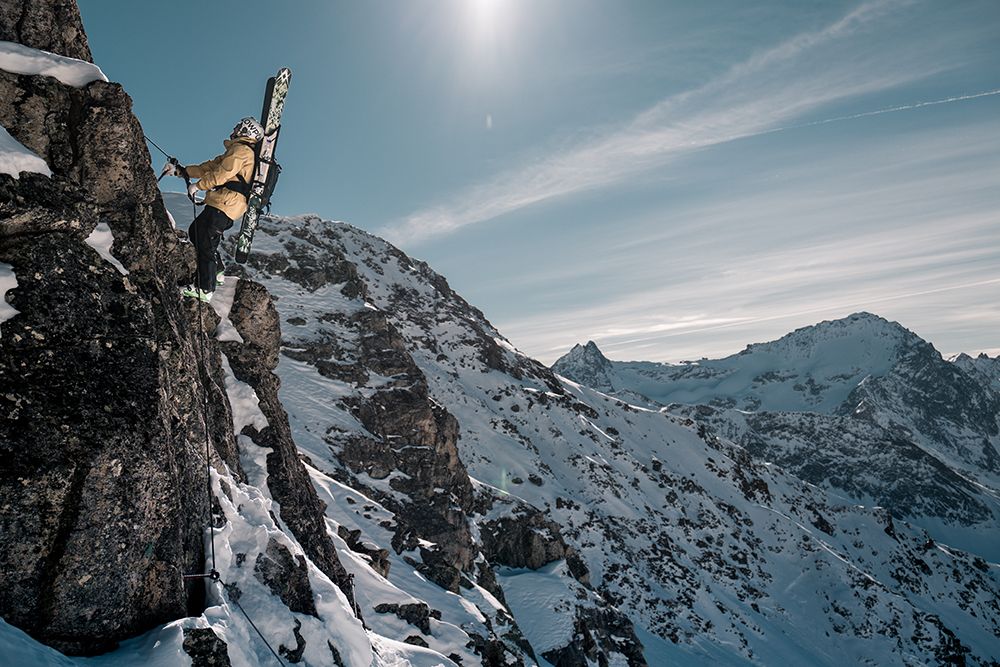
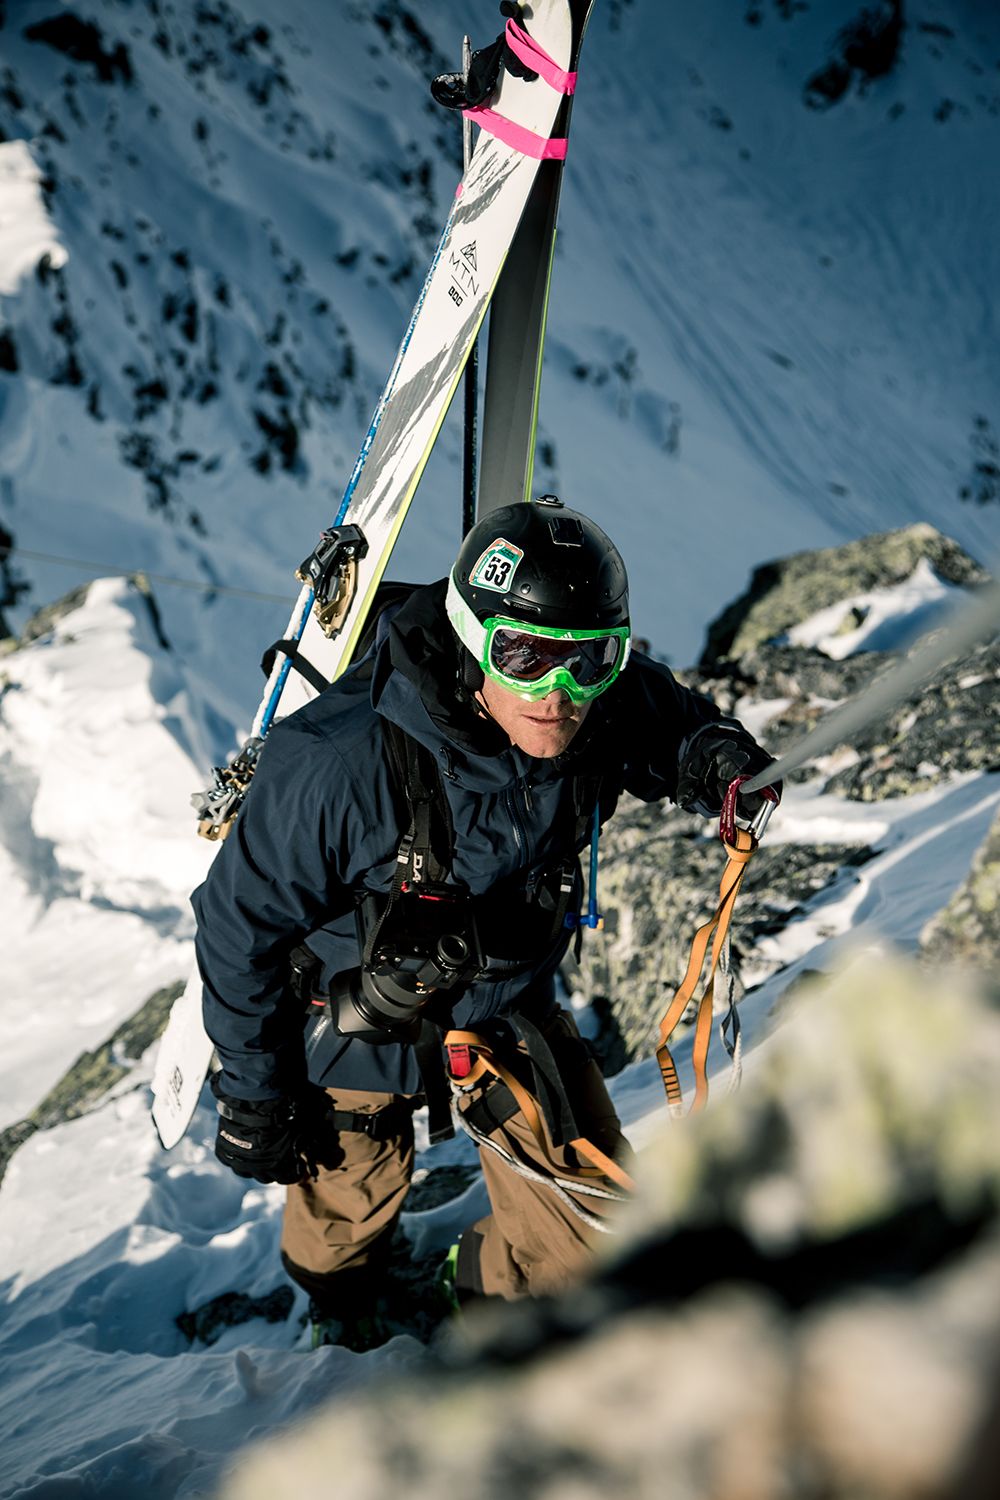
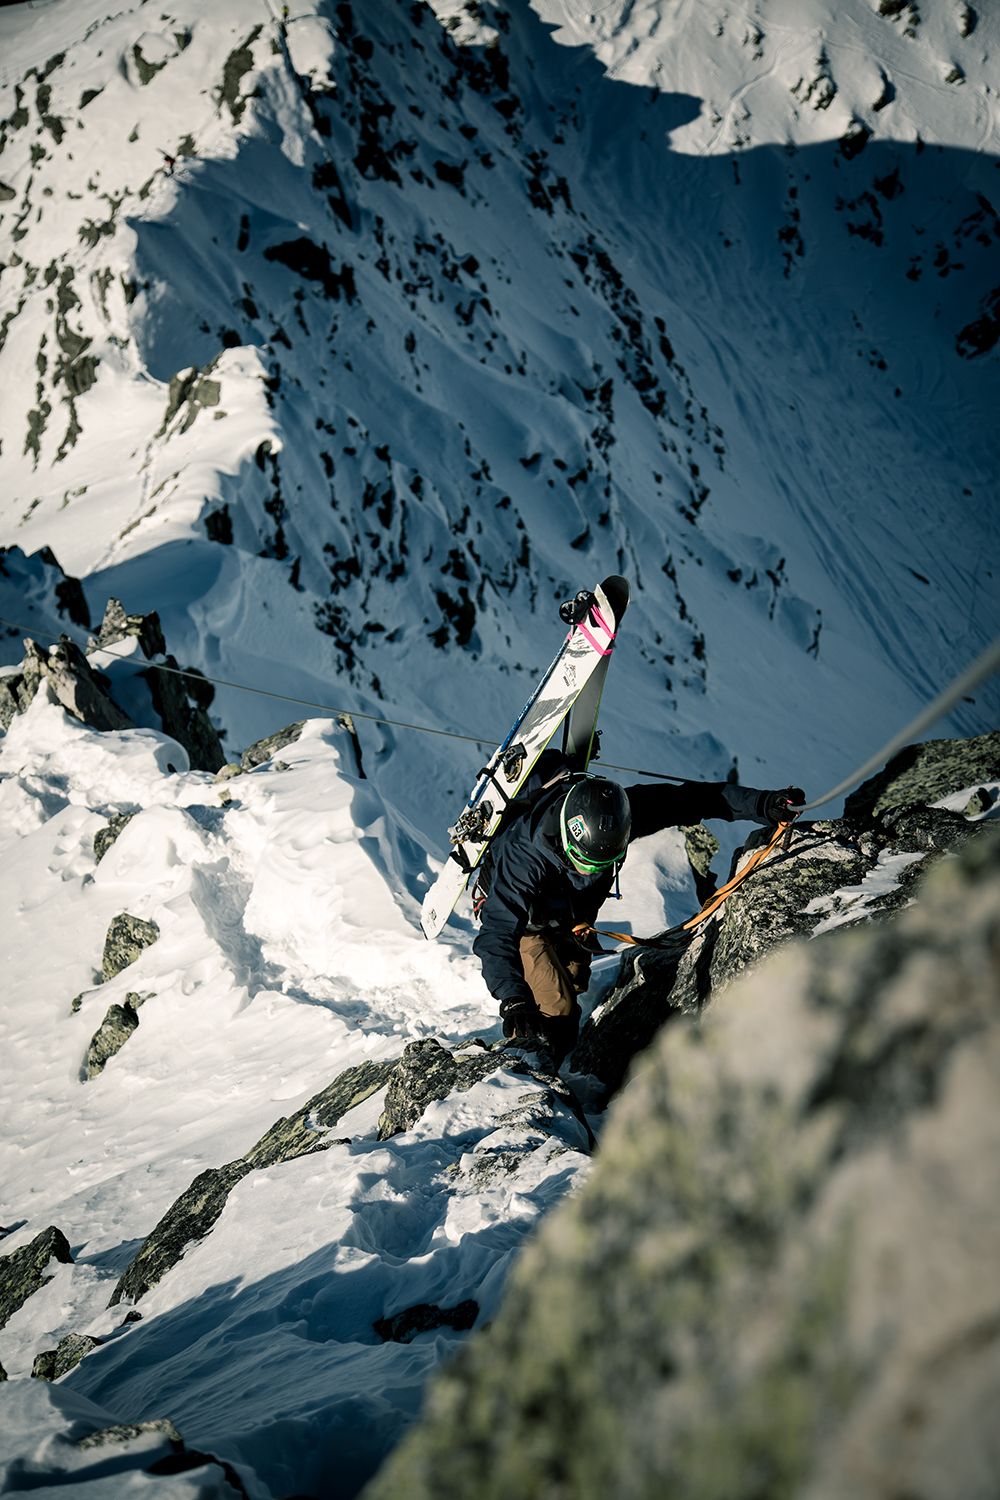
Fixation Ambassador Hugo Pettit and his shooting partner Finn Pomeroy put the Leica SL through its paces on a recent trip to Austria. Here they talk about their experiences and Hugo discusses his thoughts about the camera.
Hugo I was heading out to Austria for a couple of days of work and knew I had one full day to get my skis on. Although a short amount of time, the ideal photo opportunities in these environments are slim, you have to take them when you can. Before being asked to review the Leica, I was going to shoot with my ‘go-to’ Canon 5D Mk III. Rugged, light and reliable, I’ve been a Canon man for a long time, I know my way around the cameras well, totally necessary when in an environment where you (or the others waiting for you) are freezing while you change camera settings. This test of the Leica was not about testing every setting, it was about experience, ease of use and most importantly, image quality. I used settings that I know work well on other cameras, therefore much more of a straight comparison.
Finn We discussed where best to test the Leica SL as we really wanted to try and show the stunning landscape but also the human exploration element within. We decided after the first day touring that our best bet was to take the camera up on a climb. We could take our time climbing across one of the regions most famous ridges and if we timed it right then the sun would be setting for our descent back into town. We were going on a mission to test the Leica SL but the most key element for everything in the mountains is safety and to ensure we remain as safe as possible. We would be equipped with avalanche transceivers, probes, shovels, first aid kits, food, water and we would be harnessed on with leashes. All the kit goes on our back along with skis and poles and then we have to work out how best to carry our camera equipment. I had my Canon 5D Mk III in my bag alongside my kit whilst Hugo carried the Leica SL on a peak design clip attached to his chest. Both have advantages and disadvantages, my aim was to lead the way and push forward to be able to stop set up shots of Hugo using the SL whereas Hugo was going to be shooting from the hip continuously when a shot presented itself.
Hugo We had about 30 minutes the night before shooting to have a play with the camera; while the aesthetics are beautiful, I did at first feel a little confused looking at the minimalist buttons and lack of instruction. However, I got to grips with the basics quickly and set the camera up on Manual exposure and flicked the ISO to auto, setting the maximum to 3,200 and minimum to 50. On photo shoots where timing is key, (unless you’re well versed with changing these while looking through the viewfinder and shooting!) it’s very handy not only to be able to set the min and max ISO but to do this and trust the camera’s dynamic range and image quality is fundamental.
We shot with 2 x 64GB cards inserted in the camera to reduce faff having to carry extra cards and carried a full battery in a jacket pocket, close to my body heat! Batteries in cold environments don’t generally perform very well, so from the outset, with an electronic viewfinder and every part of the camera being electronic, battery life was certainly a worry.
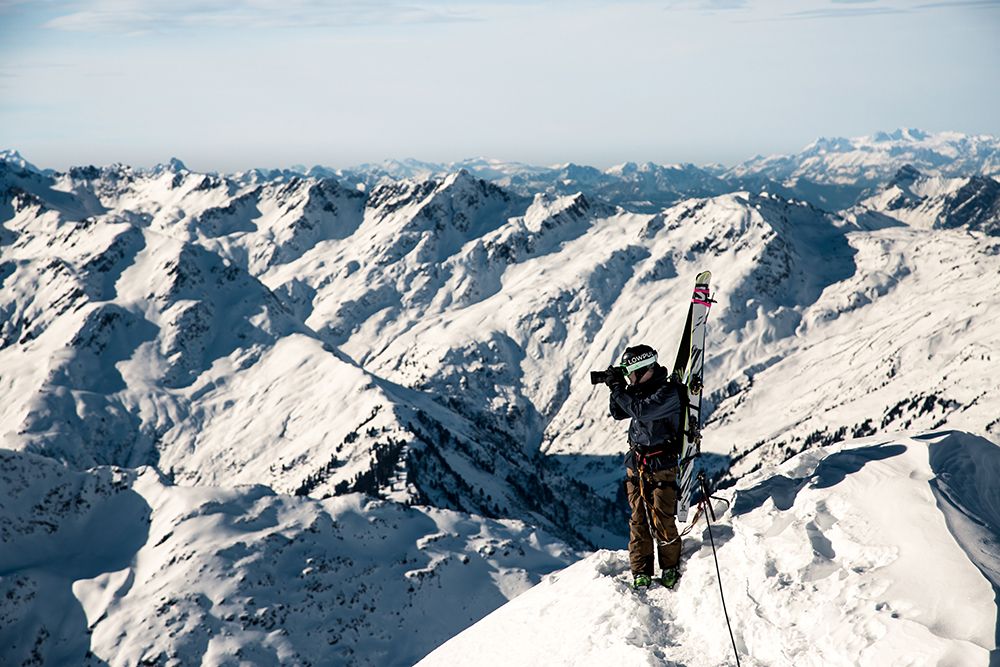
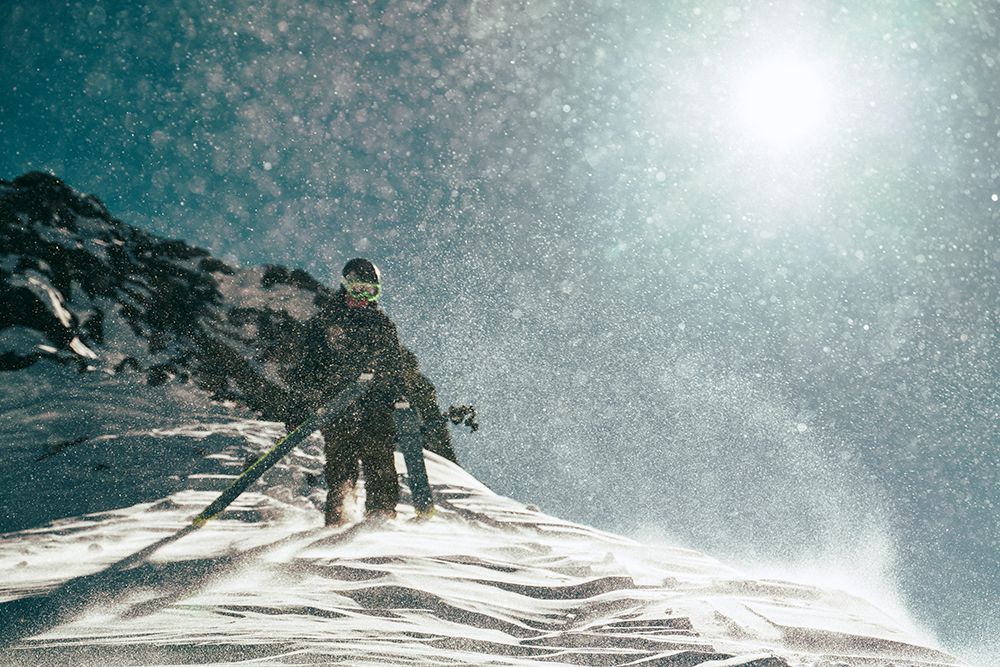
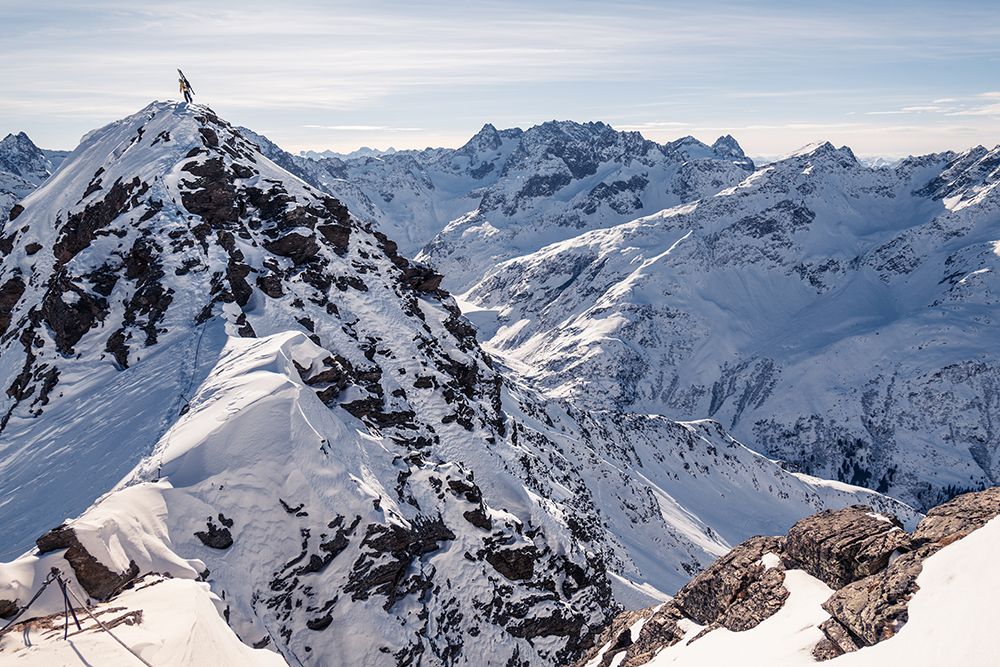
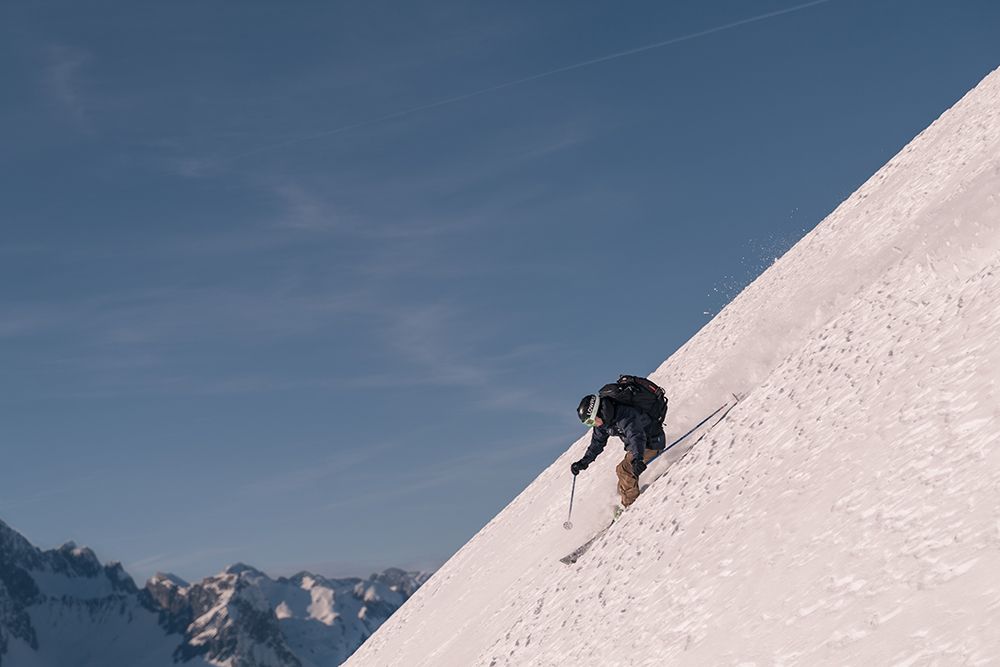
Finn We wanted to leave toward midday as then the ridge we were climbing would sit in the sun nearly continuously. It worked out well and, apart from the initial ascent, we had some beautiful light to use and work in all day. It’s quite an undulating climb varying between vertical sections, down climbs and meandering ridges with sheer drops either side. I pushed forward and allowed Hugo to shoot in as much space as he needed. He would radio through to me when a shot appeared and we would work together with his direction where I needed to be. Unsurprisingly he would normally find the most precarious positions to shoot in. I normally work directly with athletes as does Hugo, so to work together on shots was really refreshing and be able to describe from a photographic point of view the direction we both wanted sped the whole process up.
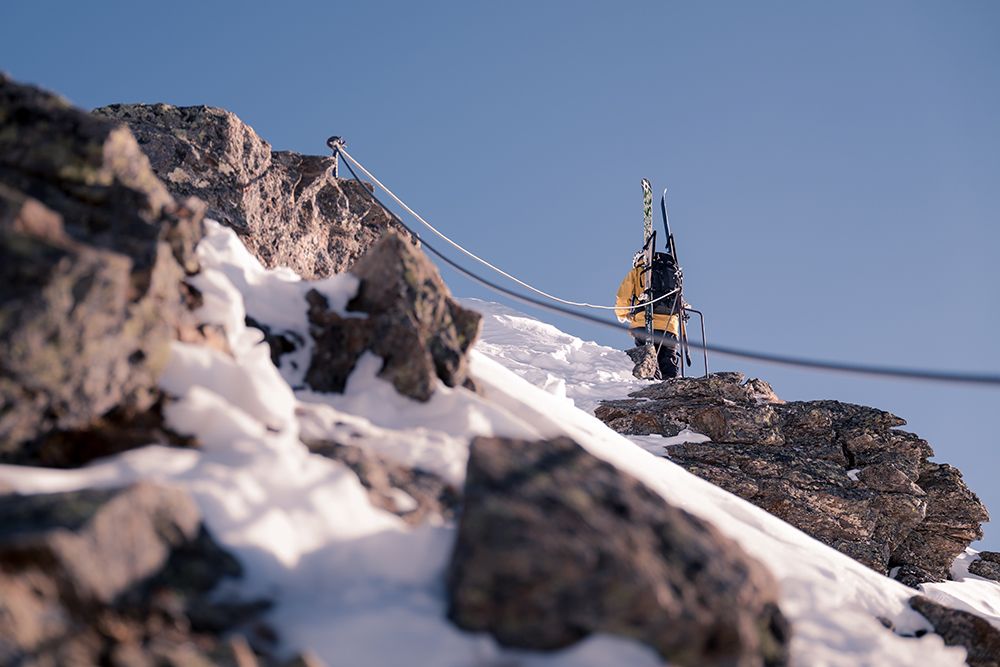
Hugo We got as high up the Rendl side of Sankt Anton as we could by lifts before started our climb along the Klettersteig from there. I used Peak Design’s Capture Pro to attach the Leica to my rucksack strap on my chest. The potential risks of climbing rock faces with over £10,000 worth of equipment round your neck are lessened somewhat with this handy piece of kit that I’ve used numerous times and trust implicitly. It was a beautifully sunny day with minimal wind and we had the mountain to ourselves. With skis and poles on my back, a climbing harness and two leashes and carabinas, I was clipped (where possible) onto a cable that ran up the spine of Klettersteig. Where I (not necessarily Finn) had a steady footing or where I felt it was a particularly beautiful setting, I had the opportunity to use the Leica, unclipping it from the Peak Design unit while still having the Leica strapped around my neck.
Finn It took us a few hours to reach the main peak from where we would start our down climb and to drop in for the skis. The Leica had been producing some stunning images and we took a few moments on the top to review what had and hadn’t been working. I’m used to being in the mountains with my Canon throwing it around, relying on it fully and knowing it inside out. It was really invigorating to be shooting on the Leica and seeing how it held up in the more than adverse conditions. The images seemed to be coming out as we’d hoped and my behind-the-scenes shots of Hugo had been working in a similar fashion.
Hugo Having spent some time arranging kit so that unnecessary movement was minimised, I was still worried about the ‘inevitable’ battery change. Leica have removed this with two simple solutions: Having a very simple and intuitive battery removal 2-step-system, and more importantly, creating a battery that I didn’t have to change all-day… unheard of! I climbed with lens cap and lens hood on to protect the lens, and despite watching the hood roll off a cliff, it was with just 100 metres of climbing left, so I felt secure that the kit was safe. Having said that, I would certainly tape the hood on and certain parts of the camera up to reduce potential scuffing of the beautifully design aluminium body.
What I look for in a camera, aside from ease of use in the more extreme environments, is simply image quality. There is obviously a price difference between the Leica and my Canon 5D Mk III, but I am incredibly impressed with the image quality and I definitely feel it’s worth the difference. We shoot in a huge variety of locations, our most natural of which are in the sea and the mountains. These environments offer incredible beauty but sometimes tricky lighting conditions. The contrast between the highlights and shadows is always extreme and unappreciated. What the Leica does beautifully is pull light and definition from the shadows. At low ISO’s (below 2,000) it has an incredible dynamic range. Added to the general image quality, this camera excels in these environments, allowing you to pull the shadows and crop very effectively when editing images.
I would love to spend more time with the camera, fully get to grips with the various settings and ability to change the functionality of the various buttons. Not only this, but the video and amazing image stabilisation looks tasty, I have some film projects upcoming which I’d love to shoot with the Leica.
Overview
Pros
Amazing dynamic range
Clarity and image quality
Camera aesthetics and solid build (with just two pieces of aluminium)
Easy to use with gloves on (as long as you don’t have to go into the menu)
Easy buttons and dials (once you know what they do!)
Easy focus point adjustment while shooting
Easy battery lock system and card slots
Great battery life
ISO 50 with 1/8000 sec shutter allows for large aperture
Dual card use (with addition of UHS-II for extra speed)
Floating ISO – changes in ISO when changing zoom (and thus maximum aperture)
Cons
Electronic viewfinder in bright light is hard to see (extra hand sometimes needed to cover incoming light)
Takes a while to familiarise yourself with the menu and controls; less buttons means more time spent in the menu sorting the personal controls. Good in the long run, not great if you’re picking it up for the first time
Weight (heavy)
Controlling focus point shooting from a long distance or picking a small point at 24mm
In a studio or in any environment where playing with settings is more appropriate than the sea or on a sheer rock face, this camera is in it’s natural home off the shelf. However, despite the seemingly unintuitive menu and minimalist buttons, with some time spent creating the perfect menu setup, this is also a camera I’d love to spend more time with in the mountains and the sea. With extra preparation, I can envisage this camera actually becoming easier to use than the more standard DSLR, with many more buttons on the back.
With image quality being paramount, this is where this camera excels. While finding some focus points a little tricky to control, the images I got out of this camera were noticeably better than my Canon 5D Mk III. With the huge contrast in light and dark in the mountains, it proved a great test of it’s dynamic range and image quality and has passed with flying colours.
Weight is always an issue with the choice of camera and despite it being comparatively heavy and seemingly cumbersome, the hardwearing aluminium shell offers great protection to a fantastic piece of kit. It’s important to continue to learn and finding my way around this camera in time is something I look forward to. It’s nice to be sure that it’ll be worth the time through the quality of images.
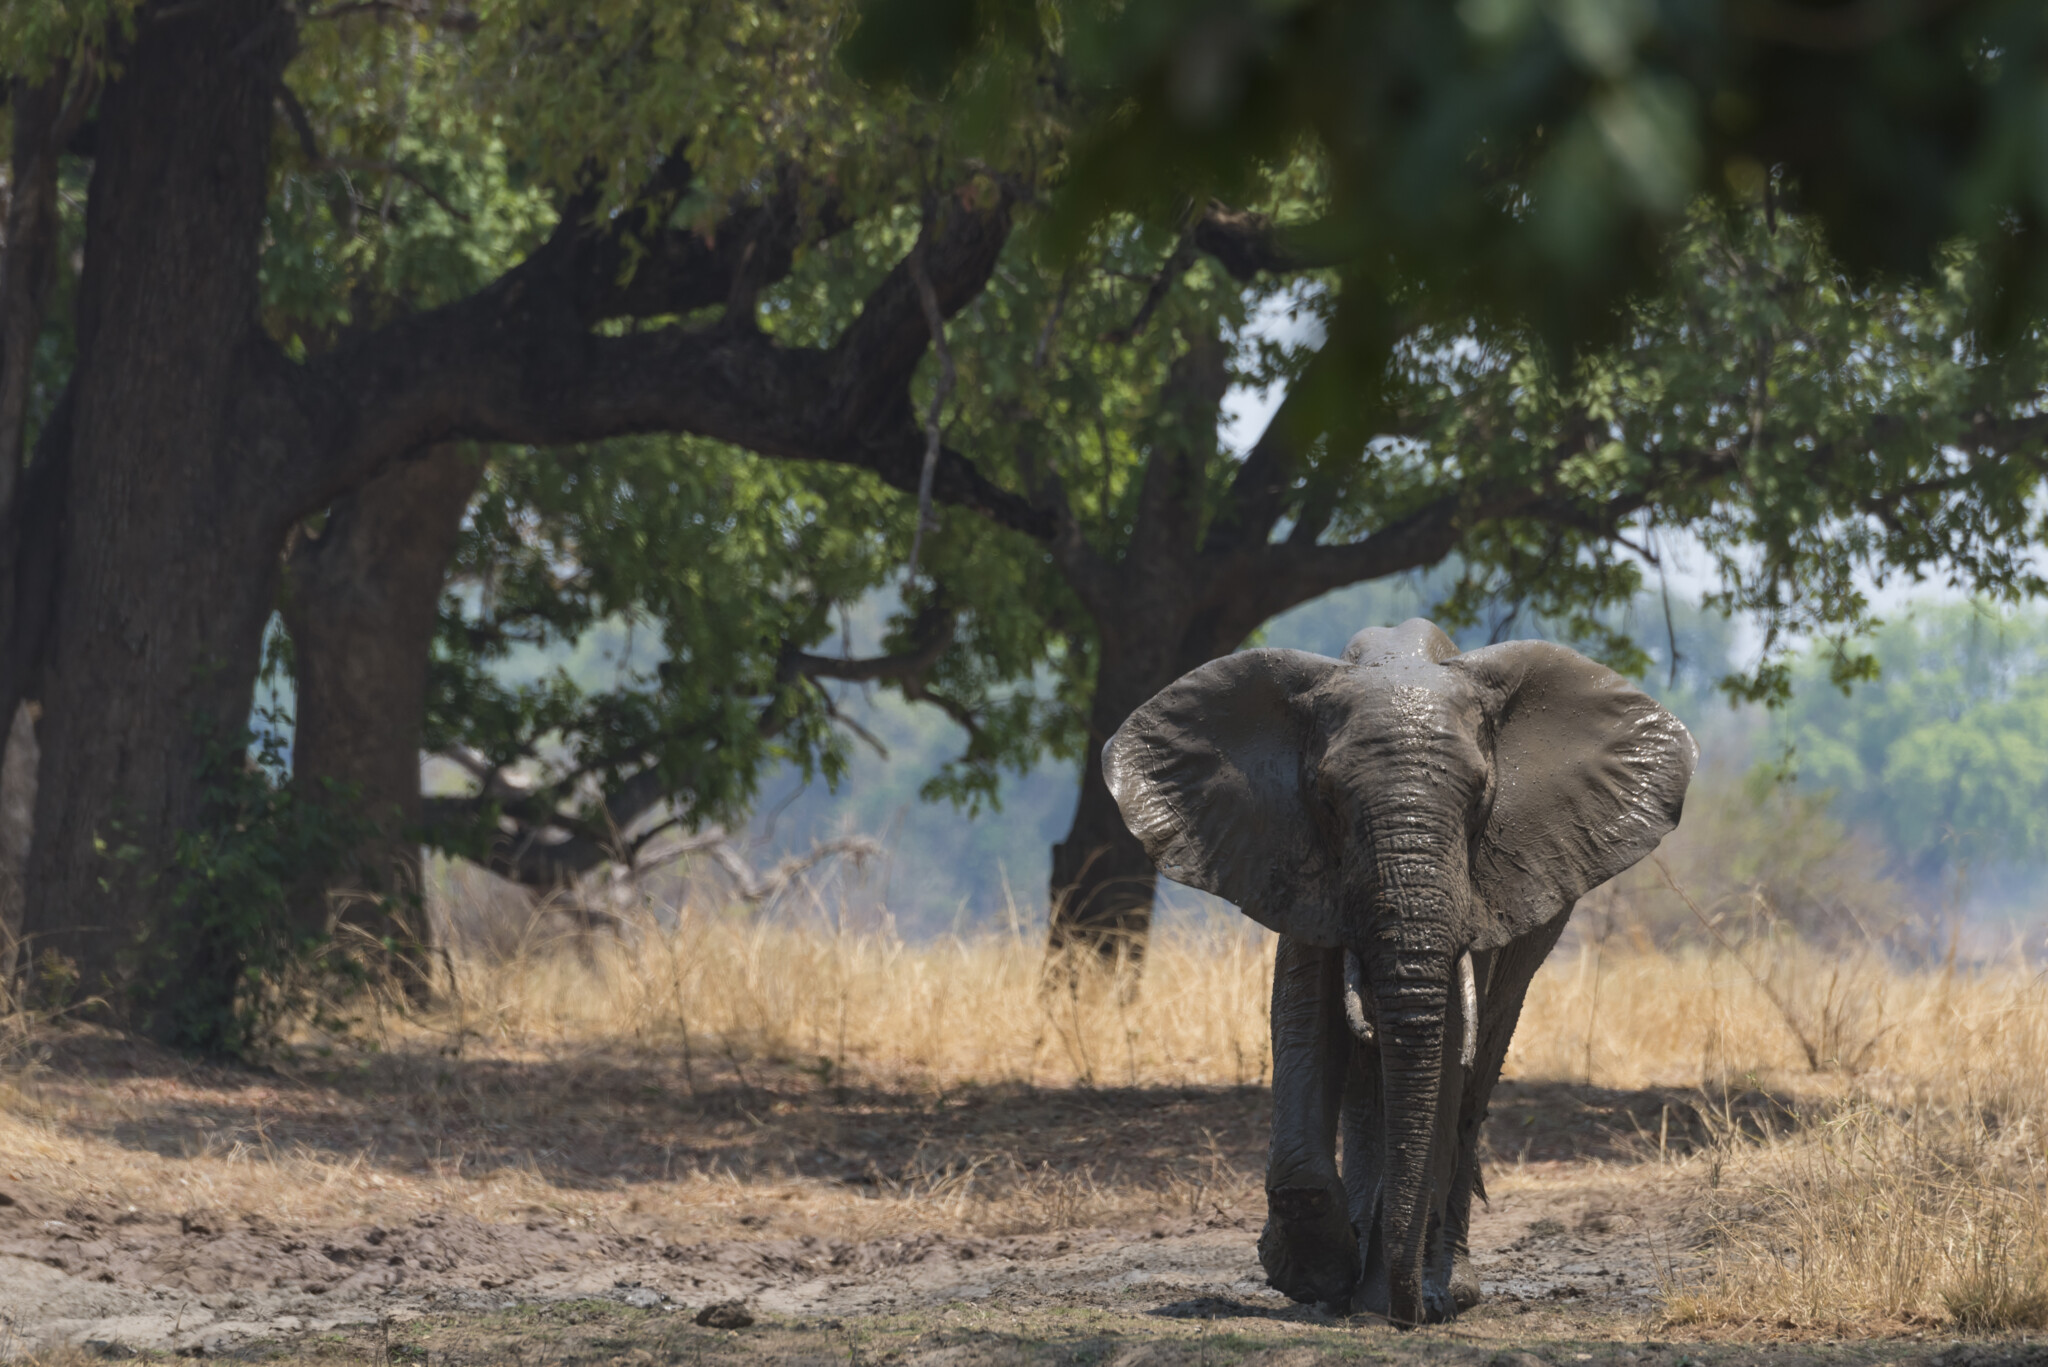
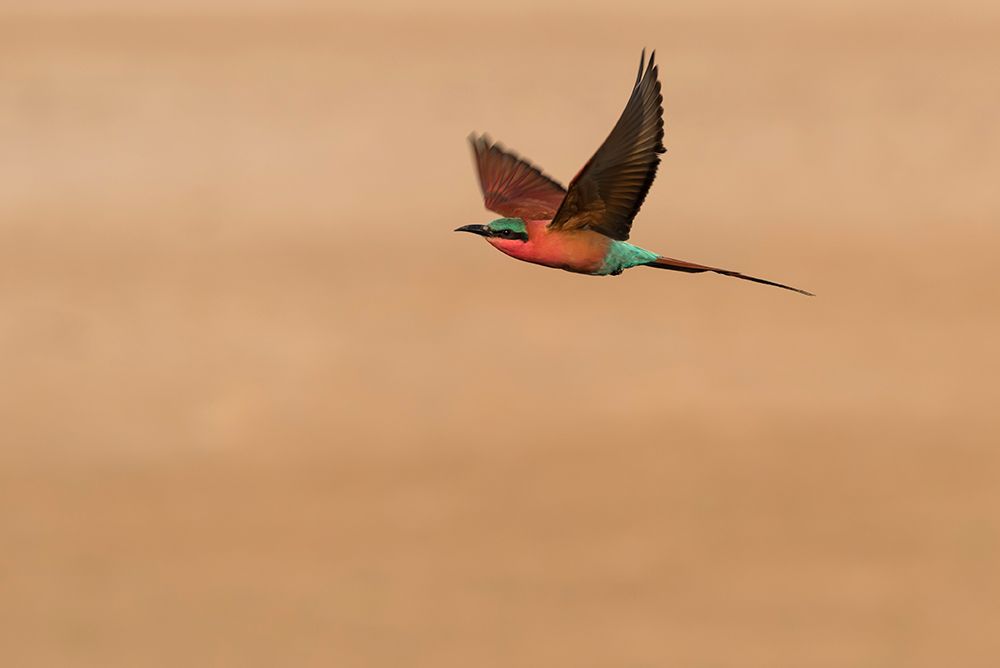
In addition to renting the usual range of professional photo gear, Fixation also offers the DJI Phantom 4 drone to give photographers the chance of a different perspective on their shoots. We recently loaned one to Chris Breen to try on his recent trip to Zambia.
Chris runs a travel company called The National Travel Collection, in which there are several different brands that offer different experiences. One of these, called Wildlife Worldwide, specialises in taking people to see some of the world’s most spectacular wildlife. And, as it turns out, a good deal of that wildlife resides in Zambia.
“I know Zambia very well,” Chris says. “I used to guide there. I was out in Zambia towards the end of last year with a group. That’s what I do – I lead trips, I design holidays, I build itineraries and I go to wild and wacky places.”
As you might imagine, travelling the world’s finest and most beautiful places can leave one with an urge to snap a few pictures, and as a consequence Chris has become an accomplished photographer. He’s always on the lookout for new ways he can get a new perspective on the animals he encountered, and for his trip to Zambia we had a suggestion.
[gdlr_quote align=”center” ]Fixation very kindly lent me a drone to take on the trip. It’s an amazing device – very easy to use and even though I’d never flown one before, I found it simple and responsive.[/gdlr_quote]
The drone in question was a DJI Phantom 4, and we were keen to find out how Chris had fared.
Thanks for talking to us, Chris. Was your trip to Zambia your first experience using a drone for photography?
Until the middle of last year I’d never used a drone before. I was lent a DJI Phantom 4, and I experimented with it at home before flying it up in the Arctic. I didn’t get a huge amount of flying done up there due to some technical issues, but I did get some quite nice footage over one of the ice fields.
After that I took it to Zambia and got some beautiful aerial shots over one of the world’s greatest national parks.
What was the experience of using the drone like?
It’s an amazing device to fly. It’s very simple, it’s very easy, and for that reason it’s quite liberating in many ways. Even though I’d never flown one before, I found it very simple to use and very responsive. It’s really a game-changer from a photographic point of view. I’ve always enjoyed wildlife and scenic photography, I’ve been doing it for the past quarter of a century, and to suddenly find you can take the kind of images that you would otherwise only get when you’re sitting in a helicopter, which of course costs a lot of money, is wonderful. And to be able to see it on a screen as you’re doing it is exciting, so I thought it was brilliant.
So it’s easy to fly, easy to use – it’s also manoeuvrable and incredibly stable. I also found that once I got it to a certain height I couldn’t hear it. When you’re out in the wilderness the last thing you want to do is make a lot of noise. In Zambia there are a lot of ambient sounds from the wildlife, so you only need to get it to a relatively low height before you can barely hear it. That enabled me to fly very safely and quietly upriver without disturbing anything. I did some low passes over some hippos on the river and lots of stuff like that – it was really neat. A great trip.
It’s presumably an important consideration of yours to avoid disturbing the animals?
Yes, it’s really important. I don’t want to disturb the wildlife, and I also don’t want to disturb the people who are going there for the peace and tranquillity of the place. That’s crucially important. So I found the DJI Phantom an absolutely brilliant device to work with, and I’m hoping I can work with it again.
I’ve got a number of projects coming up. I’ll be in Mexico at the end of March to do some whale watching off the Pacific coast, and I’m hoping to take one of the drones out with me, which I’ve never done for whale watching before. I’m interested to try the newer DJI drone – the DJI Mavic Pro. From my point of view, as I travel with a lot of camera gear, it’s the fact that it’s much smaller that’s particularly important.
I’m going into the rainforest in Borneo, where I’ve been a number of times before but never taken the drone, and I’m also hoping to take the drone back to Zambia when I go out in mid-September. One of the cool things about that trip will be that I’m going at a different time of year – a couple of months earlier than I did last year – so the landscape will look totally different.
NB.Please note that some countries enforce a ban on the use of drones which are sometimes used by poachers to locate target animals. Please check with the relevant authorities before attempting to fly a drone near wildlife.
No strangers to medium format, Fuji’s heritage lies with iconic cameras such as the GS645, G617 and the first AF medium format, the GA645.
While the design and technology are distinctly modern, the camera follows Fuji’s philosophy of portability and size, resembling a larger X-series camera. Despite boasting a medium format 50MP sensor – almost 70% larger than a full-frame DSLR – the camera itself is comparable in size to a D810, albeit slightly deeper.
Menu navigation and operation on the GFX is similar to its smaller stablemate, the X-T2 and existing Fuji users will feel at home with the controls.
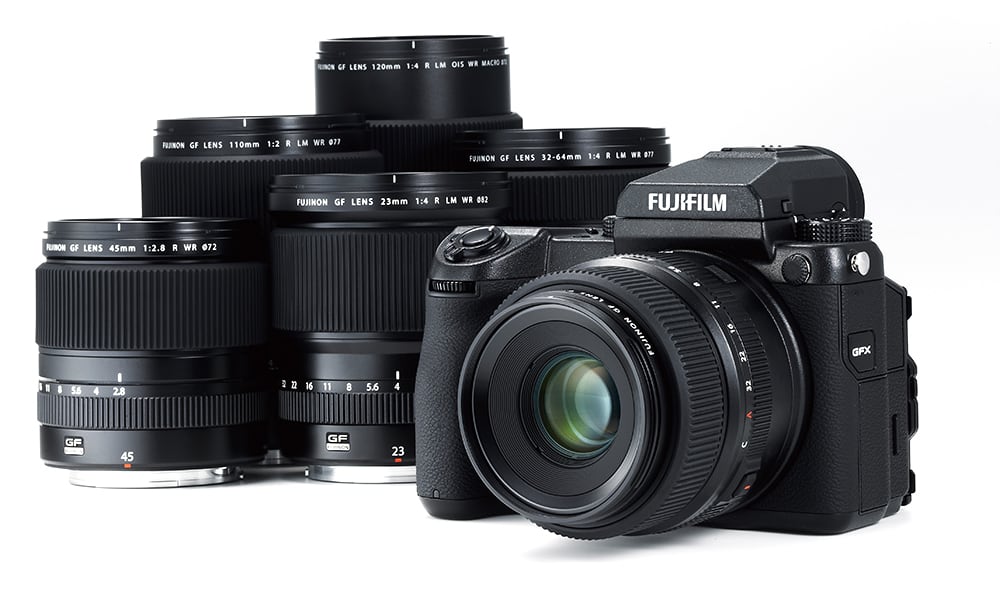
The initial lens lineup comprises six lenses ranging from a superwide 23mm ƒ/4 (18mm equivalent in 35mm) to a 120mm ƒ/4 Macro (95mm equivalent), although not all lenses will be shipping immediately.
Peter Dazeley BEM FRPS – known simply as ‘Dazeley’ – is a celebrated London photographer renowned for fine art and advertising photography.
He is delighted to have been awarded The British Empire Medal in the Queen’s New Year’s Honours list for 2017. The BEM was awarded to Dazeley for his services to photography and charity. In 2013 Dazeley was awarded a Fellowship from The Royal Photographic Society; a fellowship is the highest distinction of the RPS and recognises original work and outstanding ability
In the 1960’s at the age of 15, without any qualifications due to his dyslexia, Dazeley started his working life as a photographer. Through sheer hard work, passion and dedication to his art, after 50 years, he has reached the very top of his profession. Dazeley’s success has given him the opportunity to ‘Give Back’ donating his time and energy as a photographer, to many different charities. He also spends time mentoring and inspiring young photographers.
Despite his full time commissioned photographic work taking up so much of his time Dazeley still finds time to work on a variety of fine art projects. Recently, in association with writer Mark Daly, he published his latest book London Uncovered (2016); a logical progression from their best selling book Unseen London (2014).
“As a born-and-bred Londoner I had tremendous fun recording my hidden London as it stands in the twenty-first century for my hugely successful first book Unseen London. Many readers of that book told me of their frustration and disappointment in being unable to visit some of the locations, especially those which had absolutely no public access; this gave me the idea to produce a sequel, featuring London’s lesser-known institutions, buildings, homes, shops, museums and attractions that are easily accessible, complete with access details and website information.”
Collectively Dazeley’s images form a picture of a London, which is strange, gaudy, grand and inventive – an endlessly fascinating world city with its own unique charm. Beneath the covers of London Uncovered, you will find famous landmarks such as Apsley House No 1 London and The National Theatre alongside unusual museums, remarkable shops, historic homes and lesser-known locations such as the Charterhouse, Wilton’s music hall and the Rivoli Ballroom.
As the author of the book, Mark Daly explains: “‘Uncovered’ does not mean the disclosure of a private place, because these buildings and sites are all available to visit without special insider access. The common thread throughout is largely the photographer’s ability to uncover a fresh perspective on a special piece of London. The subjects are eclectic, encompassing buildings, monuments in plain sight and walks, with some places famous and others obscure.”
BBC Worldwide News recently interviewed Peter as he took a tour of some of the book’s locations. Watch the video here
We recently caught up with Peter during a break from his busy workload to ask him a few questions.
Is London Uncovered part of a trilogy project?
I didn’t set out to shoot a trilogy, but I am just finishing my third book on the wonderful theatres of London, which has been tremendous fun to do and I’m really proud of it. It will be published by Frances Lincoln in September 2017.
What projects are you working on now?
My publisher and I are in discussion regarding a new project which I will start this year. Top Secret at the moment…
What camera equipment do you use?
London Uncovered was shot using available light and long exposures, to keep the ambience of the locations. My Nikon D810 coped beautifully with mixed lighting and very long exposures. As far as lenses go, I used the Nikkor AF-S 14-24mm ƒ/2.8G ED and Nikkor AF-S 24-70mm fƒ/2.8G ED.
My first book, Unseen London, was shot on a Hasselblad with an assistant, a laptop, a laptop stand, etc. and was very hard work. Shooting on my own with just a Nikon and tripod has completely reinvented the way I work.
You’ve been a friend and customer at Fixation for many years. To what extent do you rely on us for your work?
I have known Barry Edmonds (our Nikon service manager) for more years than I can remember. Way back when he was the genius at Nikon UK, who solved my problems. I am wildly dyslexic and constantly struggle with technical stuff. Barry and Fixation have always been there to help and support me. In this day and age it is wonderful to have a company who will go the extra mile for you.
We use cookies on our website to give you the most relevant experience by remembering your preferences and repeat visits. By clicking “Accept”, you consent to the use of all the cookies.
This website uses cookies to improve your experience while you navigate through the website. Out of these cookies, the cookies that are categorized as necessary are stored on your browser as they are essential for the working of basic functionalities of the website. We also use third-party cookies that help us analyze and understand how you use this website. These cookies will be stored in your browser only with your consent. You also have the option to opt-out of these cookies. But opting out of some of these cookies may have an effect on your browsing experience. We log visitor IP addresses and cookie preferences for due diligence reporting.
Necessary cookies are absolutely essential for the website to function properly. These cookies ensure basic functionalities and security features of the website, anonymously.
Advertisement cookies are used to provide visitors with relevant ads and marketing campaigns. These cookies track visitors across websites and collect information to provide customized ads.
Performance cookies are used to understand and analyze the key performance indexes of the website which helps in delivering a better user experience for the visitors.
Analytical cookies are used to understand how visitors interact with the website. These cookies help provide information on metrics the number of visitors, bounce rate, traffic source, etc.
Functional cookies help to perform certain functionalities like sharing the content of the website on social media platforms, collect feedbacks, and other third-party features.