USING THE PROFOTO A1 image

Using the Profoto A1

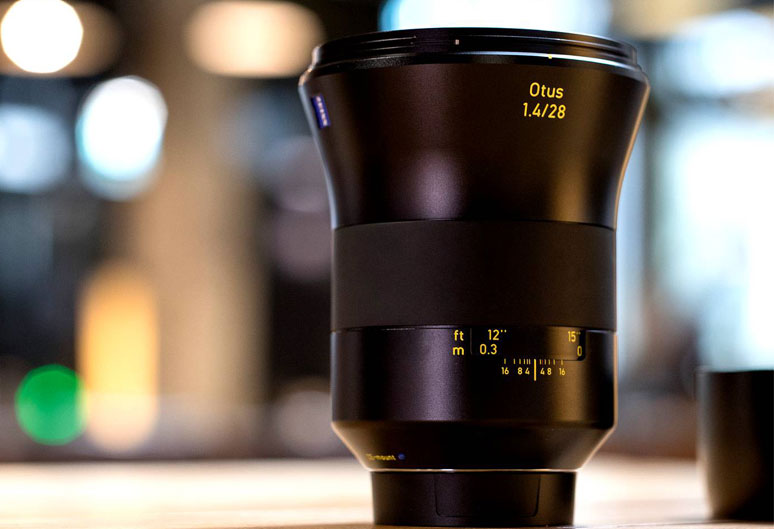
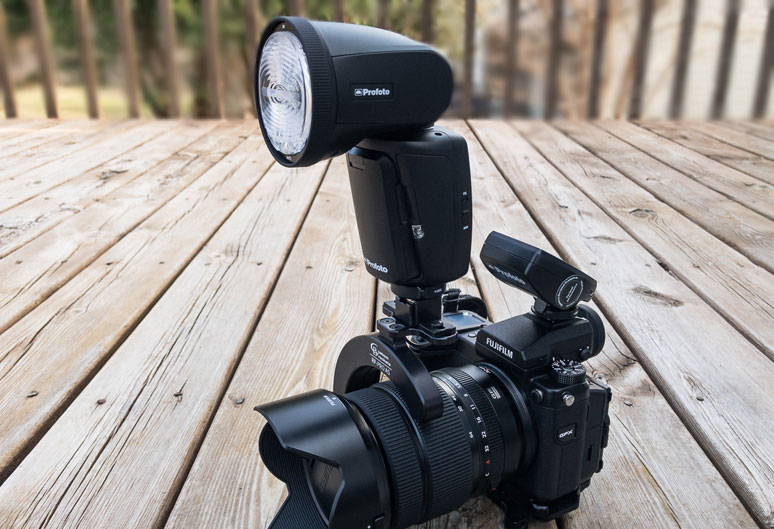
Profoto made a big splash recently when they released the A1 – dubbed the world’s smallest studio flash.

I was fortunate enough to get a hands-on training day with the A1 at Ashridge House in leafy Hertfordshire, where I got to play with the new flash alongside existing Profoto gear. Our tutor for the day was Holly Wren, a self-confessed Profoto fan and user of the brand. I caught up with Holly after the official launch to ask her views on the A1 and how she found working with it during the training sessions.

© Holly Wren
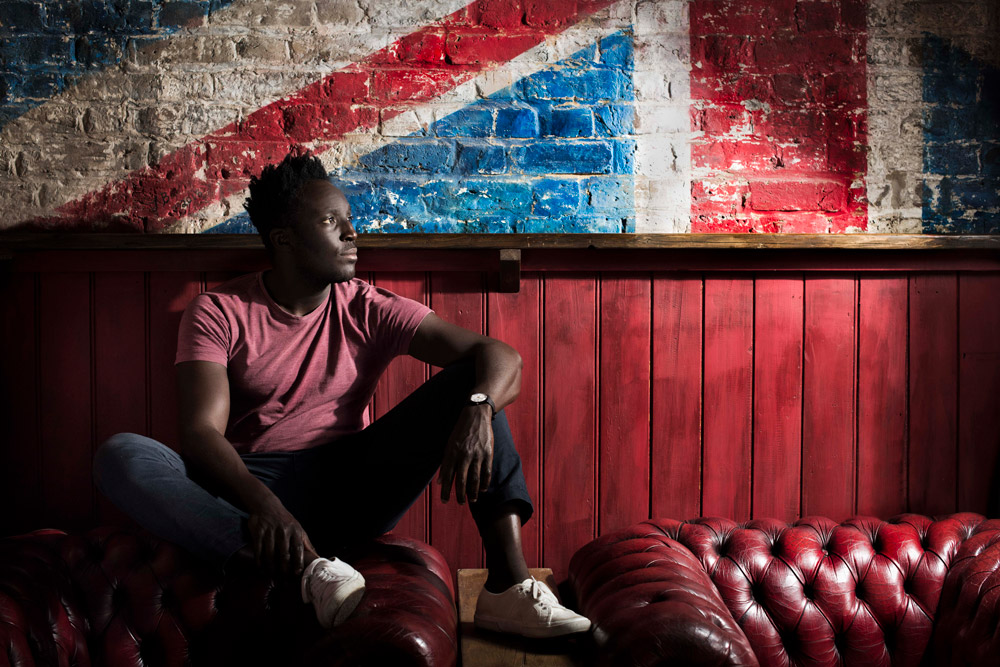
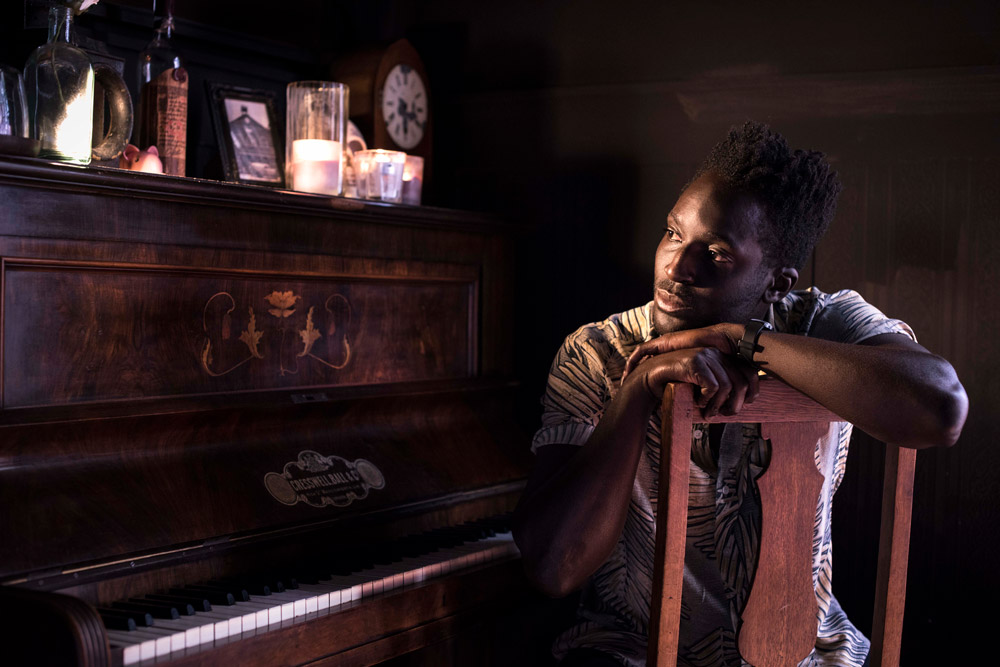
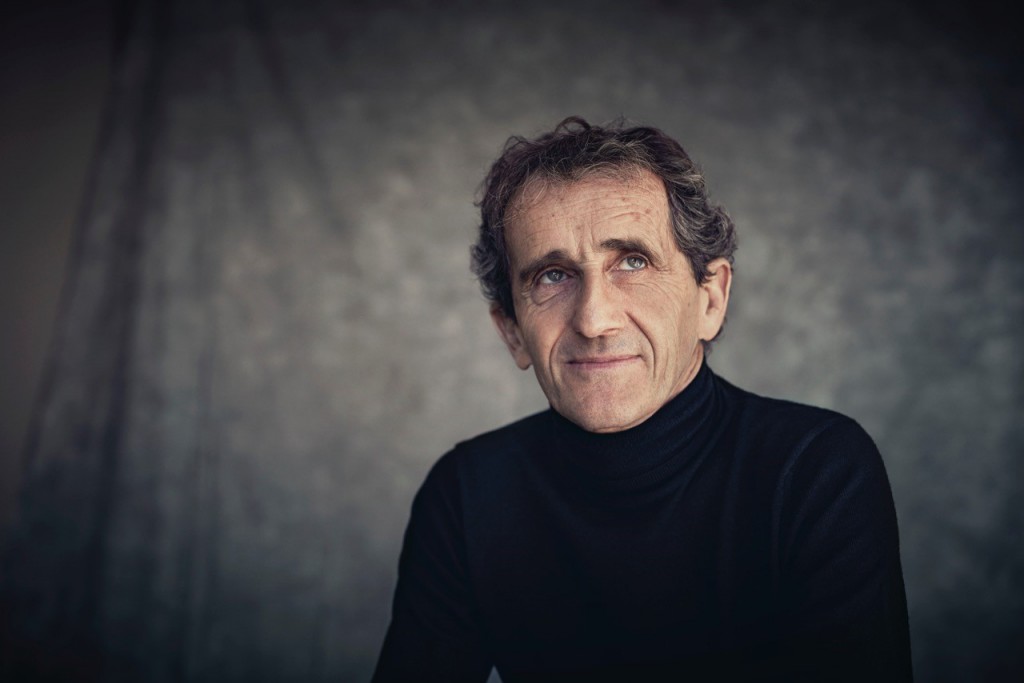
Nikon D810 + 24-70mm ƒ/2.8G | 1/250s ƒ/3.5 ISO 1250 | © Holly Wren

I understand you were privy to the A1 for a long period before the launch. What were your initial thoughts when you finally got to try it?

When they told me there was a new product they wanted me to try, I guessed that it would be a smaller light, an on camera solution; it made sense as Profoto’s range has become more compact and portable in the last few years with the B1X and the B2.  Photographers want to bring the quality of their studio lighting kit onto their environmental shoots, and I think that ‘speedight’ market hasn’t been updated for a while, so I was eager to see exactly how they’d interpreted that.

My initial thoughts when I got my hands on the A1 were about how small and portable it is, and the standard of build quality, plus it’s ease of use – picking it up for the first time I was very quickly able to use it without reading a manual.

Man against wall | © Holly Wren
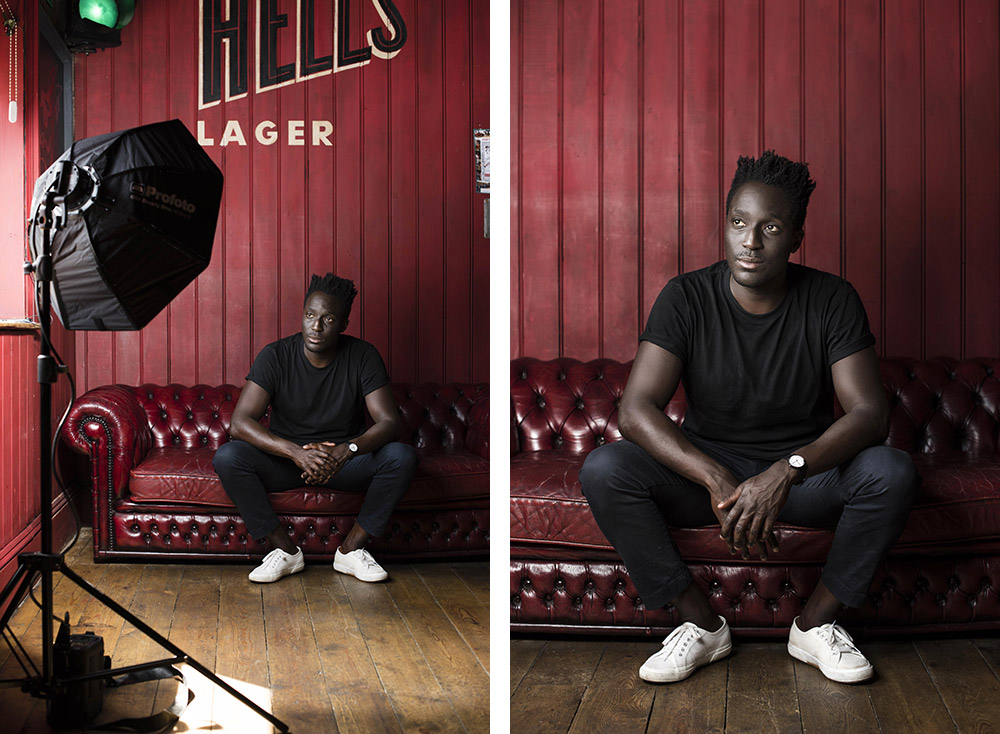
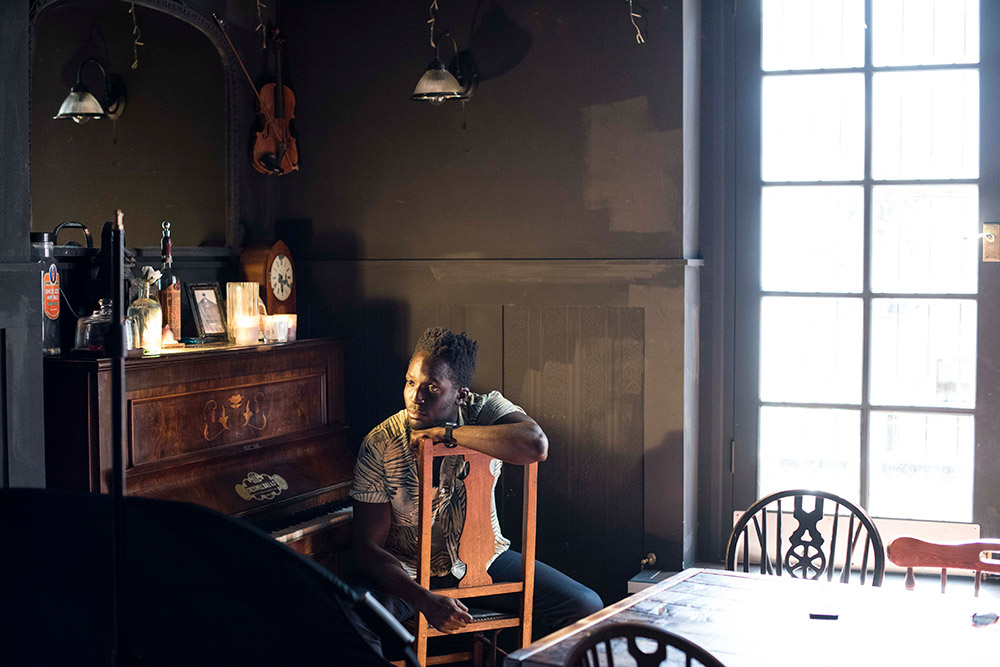
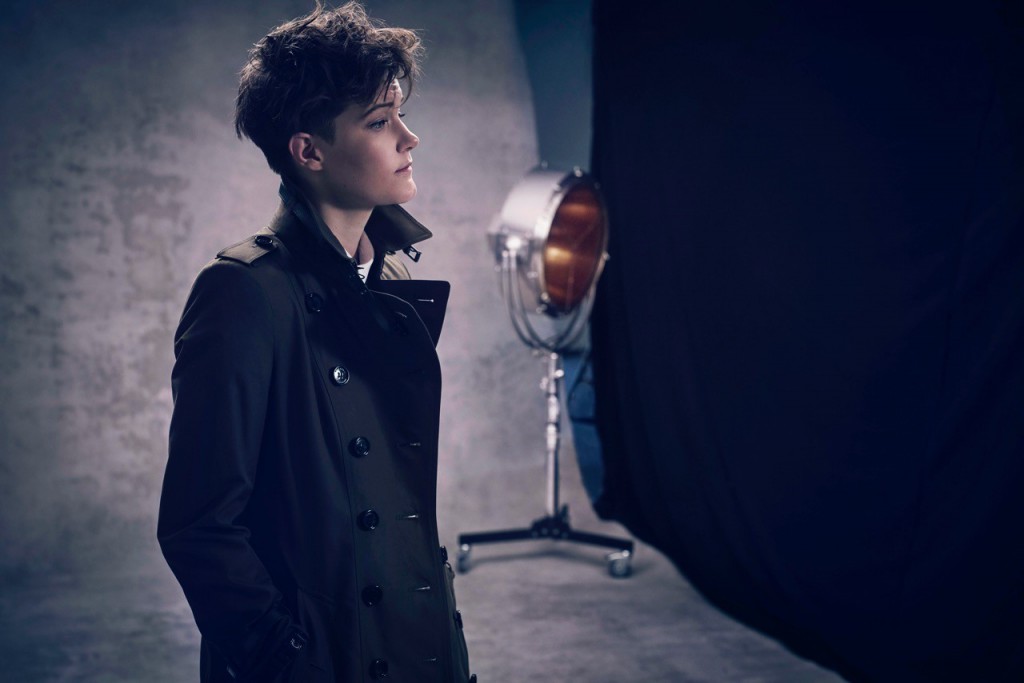
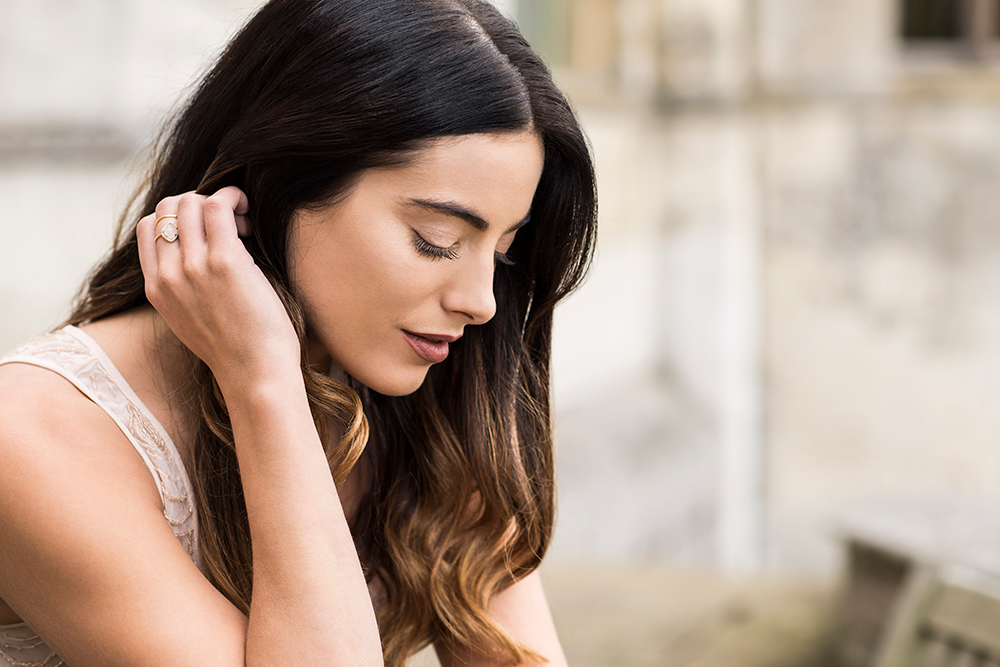
Here an A1 is held slightly off camera and used to add more light to the scene, but blended seamlessly with natural light | © Holly Wren

You refer to it as a Speedlight, but Profoto like it to be referred to as a studio flash, why the confusion? Where does this product fit in a photographers lighting kit? 

Profoto like it to be referred to as a studio light because it has the features and technical sophistication of their location light be it in a smaller package; but in my opinion the fact that it is the same size and performs on camera like a speedlight, it is largely comparable to one. In fact, I think to not compare it to a speedlight is an injustice to just how well Profoto have done in their improvement on the traditional on-camera flash unit. For a lot of photographers it will replace their speedlight as it corrects some of the frustrations that a more traditional speedlight brings.

I see it as a true hybrid between my larger location lights and my speedlights. In some circumstances it replaces my B2 or B1, but in all circumstances it replaces my speedlight. In fact, I’ve already sold both my Nikon SB910’s, which is a testament to this product.

You can use it as you would a speedlight on camera, as a light off camera, or combine it with other Profoto kit such as the B1X or B2.

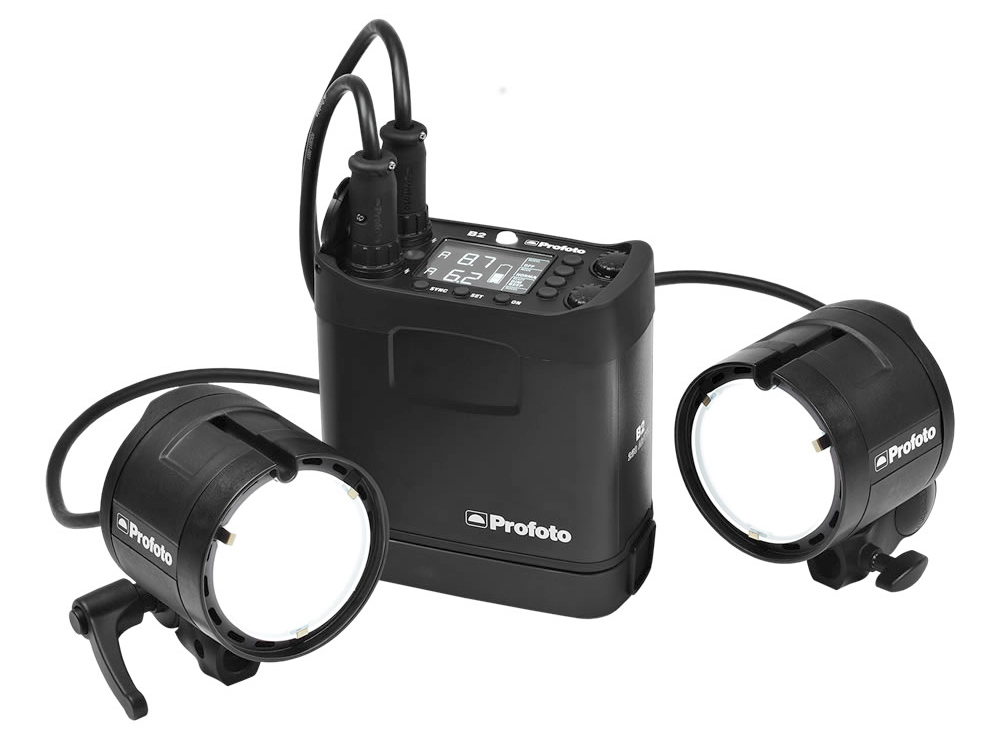
You’re a big advocate of the B2’s. How do you think the A1 will fit into your style of shooting, given that the output is lower?

What I’ve discovered using the B2’s is often that I don’t use them on anywhere near full power, often they are set on the lowest power. Primarily that’s because I use them to add an extra bit of clean, beautiful light into an already well lit, natural light led set up.  So if I’m using them on the lowest setting, I can substitute them for an A1 easily, without being short of power.

In addition, I sometimes use the B2’s to add a hair or rim light or to light something within a scene, the A1’s are perfect substitutes for this, being small and discreet.

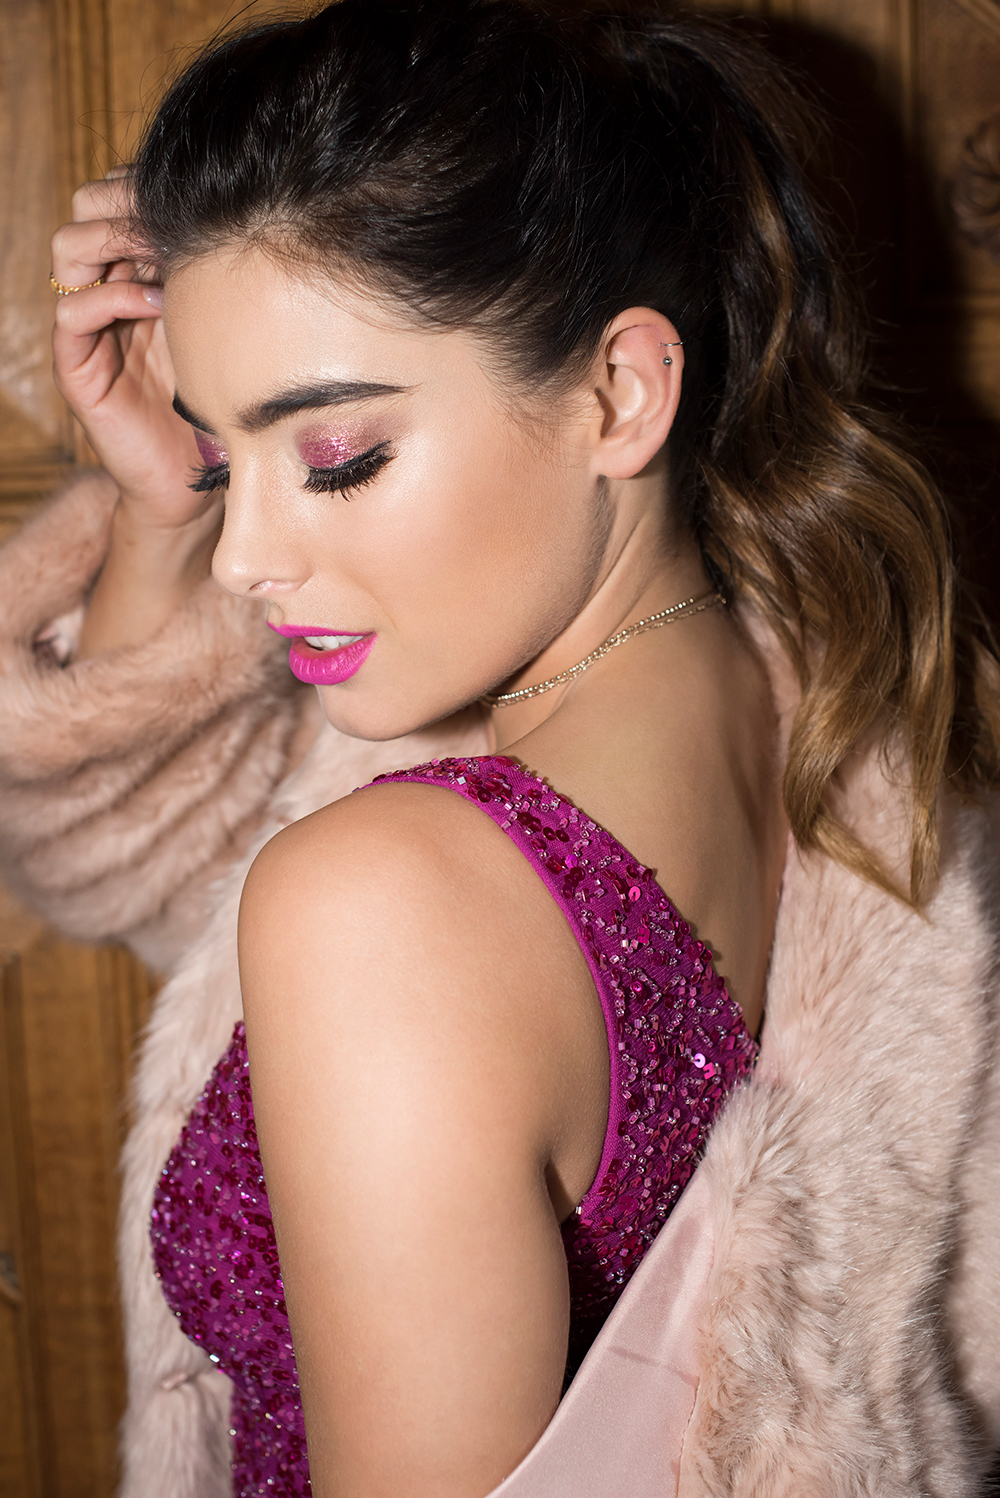
Nikon D810 + 85mm ƒ/1.4G | 1/250s ƒ/3.5 ISO 200 | © Holly Wren

Are there any particular features of the A1 that you feel set it apart from other on-camera systems? Do you ever shoot with Speedlights, and if so, will the A1 replace these for you?

Absolutely. I have used speedlights throughout my career. The A1’s key selling points are clear, and in my opinion means the A1 outperforms its competitors in this on-camera market.

The first is its use of Lithium batteries – meaning you can recharge, see how much battery you have left, and expect consistent power to the end. Farewell to piles of AAs in the bottom of my kit bag and the uncontrollable urge to replace barely depleted batteries with new ones before key shooting moments.

Second is the recycle time, you need to see it to believe it but the A1 literally doesn’t miss a shot. Firing at 12 fps on the D4 you will see no drop off in flash (as long as you’re not at full power on the A1), and anyone shooting events will understand the frustration of getting the shot but it not being lit correctly because the flash cannot keep up with the shooting speeds. That really blew my mind.

Thirdly is it’s much softer and gradual light fall off. I’ve shot portraits with this light on camera, with the flash pointing at my model. Something that I think is a pro- no, no! Profoto are known for their beautiful light, and the A1 delivers this.

Finally, my favourite feature is the ease of use. I honestly could not tell you what half of the menu does on my speedlights. But the A1 cuts the out all the unnecessary and goes straight to the important bits; the large wheel dial lets you easy adjust power or relative power in TTL. And the menu is self explanatory.

Off camera, before I owned the B2’s I used to use a speedlight in a Lastolite softbox (of varying forms) to take portraits which I moved away from because of connection issues, poor recycle times and lack of power consistency. But now the A1’s correct those issues I can go back to using the A1 off camera, instead of the B2s.

Wedding portrait | © Holly Wren
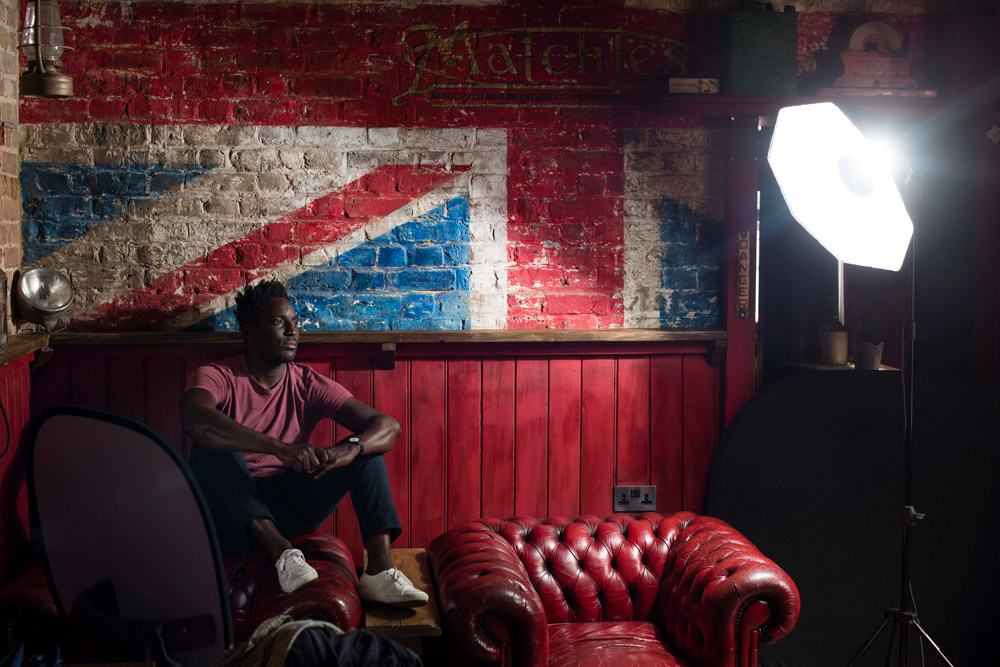
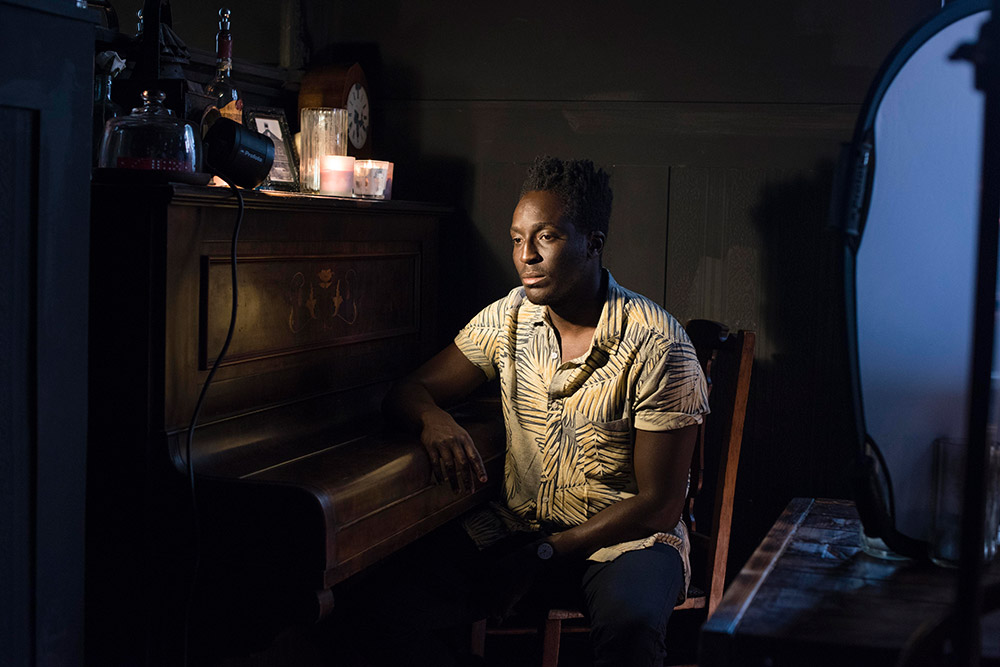
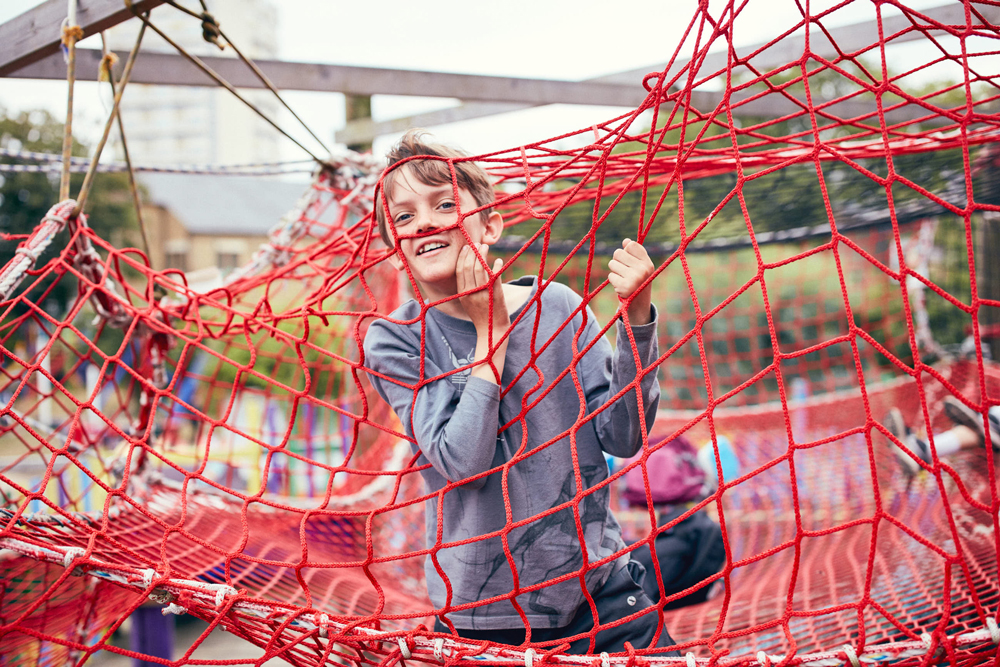
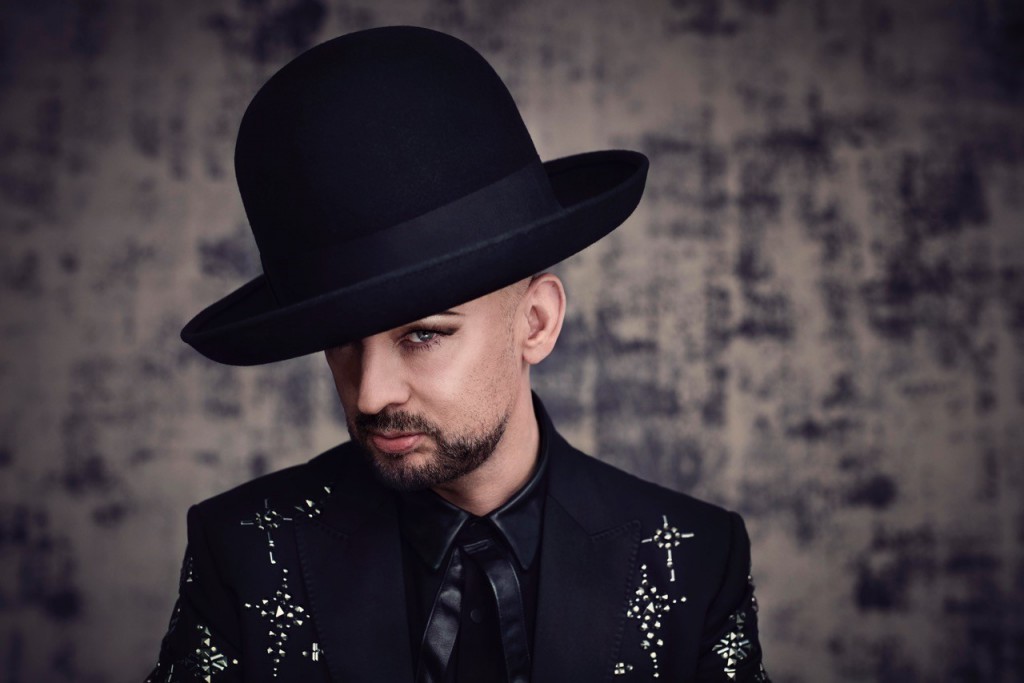
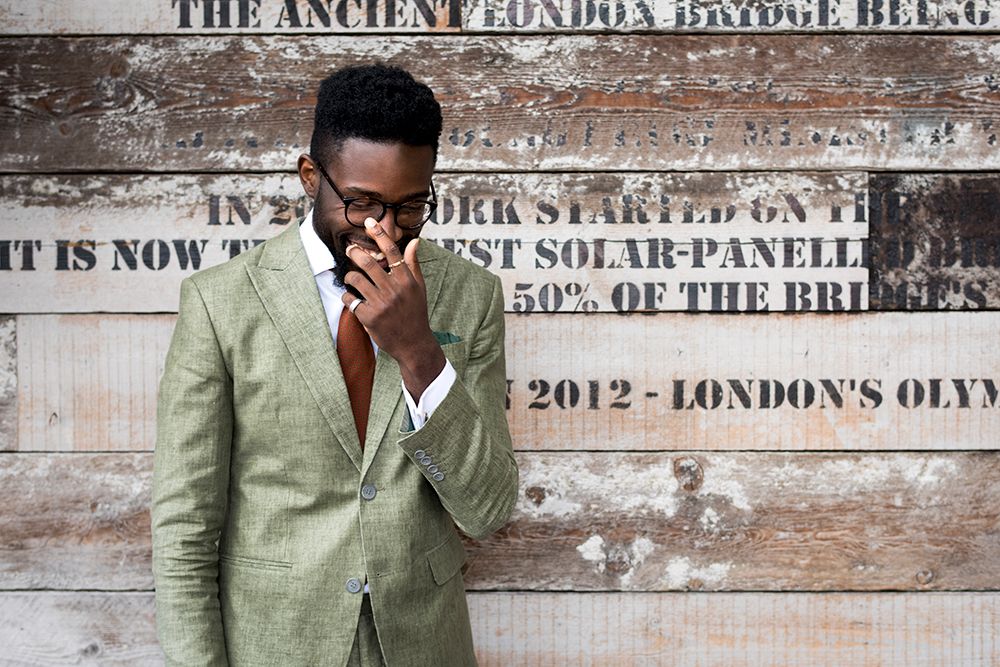
Here the A1 is used on camera as a front fill-in flash. In this shot I exposed for the sky, and the faces are filled-in with the flash, creating a dramatic shot without over exposing the sky | © Holly Wren

You demonstrated some interesting setups during the training – some simple and others more intricate. Did you devise these yourself?

Yes. The training was designed alongside the team at Profoto to demonstrate the main features of the product. We wanted to show its strengths, so I designed the set ups to encompass the range of situations that the A1 was capable of performing in, which is why I demonstrated it both indoors and outdoors.  I also wanted to show that it could be used on and off camera, as well as for the key light on a portrait or as part of the Profoto system. I think it’s versatility of use is one of it’s key selling points – wedding, portrait, press, event and travel photographers will all have a use for this product for different reasons.

Was the A1 able to deliver the shots you imagined, or did you tailor the setups to accommodate any limitations?

The shots were built to show the A1’s strengths. We didn’t design any of it to show how it would fail!!!! But in terms of it’s limitations, there of course are some. I guess that power is the main one, it’s only a quarter of the power of a B2 so it doesn’t, for example, have capacity to overpower harsh midday sun from a distance, or to replace the flash speed of the D1’s or B1X’s in studio, but that’s not what it’s for. With all photography you have to use the equipment relevant to your needs, will the A1 outperform studio lights? No. But, will it be incredibly useful as an on location flash? Yes.

The best advice I can give, is try it! That’s the beauty of renting before you purchase – try before you buy. Find out if this is the light for you.

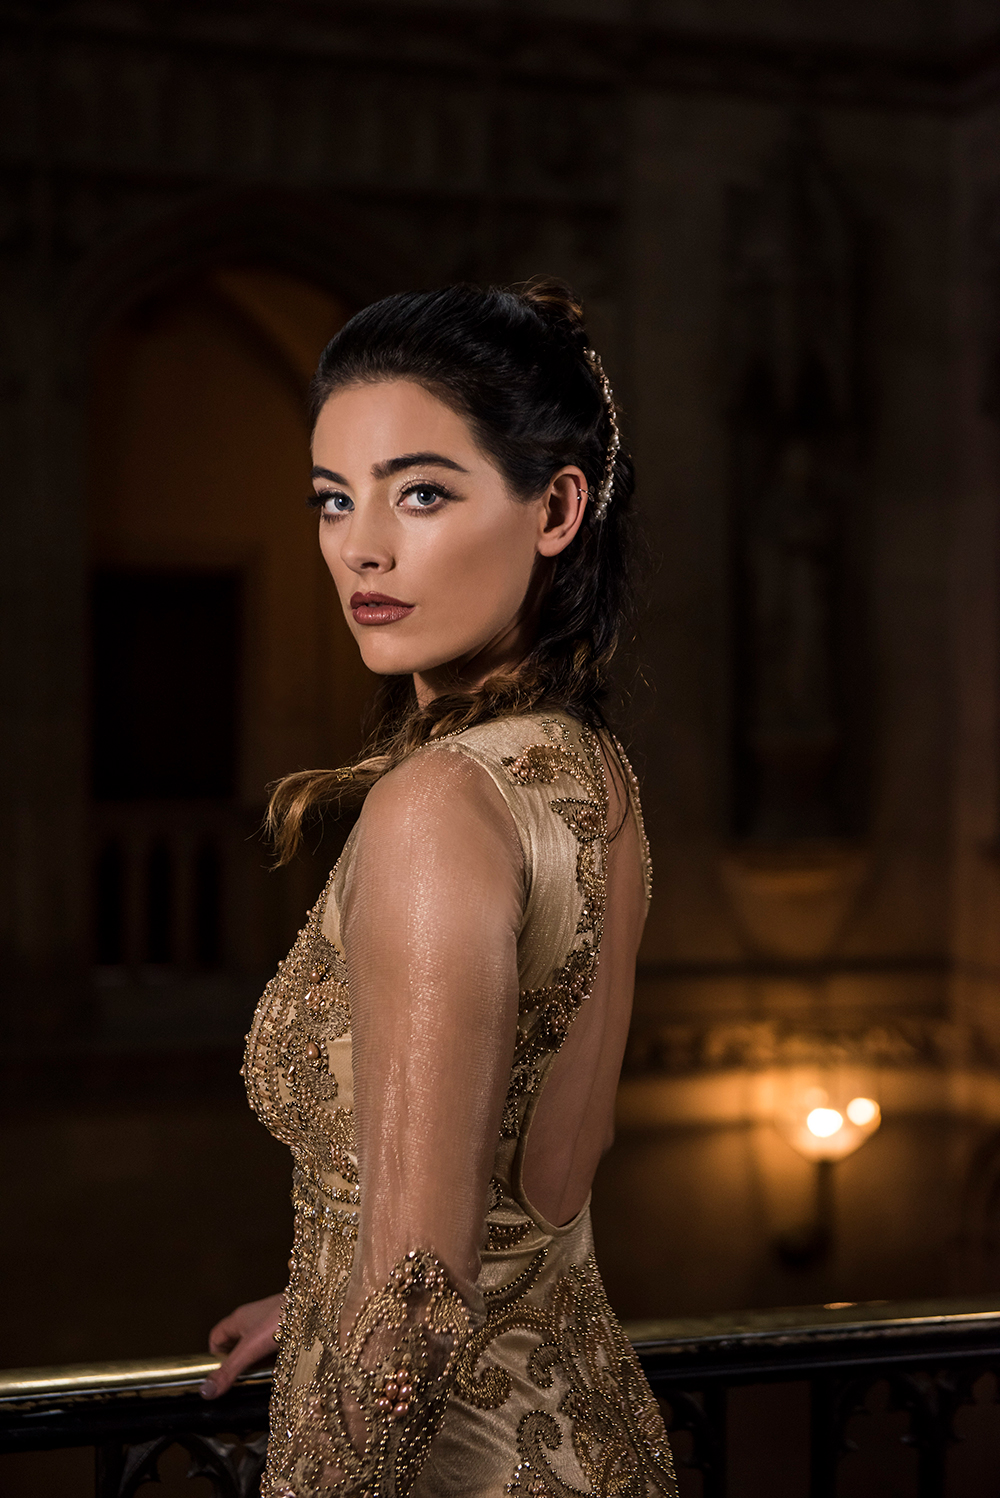
Nikon D810 + 50mm ƒ/1.4G | 1/250s ƒ/4.5 ISO 1000 | © Holly Wren

You seem pretty convinced that the A1’s  will form a key part of your kit bag– what’s the catch? How could Profoto improve on them? 

The only gripe for me at the moment is the modifiers you can use with the A1. Profoto have launched a range of magnetic ones that you can use to soften the light but for me it needs to go further. I want to see grids and soft boxes that can be used with this system. Which would allow me to go further with their use off camera.

Manfrotto do a handy little gadget called the ‘Snap Tilthead’ which allows you to use them on a lighting stand with an umbrella. I’ve used that set up on a few occasions and it goes that extra way to soften the light but I want to be able to do more!

It would also be nice to see them sold as a pair, I think that most people purchasing these will want two, or at least one with a TTL Air remote so they can be used off camera without buying the remote separately.

Lady against wall | © Holly Wren
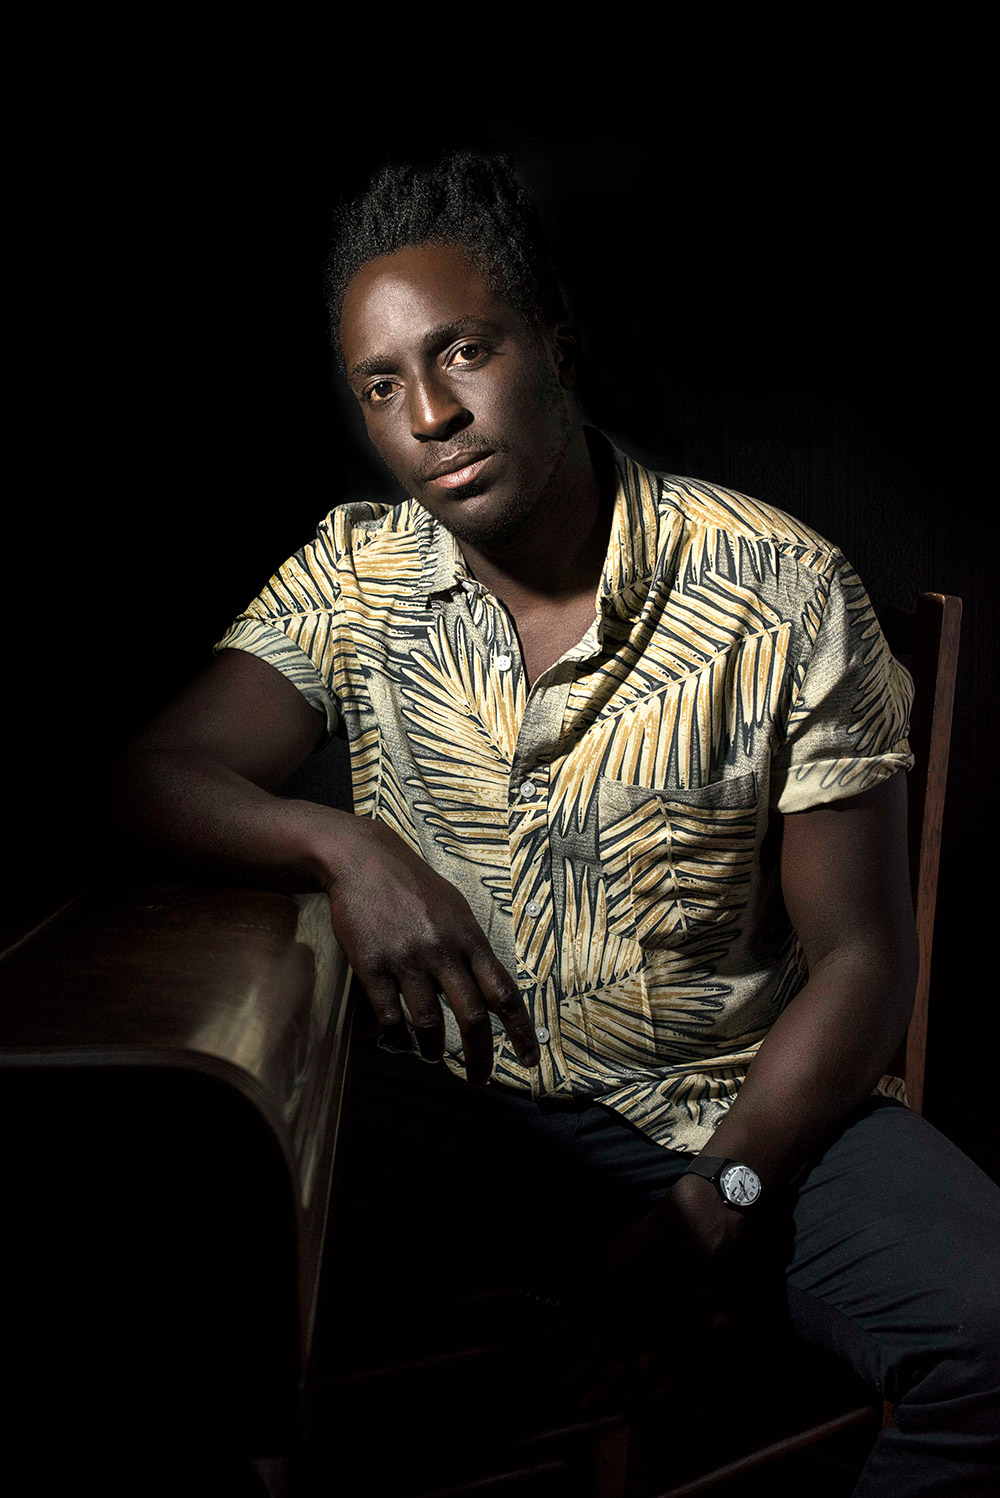
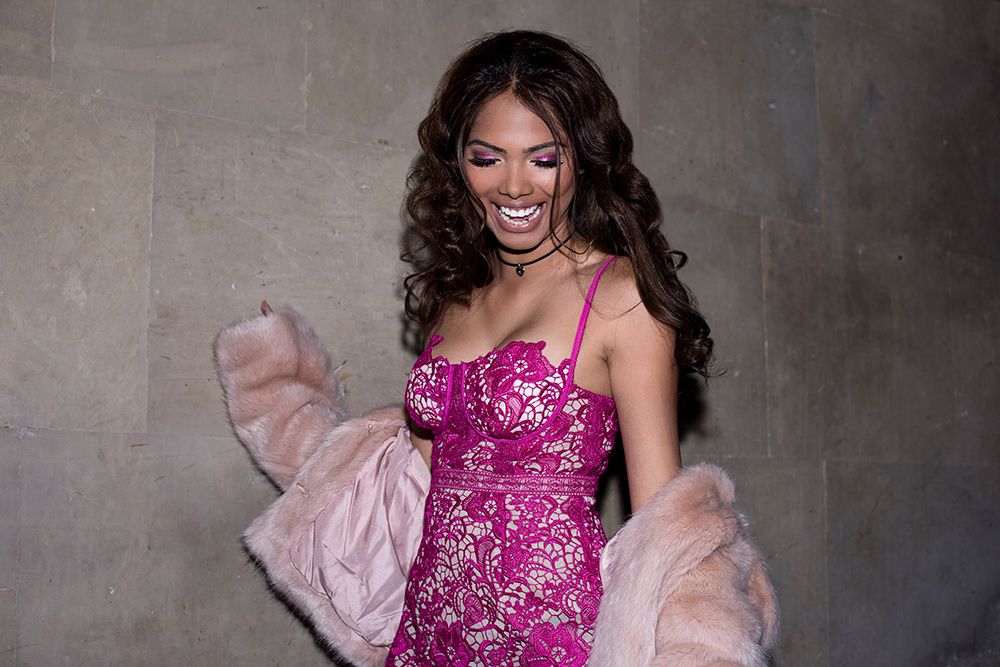
An A1, modified with a dome diffuser is used on camera and fired directly at the model | © Holly Wren

Finally, there is a lot of talk about the price, this is not cheap at £849, do you think it’s worth the extra investment? 

Well firstly, when was buying any Profoto gear ever cheap? But in the same way you might choose to buy a BMW over a Skoda, you need to consider what you’re getting for the money, and whether that investment is worth it. If you want to travel from A to B, both cars will get you there, but it’s more the experience of the ride that changes. If you care about heated seats, better build quality and a quieter ride you might prefer to drive the BMW. If those things are irrelevant to you, you’d save the cash and buy the Skoda. Either is the right decision, it comes down to what’s important to you, your purpose of use and budget.

The A1 allows me to work quickly, more efficiently and more professionally. It solves the issues I have with speedlights and provides me with the quality of a studio light in a portable package. I can use it on location for portraits as well as on camera at events.

Those factors for me, make it worth the extra spend, but of course, people will decide how much those features are worth to them, and how much of a role the A1 will play in their kit bag.

Holly was talking to Tim Stavrinou.

For more information on the Profoto A1, contact our sales department, or to try before you buy, visit Wex rental

Portrait and commercial photographer Holly Wren tests the Profoto B2

A Case for the Profoto B2

Portrait and commercial photographer Holly Wren tests the Profoto B2.

I should start this review by saying that, B2 or B1X, I’m a huge Profoto fan, and the launch of the B1’s back in 2014 literally changed my life. I exaggerate, but you see my point. So when the B2’s launched a year later in 2015 it was hard to prise the B1’s out of my Profoto obsessed paws. I saw the B2’s as a lesser B1, perhaps a cheaper, inferior B1 with less power (250w as opposed to 500w).

Profoto B2 location kit

Maybe I didn’t like the battery pack, or the wires, or most importantly the stupid on-camera holder thingy that featured heavily in the launch, but the fact is I was wrong. And here’s why.

Specification wise both the B1X and B2 perform with the same signature Profoto functions (with varying abilities on some of the below)

  • HSS (High Speed Sync), allowing you to shoot up to 1/8000 second and wide open in daylight.
  • “Freeze” mode, meaning you can freeze action down at shutter speeds as little as 1/200 second (the function uses flash duration as opposed to shutter speed to stop motion).
  • Wireless triggers that function with TTL (for Nikon, Canon, Olympus and Sony).
  • Compatibility with Profoto’s range of light shaping tools (or modifiers) meaning we can soften and harden the light in over 120 ways.
  • Easy to use interface (you probably won’t even need an instruction manual to get going).
  • And of course, the beautiful and consistent light.

That’s all impressive stuff, and chances are if you are looking to buy a B2 or indeed a B1X these are the compelling reasons to do so. So why choose the B2?

Putting power aside for a second (and that may be the deal breaker for you) the B2 actually gives you the functions of the B1X but with extras. Not specification extras, like, and I’ll say it again, power. But extras that just make these lights a little more user friendly than it’s big brother the B1X.

You see, Profoto are pretty good at location lighting, okay, they’re excellent at it and the B1X is certainly a light to be reckoned with, but my problem with it is, is it truly portable? Like, would I carry it on my back with my camera gear across London portable? And the answer is no. Which is where the B2 wins my heart with its size and portability.

The B2 actually does what it claims to – it’s a portable studio flash. It’s lightweight (just 1.7kg for the battery pack and 0.7kg for the head, as opposed to 3kg of the B1X unit), and it fits in my kit bag alongside my cameras and lenses, meaning that the only extra to carry is a modifier or two, and a stand.

I can take it places without an assistant or a car and the battery pack allows me to plug two heads in, offering me the flexibility of a multiple light set up with very little extra weight or bulk. It’s the kind of light you can take with you “in case” you want or need to use flash, for the times when you don’t know exactly what your location or client has in store.

One could argue also that the head being much smaller and lighter than the B1X makes it easier to handle by an assistant as the weight on the end of the stand is less, given the majority of the weight is in the battery pack, which can be placed on the floor, carried over the shoulder or on a belt (has anyone actually ever done that?!)

The lighter head also means if you’re going solo you can use a more lightweight stand (depending on your modifier) saving yet more trips to the chiropractor. And with modifiers such as grids and the 2′ octa being lightweight and small there is very little needed to create a successful basic set up.

However, the B2 isn’t perfect; it’s battery life isn’t comparable to that of the new B1X. Officially the stats are up to 215 full power flashes which is the equivalent of just over 600 on the B1X. In the real world, in my experience, shooting at around half to full power, with the modeling light on, you’ll probably get an hour or so out of a battery out of the B2, before you need to change it. That said, carrying a spare is essential anyway and charging is quick, at just under an hour, making the battery life a slight inconvenience but not a deal breaker. I should note here how irritating the battery is to change; it’s a faff, not the actual battery, which is easy, but the holding case, which sits a little too snug.

And although the wires aren’t too much of an issue, they do lack length if you want a head raised high up on a stand, so you’ll probably need to buy an extension lead, especially for getting that second light in position.

So, the only real question that remains is power – the B1X at 500w doubles that of the B2 at 250w and so if power really is your requirement, the case for the B2 is redundant.

Although a point worth making here is that although the B1X has double the power, it only equates to around 1 additional stop of light. Technically if you’re prepared to open up, you can deliver almost identical results.

So the question remains, how much power do you need? For me, I hardly ever use the B2’s at full power so they are more than sufficient.

If you want beautiful light, easy handling, portability and multiple heads that can both infill ambient light and overpower the sun, the B2s might just be the light for you. But as with all camera gear, you need to work out how and what you’re shooting before you can decide which product suits your needs best. Which is why it’s especially handy that you can hire before you buy or just rent on demand.

Give the B2’s a go, I promise you won’t regret it.

Examples

In the shots below I worked alone to photograph Ayo, on a one light set up, with only the 2’ OCF beauty dish as a modifier, to show what’s possible with minimal kit.


Shot using the B2 to mimic and infill the natural light coming through the window as shown on the left. Using the OCF Beauty dish, the flash blends with natural light.

Profoto B2 lighting example | © Holly WrenNikon D810 | 50mm ƒ/1.4, 1/160 sec, ƒ/4, ISO 400, B2 Power 3.2


Shot using the B2 to create a look of harder light falling onto the image from the right, making the room look darker and creating a higher contrast. Using an OCF Beauty dish and white reflector behind subject.

Profoto B2 lighting example | © Holly Wren
Profoto B2 lighting example | © Holly WrenNikon D810 | 50mm ƒ/1.4, 1/200 sec, ƒ/5, ISO 640, B2 Power 6.0


Shot using a bare head that was positioned on top of the piano close to the subject, with a white reflector behind. Flash is used to create a low key, high contrast image; back black wall is eliminated to focus on Ayo at the Piano.

Profoto B2 lighting example | © Holly Wren

Profoto B2 lighting example | © Holly WrenNikon D810 | 50mm ƒ/1.4, 1/160 sec, ƒ/9, ISO 1250, B2 Power 2.2


Shot using the B2 on its modelling light to illuminate Ayo’s face and give the feeling it’s being lit by the candles on the piano. Natural light used to highlight the arm. B2 placed on piano behind vase. Reflector in front to reflect the natural light back into the image.

Profoto B2 lighting example | © Holly Wren

Profoto B2 lighting example | © Holly WrenNikon D810 | 50mm ƒ/1.4, 1/125 sec, ƒ/3.2, ISO 1250, B2 modelling light

To try the Profoto battery lighting, contact our rental department and take advantage of our special weekend rate.

To see more of Holly’s work, visit her website www.hollywren.com

Sony A9 & G Master Lens Review

Sony A9 & G Master Lens Review

The recently released A9, Sony’s latest addition to the Alpha mirrorless series cameras, promises to be the tool of choice mainly for sports photographers. With its unparalleled shooting speeds and autofocusing system that’s able to precisely track objects in fast motion it enters the race with the likes of Nikon D5 and Canon 1D X II, cameras that already have a strong position in the market. So how does it perform?

© Jordan Matyka | a9 + 70-200mm ƒ/2.8 GM | 100 ISO, 1/3200s @ ƒ/2.8

Jordan Matyka, a professional freelance editorial and music photographer has recently been using an A7s for his work and was delighted when we asked him to review the A9. Here are his thoughts in his own words:

I took it for a day’s shooting in London’s South bank to check it out and also took the opportunity to try the Sony G Master 24-70mm ƒ/2.8 & 70-200mm ƒ/2.8 lenses. I was particularly interested to see the telephoto’s ability to work with the camera’s AF tracking as this is the longest native lens currently available for the system, until the recently announced 100-400mm ƒ/4.5-5.6 GM OSS becomes available.

Also, as an (soon to be) ex-Nikon shooter, I’ve tried to outline the pros and cons between the two systems to make it easier for anyone thinking of making the switch. But let’s go through the basics first.

Features

The A9 is currently the flagship model in the full-frame Alpha series. A lot of people are very confused about the lineup as at first glance; the differences aren’t obvious but they can be simplified down to the following:

  • Alpha 7 and 7II – good all-rounder, mid-resolution (24MP)
  • Alpha 7r and 7r II – high resolution (36 and 42MP respectively)
  • Alpha 7s and 7s II – low resolution (12MP), fantastic high-ISO quality

There are other differences, especially in the AF and video specs and capabilities, but I think the above outlines the key areas of interest.

The new A9 on the other hand, being the flagship model, encompasses all of the above in one package. The 24 megapixel provide files big enough to satisfy most studio photographers. It’s BSI (back-illuminated) CMOS sensor provides low-noise images when using high-iso and also expands the dynamic range – this will be a huge benefit to anyone working in low light but also to sport shooters as it gives the opportunity to use higher shutter speeds, especially when using lenses without particularly low aperture.

The sensor combined with BIONZ X image processor allows the camera to produce 20 compressed RAW shots per second when using the electronic shutter. That’s 6 more than the D5 and 4 more comparing to 1D X MkII. It may not seem like a lot, but having these few more fps in a critical moment may be decisive. The camera does that with absolutely no viewfinder blackout meaning that you can focus on what’s in front of you without any distractions. The buffer can hold about 250 consecutive shots (that’s over 12 seconds of non-stop shooting) before it starts to clear. Using a Class 10 300MB/s SD card it only takes about 3 seconds to clear approximately 50 images meaning that you can capture an action sequence and almost immediately continue with another one.

© Jordan Matyka | A9 + 24-70mm ƒ/2.8 GM | 1000 ISO, 1/12,800s @ ƒ/2.8
A series of frames shot with the electronic shutter at a higher than usual shutter speed.

Speaking of the viewfinder, a lot of DSLR users are wary of electronic models as opposed to the optical ones they’re used to. After years of seeing not-so-good examples of these on different compact and mirrorless cameras I can fully appreciate this. However, it’s not the case here. Looking though the A9’s EVF is a pleasure – it refreshes at 120 frames per second and has a 3.68 million dot resolution providing a very smooth and extremely detailed view of the action.

There’s another advantage of using an EVF over classic optical – exposure preview. Yes, if you’re a pro you will know what you’re doing and rarely set this incorrectly, but we all sometimes make mistakes and this feature provides a backup for these situations. Secondly, when shooting in extreme low light it allows you to see things that would be impossible to notice when using a traditional DSLR.

However, as pretty much anything in this camera, the EVF exposure preview can be customised or turned off altogether and you can shoot the way you’re used to. It’s also worth mentioning that the viewfinder covers 100% of the frame so critical framing is not a problem and will especially benefit architectural and studio photographers.

Design & Operation

Mirrorless cameras are small; the A9 is roughly the same size as the A7 II series bodies. When compared to the flagship Canon and Nikon models it dwarfs at about half the size. This can be a good or a bad thing, depending on the type of work you’re doing and, well, your hand size. Being 6’ 5” with palms to match I found the body just a bit too small with my pinky sliding just beneath the battery compartment. Sony’s GP-X1EM grip extension rectifies this and there’s also the VG-C3EM battery grip that makes the whole setup a lot more comfortable to use.

The body, at 673g, is just over half the weight of the aforementioned models. Again, the advantage of this may be questioned especially by sport shooters using big lenses, but having walked all day with the 70-200mm attached to it I did not feel the imbalance reported by other people. This is, of course, a matter of personal preference, but I’ve found that combination to be pretty well balanced and the lens did not feel too big at all for the body. The metal lens mounts feel secure and even without supporting the lens it feels like it can withstand even rough handling that pros often expose the gear to.

Which brings us to the build quality. Nikon’s D5 can take pretty much anything you throw at it. Similarly, the A9 is constructed from magnesium alloy and Sony lists weather sealing as a feature. However, a closer look at different openings such as the card slots cover and I/O ports reveals lack of rubber outlines which would make me cautious of taking it out into the rain. That being said, the camera has only been out for few weeks and durability can only be tested over time so we’ll have to wait to make a judgment.

Even though the body is small, Sony managed to place dedicated, essential controls outside so there’s no need to wander around the menus to find the desired function. Four custom-function buttons can be assigned to perform different operations so even when there’s something missing, you can add it yourself. The menu system may feel a bit overwhelming at the start but the often used points are easy to find and the redesigned interface and customisable ‘My Menu’ section help to move around quickly. The camera offers a great number of tweaks which can be applied that, with a little bit of practice, can greatly improve the experience and help to make the most of the system.

Autofocus

The new AF system on the A9 is simply outstanding. 693 focusing points cover 93% of the frame and with 60 calculations per second it can track fast moving objects with staggering precision, right to the edge of the frame. When testing this with the 70-200mm I often found myself not being able to keep up with the subject’s movement when the camera kept the focus locked regardless of the subject’s movement within the frame. I’m not a sports photographer but someone experienced in the field will surely be able to use their experience combined with the AF system’s capabilities to capture pin sharp series of photos and pick ones that they need.

© Jordan Matyka | A9 + 70-200mm ƒ/2.8 GM | 400 ISO, 1/2000s @ ƒ/2.8
Even as the motorbike leaves the frame, the focus hasn’t switched to the bus behind.

During many attempts to test the limits of the system I’ve rarely found out-of-focus shots afterwards. Shooting at 20fps it only takes the camera a handful of frames to refocus on the subject and after that it tracks it without fail. Even in situations when another object moved in between myself and whatever the AF locked on, it kept the focus spot-on.

Zooming in or out on the subject whilst tracking– also a difficult ask for some cameras – proved not to be a problem for the A9.

The only tricky moment was shooting against strong backlight when the amount of misfocused shots was higher than normal but this would prove difficult for any AF system so I won’t deduct any points here.

A type of focus mode worth mentioning is the Eye AF introduced earlier in the A7 models. Face detection is something that we’ve already seen on some compact, mirrorless and even DSLR models but the A9 takes it to another level with phase-detection continuous AF. In this mode the camera will focus on the subject’s face if it’s too far to find the eye, but if the subject is close enough for the feature to be distinguishable it will lock on the eye and keep tracking it flawlessly. Combine that with another great property – the ability to switch the focusing points within the frame if you change from portrait to landscape orientation – and it’s something that portrait photographers will absolutely love. No more focus locking and re-framing – you can just keep on shooting and every photo will be focused on the subject’s eye.

© Jordan Matyka | A9 + 70-200mm ƒ/2.8 GM | 100 ISO, 1/800s @ ƒ/7.1
This shot of a bubble was part of a 33 frame sequence where all but 2 of the images kept focus, despite the bubble drifting out of the frame a few times.

Sony provides a detailed guide to the system, with recommended settings for different shooting scenarios that greatly help to set the camera up, without having to go though a tedious trial-and-error process. The guide can be found here.

Image Quality

The A9’s 24MP sensor is capable of producing 14-bit uncompressed RAW files, weighing about 50MB each, as opposed to 24MB compressed ARW (Sony’s RAW format). Such resolution may seem like not a lot these days, with some cameras going way beyond that, even in the Alpha lineup, but it’s a good compromise as higher resolution would hinder it’s low light performance. Using it in this mode limits the fps to 5 which is still very good, considering that it will only be required by studio, landscape or architecture photographers not in need of the highest frame rate.

Regardless of whether you use the compressed mode or not, the output files have great amount of detail, colour reproduction is accurate and there’s enough dynamic range to allow you to pull the shadows up in your image editing software.

© Jordan Matyka | A9 + 70-200mm ƒ/2.8 GM | 100 ISO, 1/800s @ ƒ/5
The A9 seems to cope well with a wide dynamic range of tones.

The best results are of course achieved with Sony’s G-Master series lenses. The whole family of these proved to resolve at the highest level when used with the A7r II model (42MP) and are reportedly designed to be able to go way beyond that resolution, which makes them future-proof should – or rather, when – an even higher resolution model arrives.

Almost zero aberrations were noticed on all the images I shot. Colour fringing was virtually non-existent, even wide-open at ƒ/2.8 and the same for moiré. Both lenses were used without hoods and even then, on a bright and sunny day, there were only a handful of shots with flare.

One thing that many mirrorless users were complaining about is banding. It is a phenomenon when, under certain conditions, the image will have off-coloured stripes running along the long edge of the frame. It can happen under certain types of artificial light (mainly LED), at very high shutter speeds, high ISO and mainly when using the electronic shutter. And even if these conditions are met, not all shots will suffer from the problem. Out of several thousand shots I’ve so far taken with the A9, only a few, shot at a concert under very difficult artificial light had the banding visible at a level that was causing a problem.

In terms of low light, high ISO quality, the A9 performs really well. Not as good as its older siblings, the A7s and A7s II, but these were designed to specifically tackle this particular area. It’s got quite a way to go to compete with the D5 but the top-range Nikon models were always a benchmark for high ISO performance. It’s worth mentioning that the D5’s sensor comes from Sony so this seems like a matter of image processing engine, not the actual hardware.

Battery life & other features

Another bane of the previous Sony Alpha models users was the battery life. A smaller body means a smaller battery and previously it was only possible to shoot a few hundred shots before seeing the empty flashing symbol on the screen. For a professional series camera this is hardly acceptable, especially considering that the Nikon D5 and Canon 1D X II can shoot a few thousand shots on a single charge.

With the A9 Sony has improved this greatly. The 2280mAh NP-FZ100 battery has more than double the capacity of the previous ones which places it close to the other big players. With 2 of these batteries inside the VG-C3EM grip I was able to shoot nearly two thousand images and still had 30% juice left. This was with with the screen turned on most of the time and all the bells and whistles like AF tracking, 20fps etc.

What most people forget about when complaining about short battery life on mirrorless cameras is how these camera actually work – not having a mirror means that what you see in the viewfinder comes  from the sensor that’s in practice turned on all the time. It’s worth remembering that all the benefits of having a pro-quality, small and lightweight camera come at a small cost.

The camera has a built-in 5-axis image stabilisation that Sony claims to offer a 5-stop speed advantage. Using this with the 24-70mm ƒ/2.8 at the widest angle, I was able to handhold a sharp 0.8sec long exposure, something previously impossible with a DSLR due to the mirror slap and vibration from the shutter.

You will also find features expected from a pro-series camera like dual card slots and a LAN connection but also Wi-Fi, NFC, HDMI output, sync terminal, mic and headphone sockets.

© Jordan Matyka | A9 + 70-200mm ƒ/2.8 GM | 100 ISO, 1/800s @ ƒ/5
The G Master 70-200mm ƒ/2.8 performs well at relatively wide apertures and the camera is showing no obvious signs of moiré.

The last two things I’d like to mention are relatively small features, though offering great benefits for certain situations. The first one is the tilt screen. A lot of people see this as a gimmick but will appreciate it when shooting from low or high angle. It’s also really well made and I was at no point worried that it could snap. The second one is something that myself and many other Sony Alpha users just love: a totally silent electronic shutter. Being able to take photos with a camera that’s 100% silent (and yes, the lenses focus and zoom without a squeak) opens up many possibilities that were in the past reserved for either rangefinder cameras (contrary to popular belief not completely silent) or DSLRs encased in cumbersome, difficult to use and expensive blimps. Shooting reportage, performance, theatre, events, interviews, street and film sets suddenly does not require changing the way you’d normally work. The rear screen can be turned off with the viewfinder taking over its role when you’re not shooting so you can be quiet but also invisible as there will be no screen glow.

Conclusion

The Sony Alpha A9 is a fantastic camera. It offers almost all the qualities of the bigger, heavier and more expensive competitors from Nikon and Canon and in some areas it surpasses them. Users of these systems will possibly look at the current FE lens range with a smirk but Sony’s quickly expanding lens range already offers some outstanding glass that in some cases outperforms the rivals. There’s always the possibility of using your existing lenses via adapters, some of which offer fast AF and stabilisation (!), especially with Canon’s EF series lenses.

CANON LENS REVIEW | 35MM & 24-70MM

Canon lens review | 35mm & 24-70mm

Longtime Canon user Jack Terry tests the Canon 35mm ƒ/1.4L Mk II and tries the 24-70mm ƒ/2.8L Mk II against his original Mk I version.

Investing in lenses is not something any photographer takes lightly. Once you have a set it’s not often that you want to go changing them, despite brands constantly pushing an updated version and striving to find a reason for you to upgrade to their latest model.

I have a general rule that I only upgrade or invest in new equipment if it will do two, or preferably three of these three things. Directly generate revenue, speed up my workflow, or provide a drastic and noticeable difference to the existing product.

After using my set of Canon lenses for almost 10 years, the Mk II versions had me asking myself the question, should I make the move and can I justify it?

To help with the decision, Fixation lent me a 35mm ƒ/1.4L II and a 24-70mm ƒ/2.8L II to shoot a recent personal project “Little Rascals”. The project is a documentary study of a children’s charity and I wanted to shoot it on my own with no assistants and minimal kit.

Little Rascals | © Jack Terry

Photographing kids is something I really enjoy. They are refreshingly inquisitive about everything and then moments later are engrossed in their own world of play and it’s like you don’t even exist. This is something I rely on to get in close and capture the natural moments that are over in seconds.

Little Rascals | © Jack Terry

I used to spend my life shooting on a 50mm ƒ/1.2L for two reasons: firstly I always shoot wide open and it is a beautiful lens, but mainly because I found my original 24-70mm ƒ/2.8L to lack in quite a few areas. The problem with the 50mm is it can be a bit narrow for lifestyle. Shooting this project with the new 24-70mm was a revelation. It gave me the image quality of my primes, but with the versatility that I had forgotten existed with zooms.

Little Rascals | © Jack Terry

Although the focal lengths overlap, I found the combination of the two lenses perfect for this project. With the zoom I could pick little details from a far, or shoot wides of crazy kids running towards me. Changing to the 35mm let me get in close and throw the background out of focus. I would go as far as saying that the 35mm Mk II is the most perfect Canon lens I have ever used. It is the perfect focal length for my work and has a mystical quality to it that just looks different. I felt like images shot on it had more depth to the tones and it gave a beautiful representation of everyday life. It is razor sharp in the right areas while still looking natural and the focus is really quick.

Little Rascals | © Jack Terry

Unlike things like lighting or digital equipment that can be hired out in addition, a photographer is expected to supply lenses, so that discounts my first rule of generating revenue. The question is, do these lenses tick the other two boxes to justify the upgrade?

Little Rascals | © Jack Terry

On commissions recently I have regularly shot the whole day just on the 24-70mm. The change in my workflow has been drastic and not swapping lenses so much allows me to focus on what I need to instead. The image quality paired with a 5DS is capable of billboard level images with no problem at all. Images are always razor sharp and have a contrast and depth to them that didn’t exist in the Mk I version. That combined with the fact that I just sold my Mk I for £550 after buying it new for £800 makes the upgrade unquestionable. If you still have the Mk I 24-70mm, sell it and upgrade. You can thank me later.

Little Rascals | © Jack Terry

In regards to the 35mm ƒ/1.4L II this is less of a black and white answer and driven by something unquantifiable that the sensible side of my brain and my accountant would be shouting at me to ignore. I found this lens an absolute joy to use, the ergonomics are perfect and it sits really nicely in the hand. If you shoot people you should have a 35mm lens, the question is do you need the new one?

I shoot into the sun a lot and always wide open. Chromatic aberration is something I am used to getting a lot of and I spend a large amount of time correcting in post. This lens all but removes it in camera which is amazing for my workflow. In terms of sharpness it is brilliant, however the mkI version is pretty good too. I am left with the dilemma that I can only honestly tick one of my three boxes. This is my favourite Canon lens by a long shot and from the project the majority of selected images were shot using it. The question is do I and do you need one? All I can suggest is hire one from Fixation and find out for yourself, but be careful it will be a tough one to return.

To try either of these lenses simply hire from our sister company Wex Rental:

Canon 35mm ƒ/1.4L II

Canon 24-70mm ƒ/2.8L II

You can also take advantage of our special weekend rates – 3 days hire for the price of 1.

To see more of Jack’s work, visit his website here

ZEISS OTUS LENSES | REVIEWED BY IAN DERRY image

Zeiss Otus lenses | Reviewed by Ian Derry

We spoke to celebrity portrait and commercial sports photographer, Ian Derry about his experience with the new Zeiss Otus lenses.


Hi Ian, thanks so much for talking to us today. You’ve made a series of visits to our London Showroom recently and rumour has it the new Zeiss Otus lenses are involved. What’s the story?

I originally popped into Fixation to look at the 5DS R. I was after the epic image quality and clarity of Medium Format, without the associated expense, weight and limited portability.

I hired the camera from Fixation for a weekend and loved it, but I still didn’t feel like I was making the quantum leap in quality that I was hoping for when using it with the Canon 50mm ƒ/1.2 and the 85mm ƒ/1.2, despite the fact they are premier lenses. Someone then recommended the Zeiss lenses, so I popped back into Fixation and hired the Zeiss Otus 55mm ƒ/1.4.  It was an immediate “WOW”. The clarity was amazing and I pretty much had medium format quality on a 35mm camera. I returned to Fixation soon after and purchased the Zeiss Otus 85mm for myself.

ID6© Ian Derry

How quickly did you see the difference in the Zeiss Otus lens?

Pretty much immediately.  We tested on the chart alongside the Canon primes and the Zeiss was just so incredibly sharp by comparison – it was head and shoulders above the rest. We were stunned by the quality and just had to have it. There wasn’t much of an argument against, but at £3,000 each they are costly and it was quite an investment, but once you see that clarity you can’t really go back. The colours are also truer and there’s great edge-to-edge definition too.

ID1© Ian Derry

What other camera kit do you use?

I have been using the Canon 1Dx and in the near future would like to test the Mark II version. However, my main camera for the Zeiss Otus lenses is the Canon 5DS R, as this combination gives me fantastic results. I work in studios mostly, using low ISOs around 100 or 200.  The biggest drawback of  this camera is that it doesn’t like high ISOs, but because I’m working in a studio a lot it works really well. I think the combination of that camera and that lens is utterly brilliant.

ID5© Ian Derry

How do Zeiss Otus lenses compare to others?

ID: There is certainly still a time and a place for Canon lenses. The Zeiss lenses are manual focus only, so if I’m working really quickly and need the use of autofocus I would switch back to Canon. I wouldn’t even attempt to use the Zeiss in unpredictable shoots like my sports or action work, only for those shoots in a controlled environment that I can predict.   Ultimately, the most important factor about lenses is the focus. If it’s in focus – BAM! – you’ve got the winning shot. I get this with Canon, but the Zeiss also gives extra clarity.  When you’re doing a portrait of somebody and they’re looking at you and you’re looking back into their eyes, the extra clarity the lens brings gives it a bit more depth.

© Ian Derry

Has the Zeiss Otus changed the way you work?

One drawback with the Zeiss lenses is how precise it has to be. It can look sharp through the camera, but when you review the image it might not be quite spot-on, so you have to be on your “A” game.  I tend to listen hard for the focus-confirmation beep on the camera now, as it gives me the indication that it’s in focus. I shoot tethered, so we check focus on the monitor all the time, but even more so with Zeiss because at first glance it can look sharp without being quite pin. The whole photography shoot becomes a slower process as you need to focus, re-frame, refocus etc.

I photograph celebrities quite a lot and surprisingly this slower pace has turned out to be a positive experience for my clients. In a normal situation, someone comes in, sits down and click, click, click – we’re done! When you arrive with a Zeiss lens and slow the whole process down it becomes more of a shared experience. Sitters have been quite interested in the different equipment and it makes for a more interesting shoot for them as well. It’s almost like going back to the Polaroid period where you take a Polaroid, you stop, you chat, you wait for the Polaroid to develop before getting to the next stage. The whole portraiture process is slowed down, making it more intimate.


ID7© Ian Derry

Do you think you can see this intimacy reflected in the images?

I think you do. Its only small, but when everyone shoots the same way and you come in with something slightly different, it just changes the pace and the interest shows. Quite a lot of people are interested in photography these days and so it becomes a talking point.

ID3© Ian Derry

Do you also notice the difference when shooting video with these lenses?

Yes, it’s a massive difference here too. Again, it all comes down to the clarity that I keep referring to. I made a short film earlier this year and we used the 55mm Zeiss Otus on a Sony F55. I can’t tell you too much about it yet, but the film is 3 minutes long and is about a lady who free dives, she just holds her breath and dives, but she does it under ice. Keep an eye out, I’ll be posting updates on Twitter soon!  You’ll really see the difference the lens makes.

ID9© Ian Derry

All images displayed in this post were taken using a Zeiss Otus lens available to purchase or hire from Fixation.

Ian was talking to Kate Wilkinson.


Hi, how can we help?