Wex Rental at Fixation image

Wex Rental at Fixation

Back in October 2015, Fixation was acquired by Wex Photo Video, the UK’s largest photo and video retailer, and since Wex’s 2017 merger with Calumet, that now extends to 13 well-stocked showrooms across the UK.

The merger also coincided with Calumet having to relocate their flagship London store from Drummond Street to its new location in Commercial Road, and a decision was made to move the Calumet rental department to Fixation’s workshop in South London and merge the two rental offerings to form Wex Rental.

Be assured – although the name has changed, the commitment to our customers hasn’t and we now boast a wider range of products for stills and videographers.

I caught up with Leonie Johnson, the Wex Rental manager to see how she and her team are settling in to their new premises, and to see what plans she has for Wex Rental going forward.
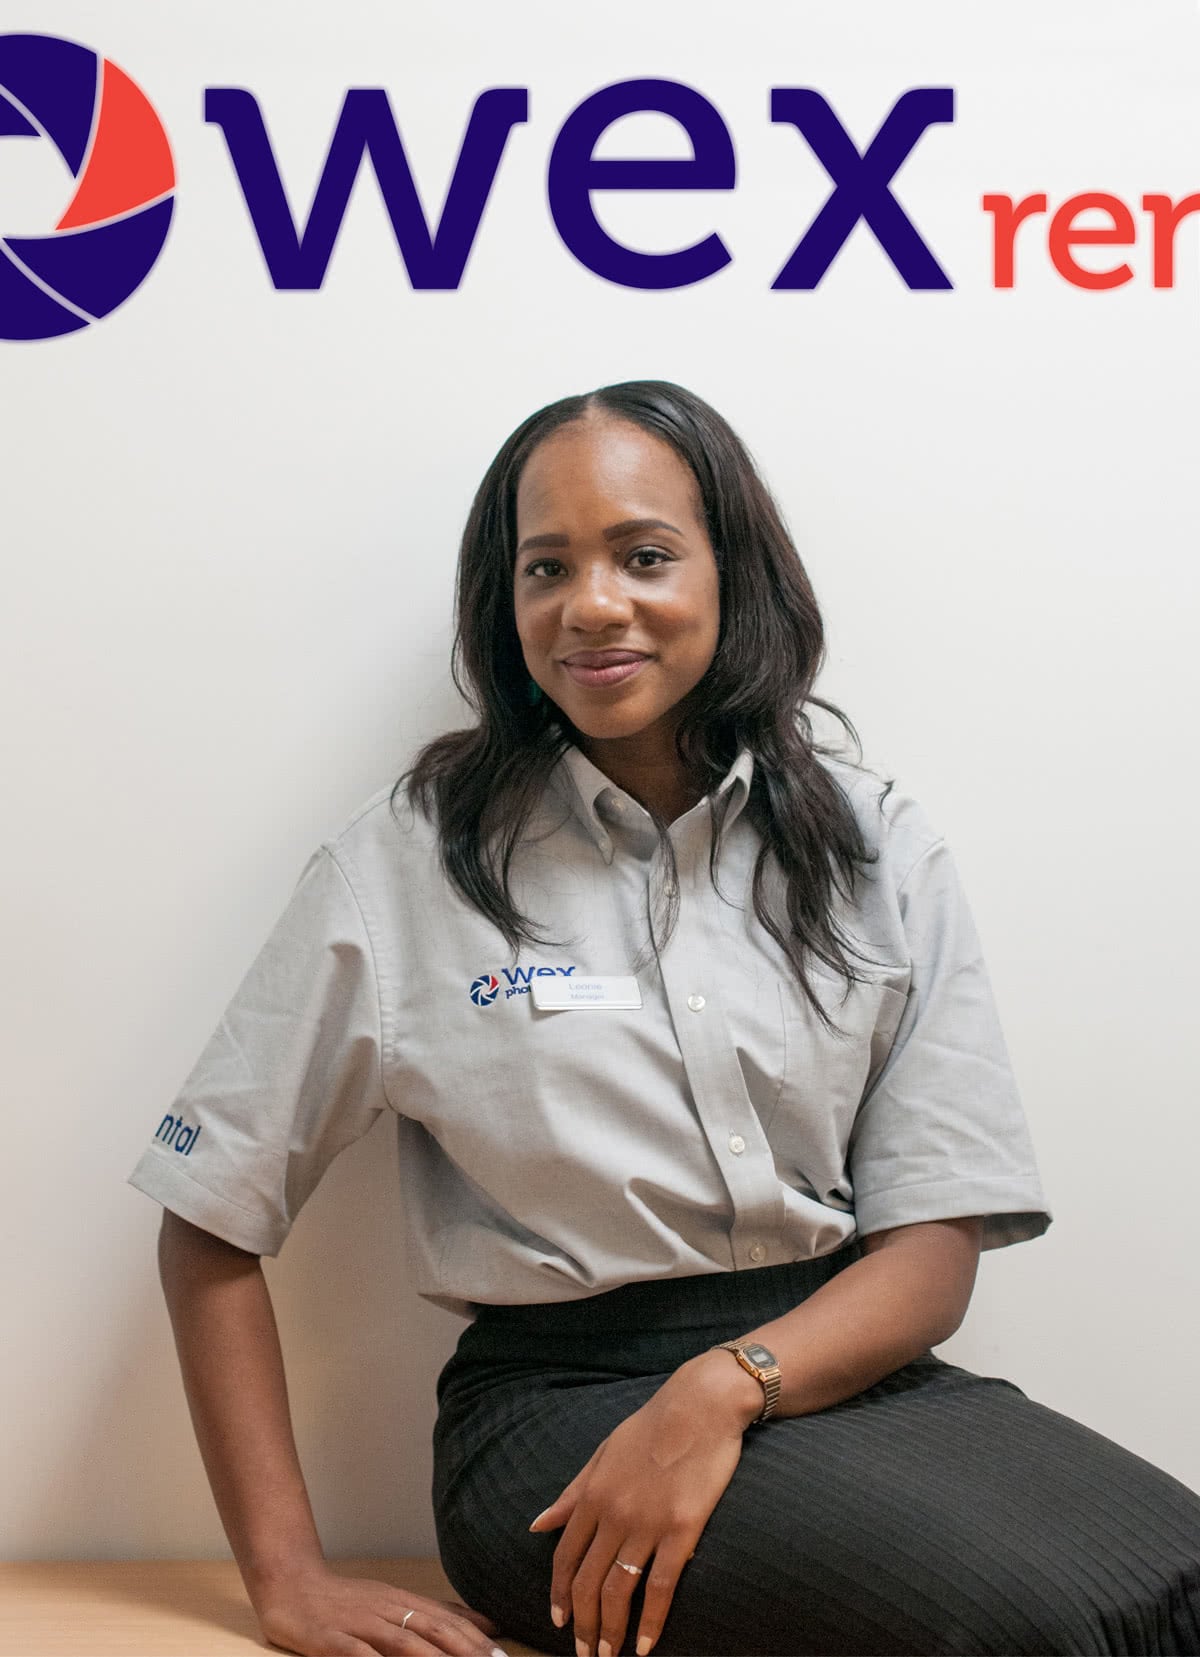
Leonie Johnson, rental manager at Wex Rental in South LondonLeonie Johnson, Wex Rental manager oversees a team of eleven

Thanks for taking time out of your busy schedule – how are you settling in to the new location?

Moving to a new location was always going to be a challenge, having been established in Drummond Street for almost half a century! However, settling in to this part of London has been great. We’re seeing a number of new customers from south of the river join us and what’s also heartening is seeing our regular faces who have moved with us too, which is fantastic.

Moving has also given us the opportunity to expand our customer offer and we now have a click and collect point in our Wex Photo Video showroom in Commercial Road, enabling us to continue to serve our customer base who may not benefit logistically from where we now are.

Vaughan at Wex Rental helps a customer with an equipment queryVaughan at Wex Rental helps a customer with an equipment query

Can you tell us a little bit about yourself; how did you get involved in photographic rental?

I took media studies at university and have worked in management for a variety of sectors, including finance, retail & facilities. I always think everything comes full circle in life, so when I got the call about this position, it just felt like the right step. I’ve been running the rental department for just over a year and it’s been an interesting and exciting journey so far!

Are you a keen photographer yourself?

I enjoy photography but I’m by no means an expert. I do love to get out and shoot when I can – especially street photography and portraiture. It’s also surprising the amount you can shoot in your living room!
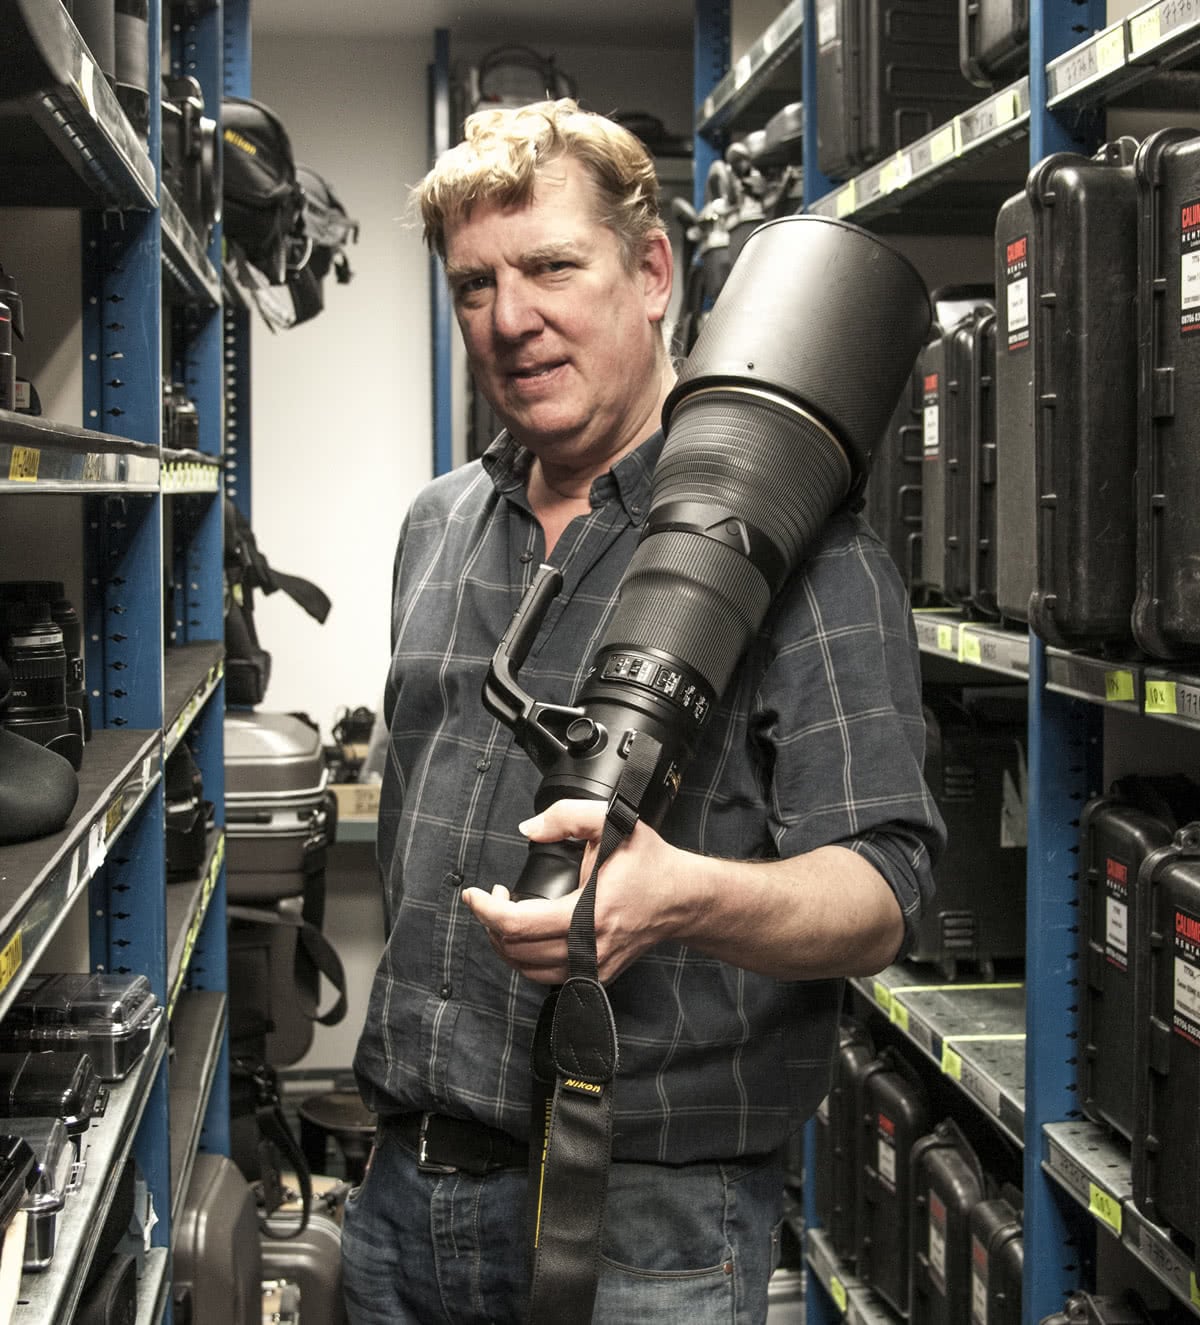
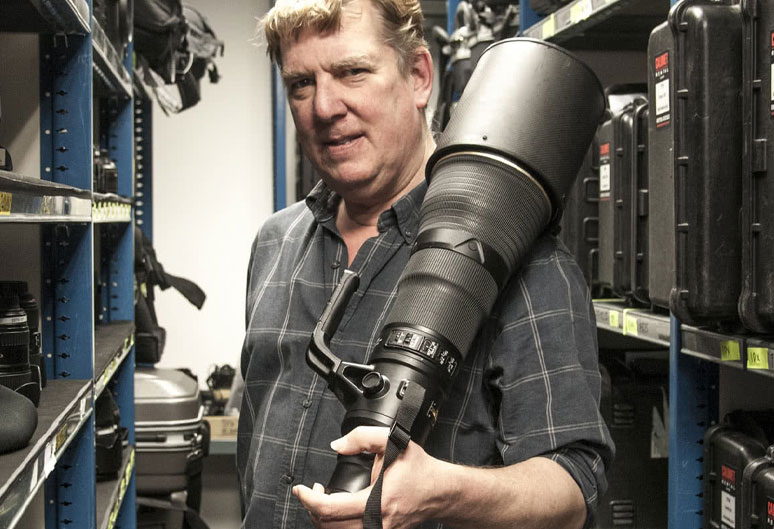
Wex Rental carry a wide range of lenses, including such beats as the Nikkor 800mm ƒ/5.6GWex Rental carry a wide range of lenses, including such beasts as the Nikkor 800mm ƒ/5.6G

You have quite a large staff, and from what I can see, they’re always busily running around. Can you tell us a little bit about how the rental department works?

We’re essentially responsible for handling the client bookings for rentals, checking equipment in and out on a daily basis and offering advice to customers who may not have shot professionally before. We also speak to a lot of assistants who are starting out and help them get their foot in the door.

I suppose we’re lucky in the fact that we have such an extensive range of equipment available and can pretty much cater to anyone looking for a camera, lighting or sound solution.

How are the roles split among the team?

There are three main areas in the department: front of house, support centre and the kit room and I’ll generally place team members where I think their skillset suits them them best. Saying that, the roles are fairly interchangeable, so I’ll rotate the team from time to time to make sure they’re getting the best exposure to new items and processes.
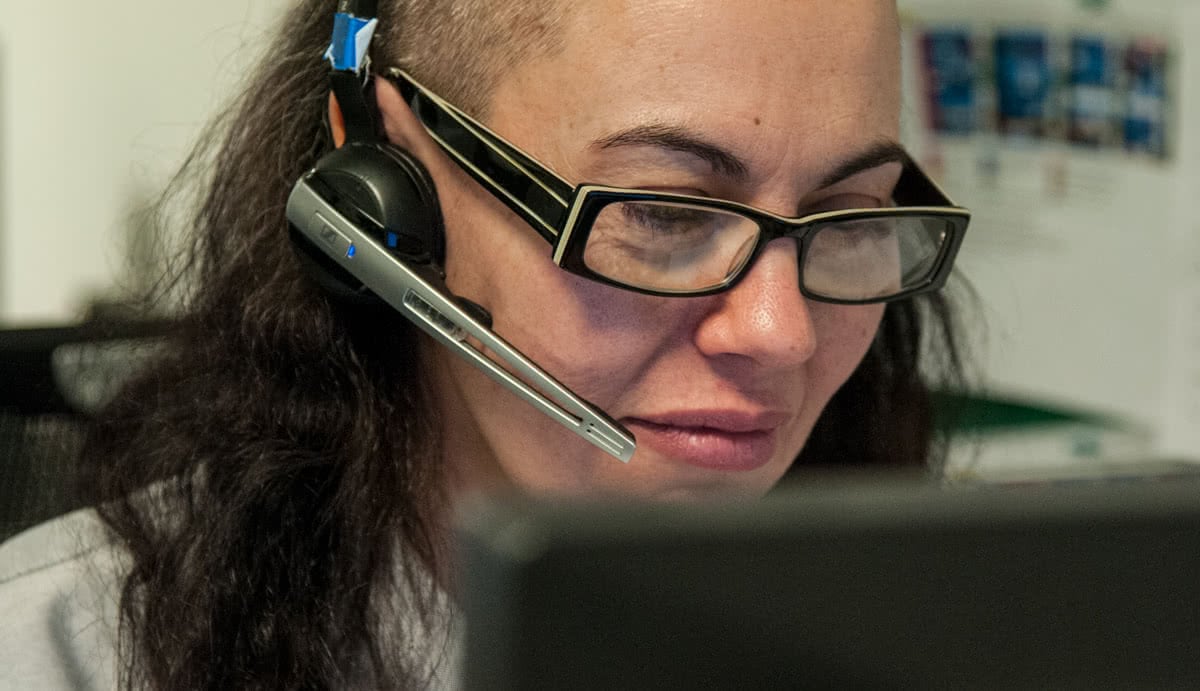
Wex Rental have a team of advisors ready to take your callsThe support team handle hundreds of calls each week

How would you describe your typical day?

No one day is the same! We have hectic days where orders are coming through thick and fast and the support team are dealing with numerous calls and emails, while the technicians in the kit room are having to prioritise what needs to be checked over and readied first. On other days, some of the team could be out on location with Profoto or Sony, training on the latest kit. And sometimes I’m out visiting clients and studios, to understand exactly what their needs are and what more we can do to help.
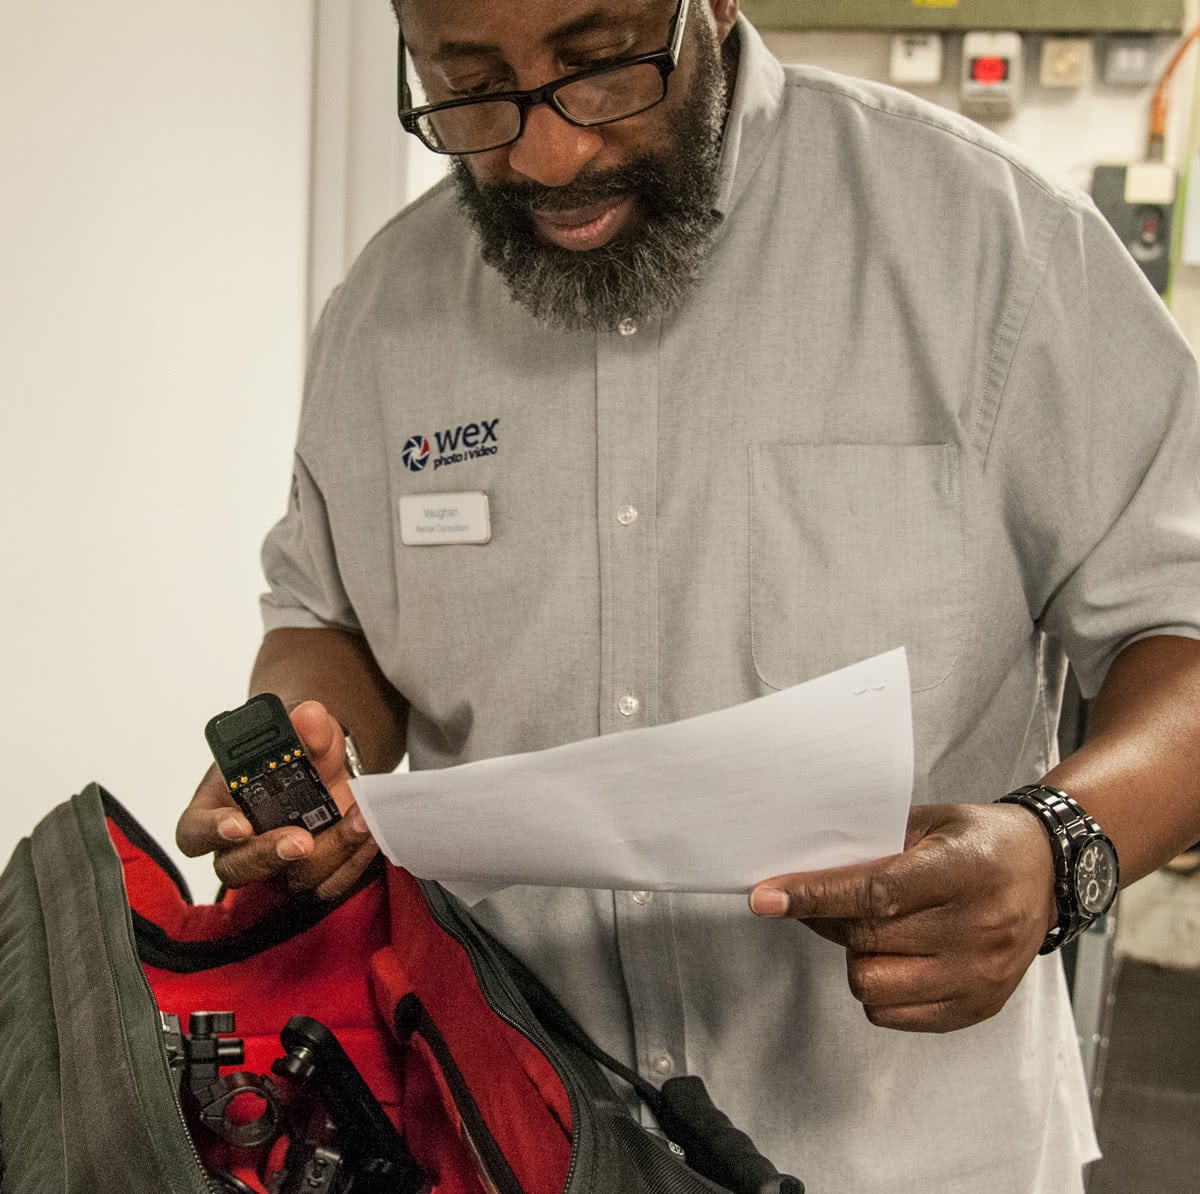
Each rental job is thoroughly checked before it is sent outEach rental job is thoroughly checked before it is sent out

What would you say is the most rewarding aspect of your job?

I would have to say it’s knowledge. The photographic industry is changing constantly and to stay ahead of the competition you have to keep up to date with the latest releases and technologies. For me it’s a matter of pride – being able to give clients the best advice, so it’s important to me that my skillset and knowledge is up-to-date.

For more information, visit the website at rental.wexphotovideo.com or speak to a rental advisor on 020 7383 5127

Workshop | Nikon D810 repair image

Workshop | Nikon D810 repair

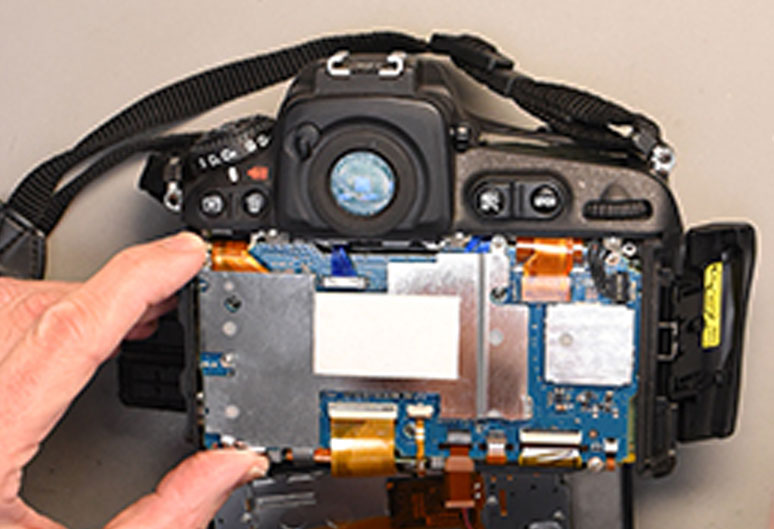
Have you ever wondered what’s involved in replacing the front body on a DSLR?

Chris, one of our experienced Nikon technicians, spends his time working on pro and semi-pro bodies and lenses. This D810 landed on his desk recently and Chris was kind enough to let us bolt a camera to his desk so we could film him in action.

The video shows the disassembly of the camera, fitting the replacement part and re-assembly. Following this, the camera would have been cleaned, calibrated and given a sensor clean.


Music courtesy of www.bensound.com/royalty-free-music


Gumball 3000 | Shooting with the Sony A7S II & FS7 II image

Gumball 3000 | Shooting with the Sony A7S II & FS7 II

Gumball 3000: A mass collection of supercars, taking on a 3,000 mile journey from Riga to Mykonos in the summer of 2017.

The entrants have 6 days to complete the drive which is segregated nightly by parties and dinners full of glitz and grandeur. Crowds fill every city that the moving circus pulls into, with fans desperate to get a glimpse of the cars they have swooned over on Instagram. It’s a level of euphoria that is hard to explain without witnessing first hand with tens of thousands of people filling streets, squares, climbing trees and attempting to clamber over security barriers. Through past work with Gumball, Finn, Hugo and 8 Seconds Media were granted AAA for the entire event, so had free roam to shoot as they pleased, enabling them to cover the rally from a unique and embedded angle, with the help of Fixation.

Gumball 3000 © Hugo Pettit© Hugo Pettit

In Hugo’s own words:
Organising the logistics for the trip ourselves, we planned a 3 week route with Gumball sandwiched in the middle and the first stop in Thirsk to see long standing partners Twisted. Having picked up our beautifully re-engineered Land Rover defender, we boarded the ferry to Europe, the start of a huge triangular trip around Europe. Commissioned to shoot both film and stills, we used the Leica SL and M 240 and for film we used our own Sony A7S II and bolstered it with another A7S II and the Sony FS7 II with a couple of Sony 24-70mm ƒ/2.8 lenses. These were rented from Fixation and were chosen for the A7’s ‘run-and-gun’ abilities and ease to mount on the DJI Ronin-M, and the FS7 II for the higher frame rate and image quality.

Arriving in Riga, we planned our route through the 10 countries that comprised the rally. It was a surreal trip; it’s rare to be able to have the time to travel through each of these countries by car and actually explore them. Although driving circa 500 miles per day, the route dissected some of each countries most beautiful roads. Mountains, coastlines, plains and stunning rivers, it was amazing to watch the scenery change the further south we travelled. Staying each night in generally the capital city of whichever country we were in, we also had the job to capture the other side to the Gumball price tag; the wild and decadent parties that occur each night, laid on for the Gumballers. While only a certain amount can be disclosed and captured on film, safe to say it was an eye-opening and amazing experience.

Gumball 3000 © Hugo Pettit© Hugo Pettit

A particular highlight was arriving at the Albanian border. Met by a huge convoy of police men and cars, one for every 10 Gumball super cars, we were under the assumption that it was going to be one of the more boring legs of the journey. Not only is Albania absolutely stunning but it seemed the the ‘creme-de-la-creme’ of police cars and drivers and been chosen for the role, while what felt like the rest of the Albanian police lined the road into Tirana (our stop for the night) to keep other traffic and people off the roads. There was not one point along the route in Albania that there were not fans in sight, desperate to see the cars.  Back to the police cars, it seemed they had been instructed to drive at 110mph through the whole country, regardless of the then unimportant speed restrictions lining the roads, corners and other cars. There were moments that were effectively 170 super cars in a line/group speeding legally through some of the most beautiful countryside we’d driven through. To then be met by the crowds that awaited us in Tirana and the night that followed topped it off. A true Gumball experience, one that could not have been replicated in any way shape or form.

Gumball 3000 © Hugo Pettit© Hugo Pettit

We spent the trip effectively moving from hotel to hotel and otherwise living out of the back of the Twisted, only just about enough space for the 4 of us, our kit and the ability to work and edit continuously while driving. With power inverters for the car, we also had all of our kit charging, definitely pushing the limits of what car fuses can usually handle.

Living out of a bag and shooting is something we’re used to but to do so while working the hours that were required each day was taking, not only for us but the kit too.

Our daily routine would see us up at 5.30am and we worked straight through until around 2.00am when we could finally hit the sack.

We finished up a laptop screen and a Sony RX100v down at the end, but the Sony A7S II’s (kept in Tilta cages or on the DJI Ronin-M) and the FS7 II kept in it’s supported bag were safe from the enduring amount of use they saw. Sony have an amazing range of cameras, of which the FS7 II and A7S II were perfect for this job. While the superior image quality and higher frame rate of the FS7 II were key for certain shots, we used the A7S II for the majority of the work, especially as we had one mounted constantly on the DJI Ronin-M. With our very-much run-and-gun approach to the job and lack of specific structure to the edit afterwards, the key for this project was to shoot as much as we could and build the edit’s story afterwards. This suited the A7S II hugely. It’s light, holds an SD card (great for quickly dumping footage onto an Macbook Pro) and is easily small enough to have sat with me while editing in the back of the car. I had it set up to shoot at 100fps continuously, giving me the ability in the edit afterwards to be able to slow footage down appropriately.

Gumball 3000 © Hugo Pettit© Hugo Pettit

The FS7 II however, although providing beautiful footage and amazing dynamic range, was much harder to have as a run-and-gun camera. Almost too bulky to have out the window of the car while moving and definitely not the space to have it next to me while editing, the FS7 II lived in its case in the boot when not being used for setup shots at specific locations. Once on location however, it performed beautifully. With its built-in stabiliser function, the camera lived on my shoulder and even at 25fps shoots a very steady image with functions easy to manage without putting it down (once you had the menu system memorised!). With the FS7 II, we shot mainly in 150fps and had the camera set up (through a customised S&Q button at easy reach) so it took just one button to switch between 25fps and 150 fps, a very handy function to have.

Having grown up as a photographer, I’ve got used to constantly and manually managing light through ISO, aperture and shutter speed, dependant on the point of the shot. The A7S II works well for those that have evolved from stills photographers, apart from the added necessity of a variable ND. If you shoot in S-Log3, which has the best dynamic range, your minimum ISO is 3200, which therefore immediately requires a variable ND, even if you were to dare shooting at ƒ/22 and a shutter far too fast for the fps (to match the speed of you eye, your shutter speed should be double that of your fps e.g shooting 100fps, your frame rate should be 1/200 and similarly, if you’re shooting 25fps, your shutter speed should be 1/50). One of the beauties of the FS7 II however, is the easy switch between the terms ISO and GAIN and the use of the in-built variable ND, which operates seamlessly, great for variable lighting conditions.

Gumball 3000 © Hugo Pettit© Hugo Pettit

Both cameras have well-discussed pros and cons that I’ve highlighted above and below, but using them in conjunction with one another was the perfect combination on such an event. Where the image quality and higher frame rate were needed, the FS7 II was the camera of choice, while the A7S II had the huge ‘run-and-gun’ advantages that were required more often the not shooting in night clubs, out of cars and in areas where bulkier cameras are less welcome/easy to operate. One of the beauties of having what looks effectively just like a stills camera is people don’t immediately react. The FS7 II doesn’t go unnoticed!

A7S II advantages:

  • Light and Easy to use
  • Great for night life with the low light capabilities
  • Great continuous autofocus capabilities with native Sony lenses attached
  • Great handheld image stability when not on the DJI Ronin M

A7S II disadvantages:

  • Complicated menu if it is not your own camera and difficult to quickly setup custom buttons
  • Noticeably lower image quality than the FS7 due to it’s 8Bit limit
  • Poor battery life

FS7 II Advantages:

  • Beautiful dynamic range and footage quality
  • Easy and smooth variable ND built into camera
  • With correct setup, easy to switch between S&Q Motion (High frame rate) and continuous 25fps 4k shooting
  • Good battery life

FS7 II Disadvantages:

  • Difficult to setup
  • Can only use constant high frame rate settings with specific software updates and v lock power pack
  • Bulky and therefore cannot use on the Ronin M or have it in a small rucksack or sitting on lap
  • Small monitor and hard to view in bright sunlight, imperative to use the eye-cup


Gumball 3000 from 8 Seconds on Vimeo.

The people of Oaxaca | Holly Wren image

The people of Oaxaca | Holly Wren

As a portrait photographer, I find myself stuck enjoying extremes in people – in my commercial work; I tend to work with traditionally attractive looking folk, pretty girls and handsome men.

Then when I shoot personal work, I’m drawn to the other extreme – character faces and interesting looks. Probably because I’m less concerned with clients opinion on how perfect people look and more about the inherent imperfections of people, they fascinate me.

I also seem to have a thing for old faces, so it was no surprise to me that exactly one year ago today, I found myself in the city of Oaxaca, Mexico.

(say Wa-ha-ca… that’s right people, just like the restaurant, but guess what, they knew you wouldn’t be able to pronounce it as it’s actually spelt!).

Oaxaca is a city in the south of Mexico, relatively modern for its developing country status, you’ll find trendy art galleries, coffee shops and restaurants adorning the centre filled with pretty squares and colourful buildings.  Popular with American set, heading to Mexico to celebrate Dia De Los Muertos (Day of the Dead), I used it as my base to get out into the mountains east of the city – where the indigenous communities live.

© Holly Wren

Although the City was alive with party-goers, it was the more traditional, quiet celebrations of Muertos I was after. For which I travelled outside the city to Mitla and Solaga.

As with all travel photography, it pays to have a “fixer” or someone to connect you with the people you want to photograph. In this case it was imperative, these communities don’t allow outsiders in. So lucky for me I had a friend of a friend, of a friend, that was from Solaga and had arranged with the villagers that I would visit (with her) and take photographs.

And lucky she was there, as the indigenous communities speak a language called Zapotec, which basically meant I needed double translation… Zapotec to Spanish then, Spanish to English.

And it was languages that was my biggest challenge. I felt like someone had literally stripped away my super power. For me, portrait photography is about connecting with your subject, to enable you to get something out of them other photographers haven’t. And how to create that connection – talking. I talk. A lot. In life and in my work. But that wasn’t an option here and I found that incredibly challenging.  And also I suck at languages, which was not helpful. But what I realised pretty quickly was that kindness and humour in facial expressions and body language are international.

I literally had no idea what I was walking into, how the light would be, the people, the location, so I couldn’t prep to my normal standards so I was firmly out of my comfort zone! My research beforehand threw up very limited information. I was going in blind, and effectively voiceless!

But as it turned out the light was quite beautifully flat, the people lovely, and really with those locations I’d have to be a terrible photographer to screw it up! And some of those faces, just amazing. That’s my favourite thing about different cultures and places – the amazing opportunity to meet and learn about people you otherwise wouldn’t connect with.

There is a whole story about my trip, and the traditions of Dia De Los Muertos which you can download Here

Photographically I wanted to keep a consistent feel across this images, and knowing they would be shot under different light conditions, in different locations I did this by shooting consistently on my Nikkor 50mm f/1.4 .

I love that lens, I feel it gives me the ability to back up to include the environment or get in closer and still be relatively flattering, and cause minimal facial distortion.  It’s fast, it’s lightweight and it’s compact. Most importantly it lets me explore my line obsession (which you may notice in this series).

I took my Profoto B2’s too, I knew that potentially some of the images may be taken inside, or as the light was fading, so these were my back up, but to use to mimic natural light, and look as natural as possible.

I went between portraiture where I interacted with my subjects, where they faced, sat, stood or looked as I directed them to pure reportage, and at times somewhere in between. Interacting and taking the time to get the right light fall, angle and framing is easier when you have permission and time, not so free flowing when you’re shooting in a busy market where people are wary. Having a local to speak to these people was therefore essential.

Below are some of my favourites with some information on each.

Rufina

Taken at her home, she wanted to take her washing down, to clear the yard for me to take her and her husbands photograph. But I loved the depth I could create using the washing, and the colours. As soon as I lifted my camera Rufina started laughing and working quicker, to get her washing out of the shots. So I started snapping a way, a throw away moment that turned out to be one of my favourites.

© Holly Wren | Nikon D800 + 50mm f/1.4 | ISO 400, f/5 at 1/320 sec

Aron

Waiting at his home, sat on the hard concrete Aron was enjoying the sun whilst his wife prepared their food for Muertos. Aron must have been 90, but he wouldn’t let us help him to his feet or on the steps. Fiercely independent and probably my favourite face.

© Holly Wren | Nikon D800 + 50mm f/1.4 | ISO 250 f/4.5 at 1/1000 sec

Unknown

I took this portrait in the market about 5am when the sun had just risen. I spotted her and held my camera up to see if she would allow me to take her picture. She did and I bought some flowers from her. I loved her skin, and her face, she was so beautiful.

© Holly Wren | Nikon D800 + 50mm f/1.4 ISO 600 f/4.5 at 1/250 sec

Lucia

Lucia was my guide Maria’s godmother, and I was invited to her house to dine with her family, where they treated me so kindly. I took her picture in the entrance to her home, you can see the bunting that was there for Muertos. Lucia had dressed in her finest silk outfit, to welcome back the spirit of her husband.

© Holly Wren | Nikon D800 + 50mm f/1.4 ISO 600 f/4.5 at 1/250 sec

Unknown 2

This lady was waiting for a ride back from the market . The locals were very wary of me taking their pictures, and if I’d been American it wouldn’t have been allowed. My American friend who was with me literally was told not to talk so they couldn’t hear her accent! I found it ironic therefore that this lady had her Walgreens bag – probably a gift from a family member now living in the states.

© Holly Wren | Nikon D800 + 50mm f/1.4 ISO 200 f/4.5 at 1/250 sec

You can see the full series of images here and hey, why not follow me on insta @holly_wren

Using Fill-In Flash | Jack Terry image

Using Fill-In Flash | Jack Terry

Why I use flash outside?

The majority of my work is outside and generally involves people. I always want scenes to look naturally lit, but often need to capture enough detail to sell a brand or product. Although cameras are getting incredibly advanced, they are still not able to capture anywhere near the same dynamic range as the human eye. This is not only true for colours but also capturing detail in shadows and highlights. We use flash on shoots to enhance the light on a subject enough to replicate what you would see with the human eye.

Define your style

There are a huge variety of possible techniques behind lighting an image, but they must be driven by the style that you would like to achieve. The first step is to decide if you want your work to look like it has been lit artificially or not? When you light an image dramatically there is a certain amount of artistic licence, whereas lighting to mimic natural light is more a case of problem-solving to make it appear real. Everything I will discuss is relevant to my style of work, but that is by no means to say that is the only way to light a scene, it is just what works for the images I create.  Regardless of style, you need to follow a few rules to ensure your work doesn’t jar the eye of the viewer and look unnatural.

Lighting Position

Before I reach for any lights, I always start by looking at the scene without a camera and working out, what the main source of ambient light is and how is it falling on the subject?

Unless we are shooting at night it is generally the sun. This means the main source of light (or key light) will almost always be the sun, even if it is diffused behind a cloud. This shapes the entire scene and the only reason to use additional lights is to enhance power and fill in the gaps where light from the sun is missing. Once the direction is decided, I will determine if the light from the sun is bright enough. Living in England the answer is usually no. If this is the case, we will place our key light so the light falls in the same direction as the sunlight. Below is a diagram of how this might look.

Fill in flash

Once you have your main light sorted it’s time to address the gaps. Here the main issue would be the model’s face. While it is tempting to place a flash facing the opposite direction to the sun, you have to remember what the human eye would see. It is natural for the face to be in shadow if the sun is behind, so that is what we need to mimic. It is common to see photos where the model appears to be cut out from the background. This is usually due to an overpowered or poorly placed fill flash.

In this scenario, I would imagine the sun wrapping around the camera right of the model’s face, so I would place the fill flash like the diagram below. Once the position of the flash is good it is a case of adjusting the power to ensure it compliments but doesn’t overpower the key light.

Quality of light

Once you have figured out the direction of your light, it is crucial to decide whether the light is hard or soft. The light quality of the sun is determined by its height in the sky and whether it covered by cloud. You can tell the quality of light best by looking at shadows. A bare, midday sun will give crisp hard shadows and as that sun sets or goes behind a cloud the shadows will get softer and the edges will be more diffused.

Modifiers

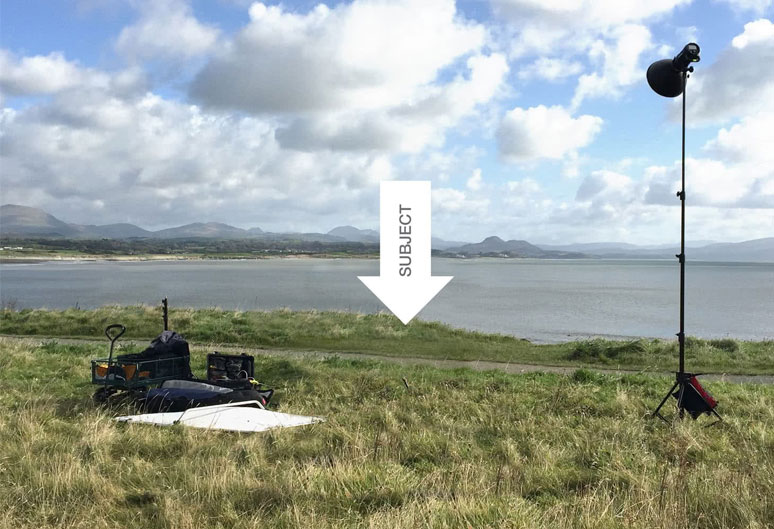
Modifiers are used to take artificial light and shape it. This can be to enhance or flatter certain aspects of your subject or to mimic a type of light as described above. The size of the modifier relative to the subject is what defines how hard or soft the light is. You can only pick a modifier once you know the type of light you are trying to create. A large softbox close to the subject will create light similar to a diffused sky, while a small source like a magnum reflector will create a crisp, hard light similar to direct sunlight. With this in mind, a 3ft softbox right next to your subjects face will give a soft flattering light, however, the same softbox 10ft away from the subject will give a hard light because the relative size is much smaller. Below is a photo showing how we used a magnum reflector up high and far back from the subject to mimic direct sunlight and fill in a few shadows that were not lit by the sun which was over the horizon to camera right.

Types of flash

There are a huge variety of options available now, but the first thing to decide is what you will be using your lighting kit for. Do you need speed, power, portability or all three?

You can either go for monoblocs where the flash is one unit or heads and packs which have a power supply with a lead to a head containing the bulb.

If you work on location I suggest lithium powered units. I use a Profoto system and the B1’s on location. For a more economical and portable solution, speedlights make really good cheap and portable lighting kits and this is how I started out. The sacrifice with traditional speedlights is recycle speed and power, however, this is improving all the time with new technology. Don’t feel like you have to buy all of your lights straight away. Renting is a great way to figure out what works best for you and monoblocs especially are very reasonable to hire for the day.

Alternatives to flash

If flash is not an option you can use one or multiple reflectors in the same way as mentioned above to give you a similar look. The main constraint here is that you can’t increase the ambient light, you can just shape it, so it works best in brighter situations.

The final option is using constant light, the same as used in video shoots. These come in a variety of options from small LED panels to huge HMIs. We often use a single large HMI to replicate the sun and then use white reflectors to add light and black ones to take light away and give the subject more shape.

I hope you found this small insight into the world of lighting helpful. It was really hard just touching the surface on such a huge topic but make sure to have a look at www.jackterry.co.uk/journal for more tips and a look behind the scenes of some of our shoots.

Hi, how can we help?